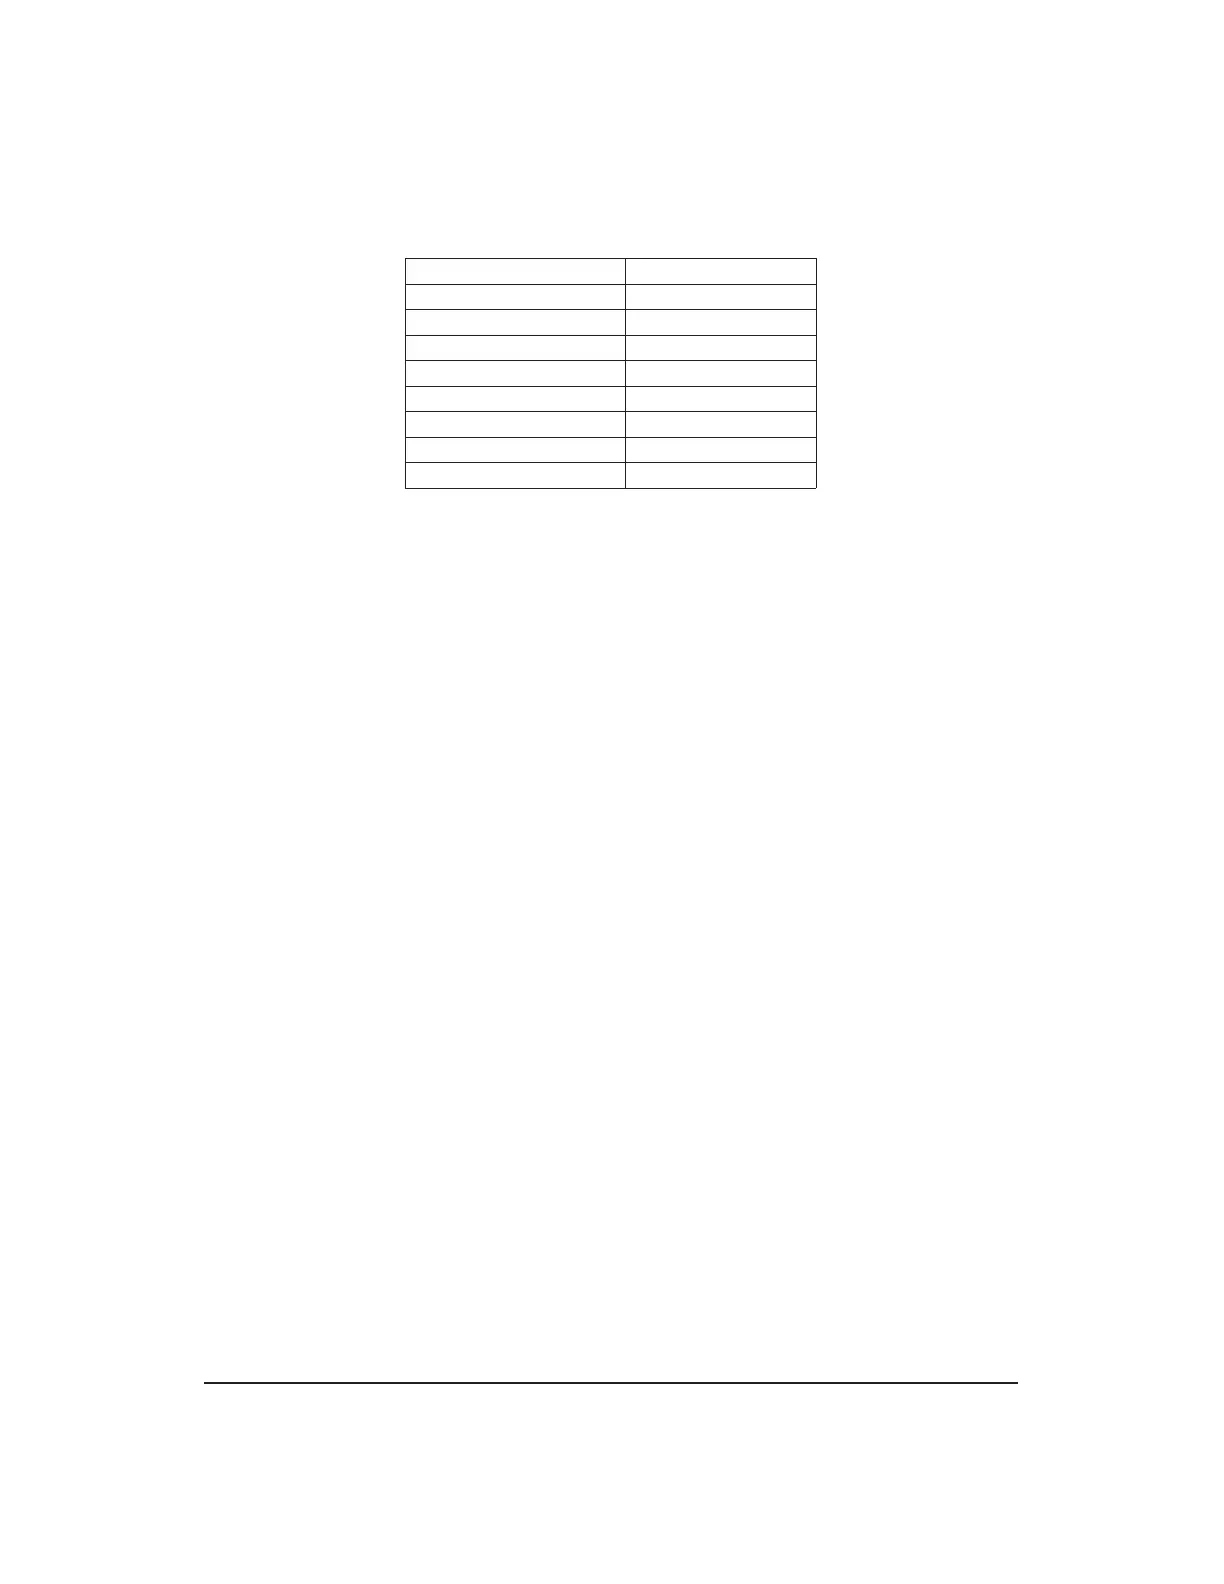
Table 3.14-2 — RJ-45 Pin Assignment
Cajun P330 RJ-45 Pin Name
1 For Future Use
2 TXD (P330 input)
3 RXD (P330 output)
4CD
5 GND
6 DTR
7 RTS
8 CTS
• Access to an ASM UNIX
1
shell.
Required Information
References to IP Address and Subnet Mask assignments in this procedure are the
default assignments for the LNCS configuration. Obtain the necessary information
from the office records when customer defined addressing is used.
PROCEDURE
1. Remove power to the Cajun switch by opening the circuit breaker for the DC
power cable. To open the circuit breaker, push the fuse in while turning it
counter clockwise, and pull the fuse out. The fuse-alarm LED above the fuse will
be lit, and the PWR LED on the front of the unit will no longer be lit.
2. Use the Philips screwdriver to remove the DC power cable connected to the rear
of the Cajun switch. The DC power cable is connected to the rear of the Cajun
switch at a terminal block (positive ’+’, negative ’-’, and ground).
Note: The ground wire should be disconnected last.
3. Remove and label the cables connected to the front of the Cajun switch:
• Ethernet
2
interface cables to the ASM(s) and host DynaStar router(s).
• Console connector cable (if connected).
4. Use the flat-head screwdriver to remove the mounting screws securing the Cajun
switch to the frame. The mounting screws are accessed by snap opening the
hinged ends of the front panel. Save the screws for mounting the replacement
Cajun switch to the frame.
5. Remove the Cajun switch from the bracket attached to the frame by sliding the
unit forward.
6. Slide the replacement Cajun switch onto the mounting bracket attached to the
frame.
7. Secure the replacement Cajun switch to the frame using the mounting screws
that were removed in Step 4. Do not overtighten the screws. Snap close the
hinged ends of the front panel once the screws are in place.
1. Registered trademark in the United States and other countries licensed exclusively through X/Open
Company Limited
2. Trademark of Xerox.
235-200-150
October 2004
NETWORK PROCEDURES
Procedure 3.14
Issue 3.00L Page 3.14-3