POWERHEAD - 4-2190-826148R2 MARCH 1997
REASSEMBLY S/N 0G380074 & BELOW
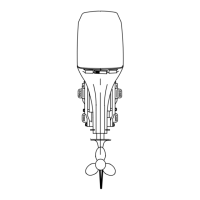
If reed block was disassembled, reassemble by lo-
cating reeds on pins with retaining washer. Using
new tab washer, insert bolt and torque to 60 lb. in.
(6.8 N·m); then, if necessary, continue the torque to
align flaton hex-head to locking tab (e).DO NOT ex-
ceed100lb.in.(11.3N·m)oftorque.Benduplocktab
to secure bolt position.
52896
a
b
c
d
e
a - Reed
b - Pins
c - Retaining Washer
d - Tab Washer
e - Bolt - Torque to 60 lb. in. (6.8 N×m)
REASSEMBLY S/N 0G380075 & ABOVE
If reed block was disassembled, reassemble by lo-
cating reeds and reed stops on pins. Secure to reed
plate with bolt, washer, and nut. Torque to 60 lb. in.
(6.8 N·m).
a
b
c
d
e
f
a - Reeds
b - Locating Pins
c - Reed Stops
d - Washer
e - Bolt
f - Nut
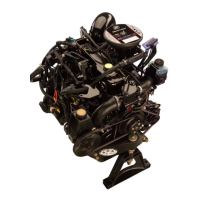
Powerhead Reassembly and
Installation
General Information
Before proceeding with powerhead reassembly, be
sure that all parts to be reused have been carefully
cleaned and thoroughly inspected, as outlined in
“Cleaning and Inspection”. Parts, which have not
been properly cleaned (or which are questionable),
can severely damage an otherwise perfectly good
powerheadwithinafewminutesofoperation.Allnew
powerhead gaskets must be installed during assem-
bly.
During reassembly, lubricate parts with Quicksilver
2-Cycle Outboard Oil whenever 2-cycle oil is speci-
fied, and Quicksilver 2-4-C Marine Lubricant when-
ever grease is specified.
CAUTION
Any GREASE used for bearings INSIDE the pow-
erhead MUST BE gasoline soluble. Use only
QuicksilverNeedleBearing AssemblyLubricant.
DO NOT use 2-4-C Marine Lubricant, or other lu-
bricants inside the powerhead, or damage may
occur.
A torque wrench is essential for correct reassembly
of powerhead. Do not attemptto reassemble power-
head without using a torque wrench.
End Cap
1. Clean thoroughly, including seal and O-ring
seats; remove Perfect Seal residue and clean
cap-to-head mating surface.
2. Using suitable mandrel, press oil seals into cap
until fully seated.
NOTE: Lip of smaller seal faces away from power-
head. Lip of larger seal faces towards powerhead.
A
Perfect Seal (92-34227-1)
K
K
52683
A
2-4-C w/Teflon (92-825407A12)

 Loading...