POWERHEAD
Page 4A-22 90-855347R1 JANUARY 1999
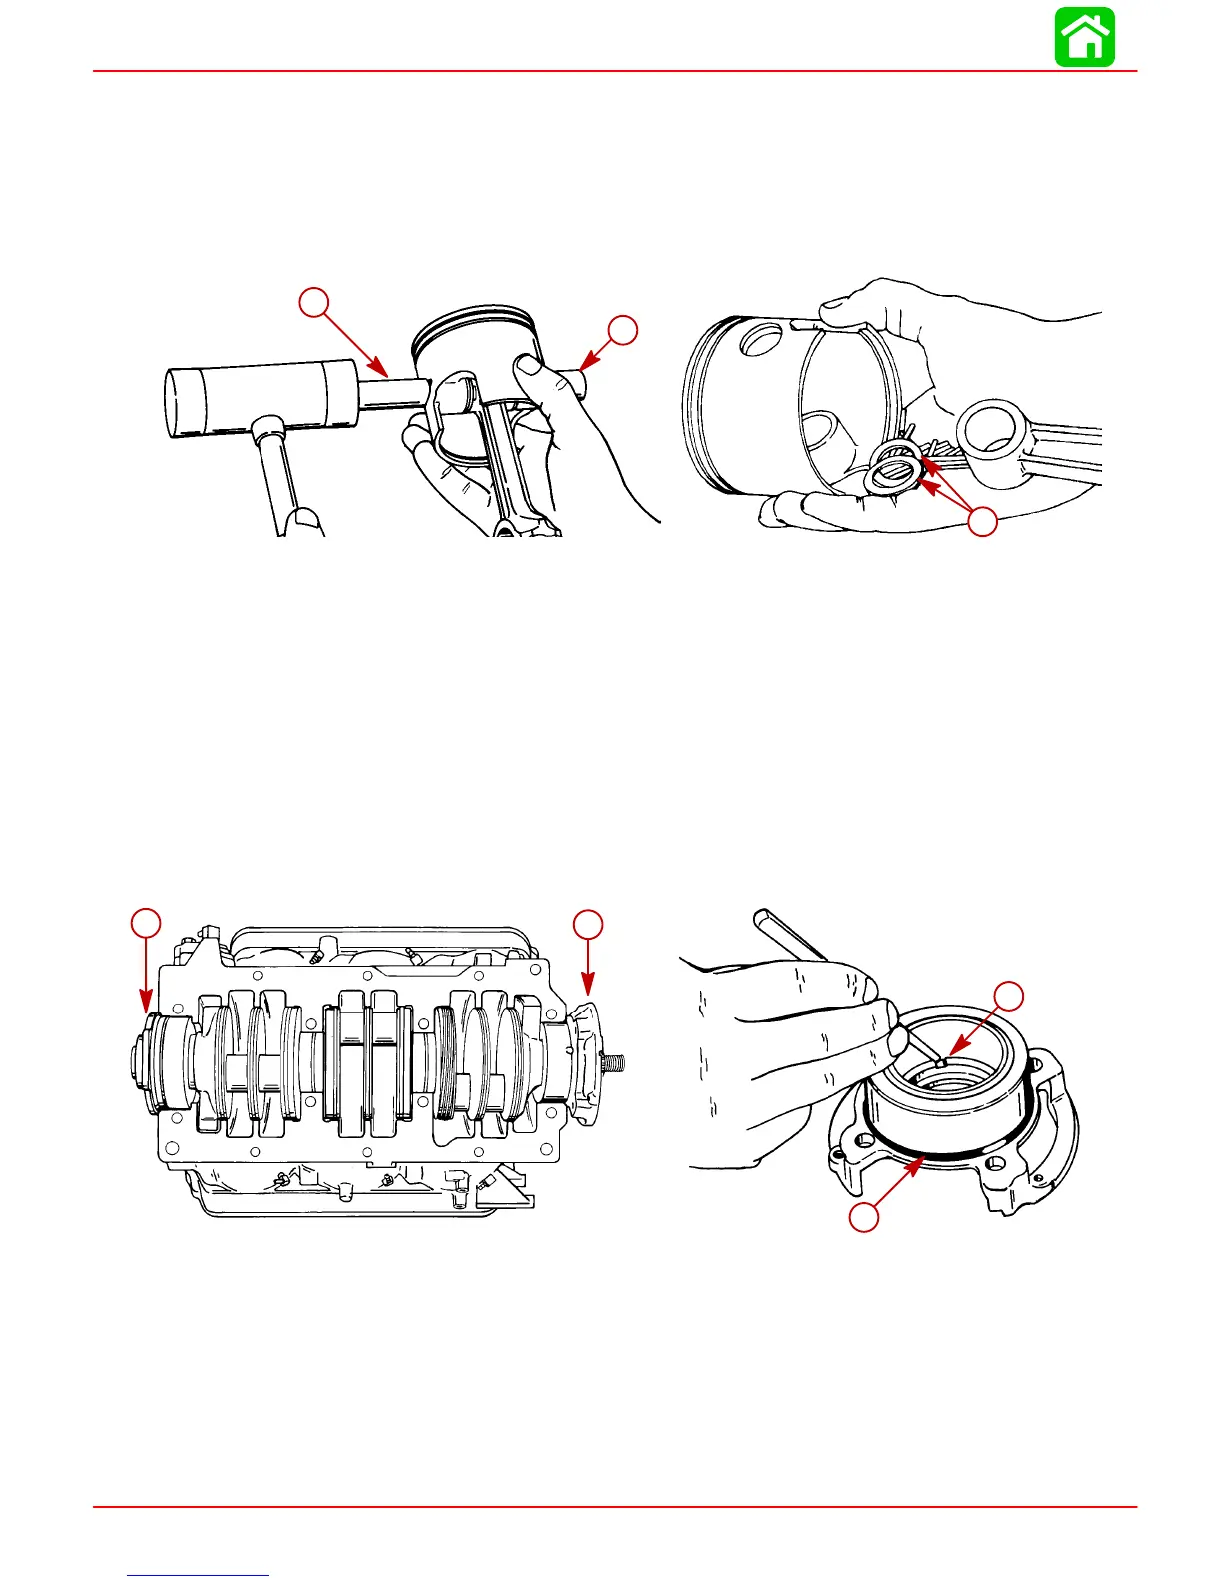
10. Support piston and tap out piston pin using service tool (91-76159A1) as shown.
11. Remove piston pin needle bearings (29 per piston) and locating washers (2 per pis-
ton) as shown.
IMPORTANT: We recommend that you use new needle bearings at reassembly for
lasting repair. However, if needle bearings must be re-used, keep each set of bear-
ings identified for reassembly on same connecting rod.
51088
51853
b
a
c
a-Piston Pin
b-Piston Pin Tool (91-76159A1)
c-Needle Bearing Locating Washers
12. Remove upper end cap and lower end cap from crankshaft.
13. Remove and discard O-ring seals from each end cap.
14. Remove oil seal(s) from end of each end cap by driving seal out with a punch and ham-
mer.
15. Inspect roller bearing in upper end cap as outlined in “Cleaning and Inspection”.
NOTE: If roller bearing is damaged, replace upper end cap and roller bearings as an
assembly.
51853
c
d
51848
ab
a-Upper End Cap
b-Lower End Cap
c-O-Ring
d-Seal
 Loading...


