© Microhard Systems Inc. 215
Appendix C: Port Forwarding Example (Page 1 of 2)
By completing the Quick Start process, a user should have been able to log in and set up the BulletPlus to
work with their cellular carrier. By completing this, the modem is ready to be used to access the internet
and provide mobile connectivity. However, one of the main applications of the BulletPlus is to access
connected devices remotely. In order to do this, the BulletPlus must be told how to deal with incoming
traffic, where to send it to. To accomplish this there are three options :
- IP-Passthrough
- Port Forwarding
- DMZ (a type of Port Forwarding)
In the previous section we illustrated how to use and setup IP-Passthrough. In this section we will talk
about port forwarding. Port forwarding is ideal when there are multiple devices connected to the BulletPlus,
or if other features of the BulletPlus are required (Serial Ports, Firewall, GPS, etc). In port forwarding, the
BulletPlus looks at each incoming Ethernet packet on the WAN and by using the destination port number,
determines where it will send the data on the private LAN . The BulletPlus does this with each and every
incoming packet.
DMZ (a form of port forwarding) is useful for situations where there are multiple devices connected to the
BulletPlus, but all incoming traffic is destined for a single device. It is also popular to use DMZ in cases
where a single device is connected but several ports are forwarded and other features of the BulletPlus are
required, since in passthrough mode all of these features are lost.
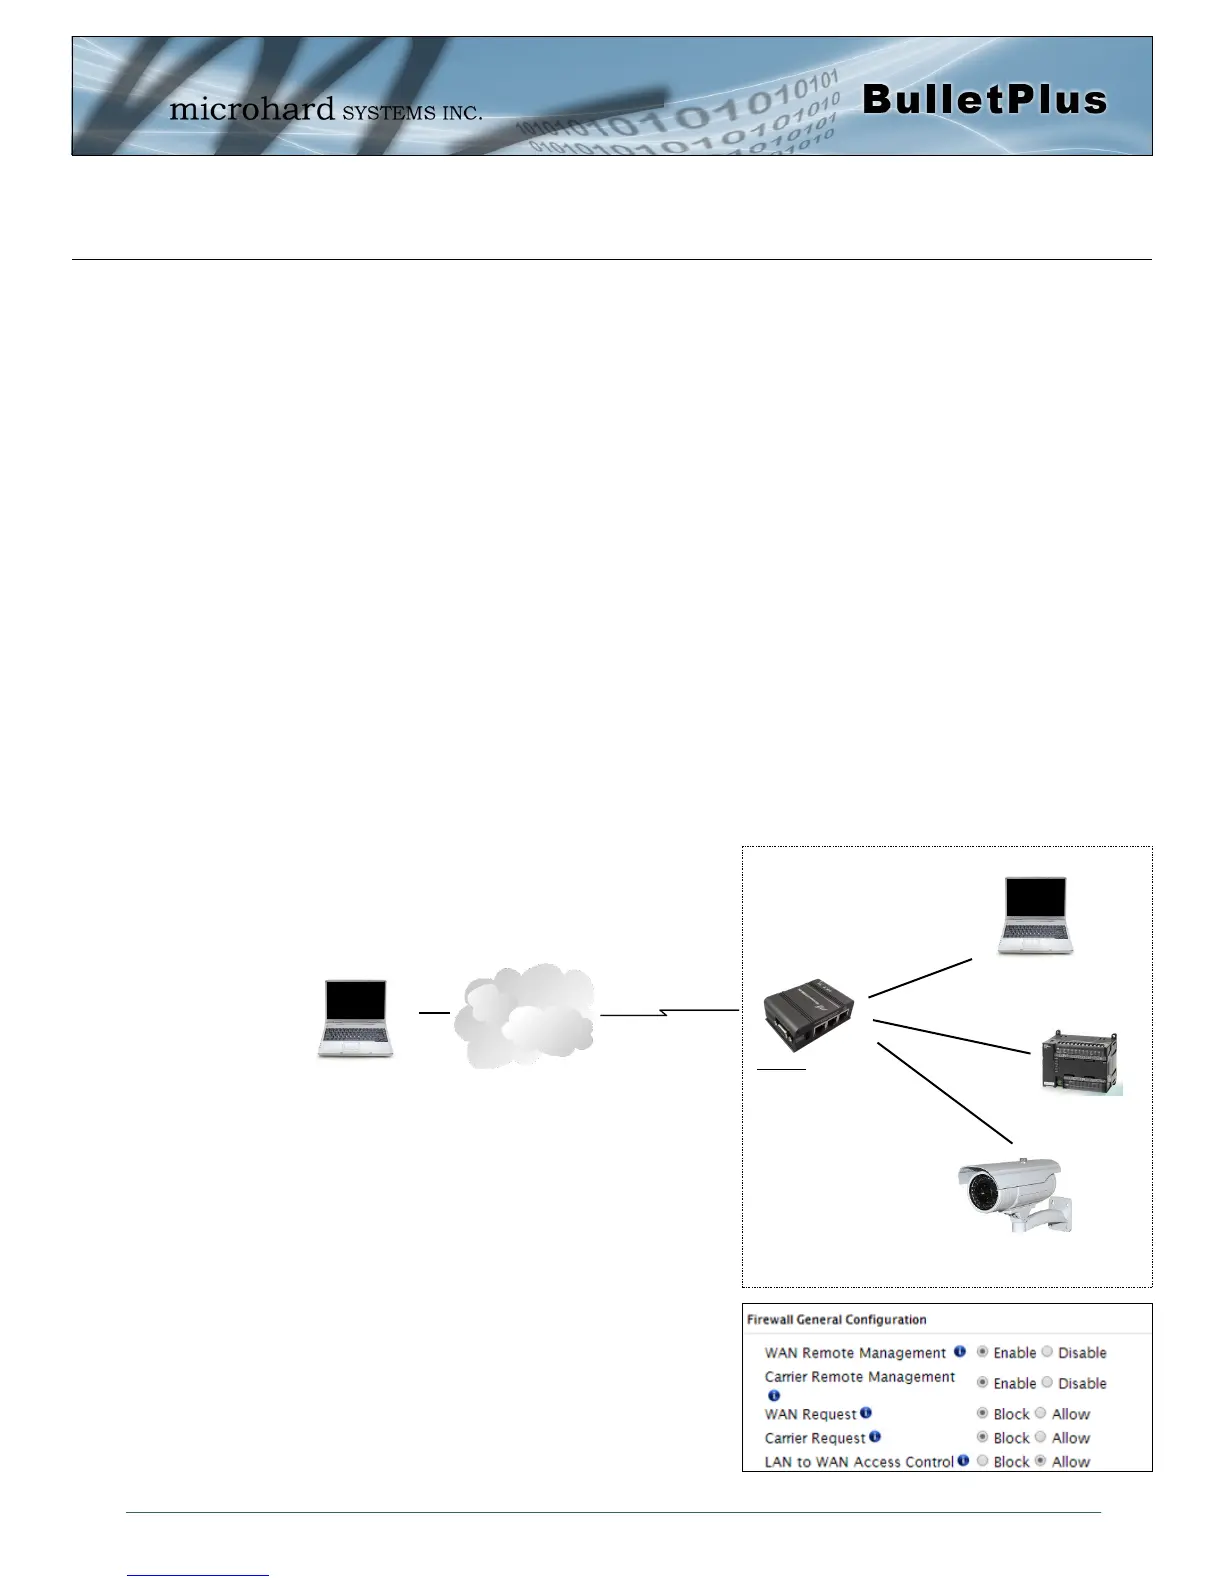
Consider the following example. A user has a remote location that has several devices that need to be
accessed remotely. The User at PC1 can only see the BulletPlus directly using the public static IP
assigned by the wireless carrier, but not the devices behind it. In this case the BulletPlus is acting a
gateway between the Cellular Network and the Local Area Network of its connected devices. Using port
forwarding we can map the way that data passes through the BulletPlus.
Step 1
Log into the BulletPlus (Refer to Quick Start), and ensure that
the Firewall is enabled. This can be found under Firewall >
General. Also ensure that that sufficient Rules or IP lists
have been setup to allow specific traffic to pass through the
BulletPlus. See the Firewall Example in the next Appendix for
information on how to allow connections from an IP or to open
ports. Once that is complete, remember to “Submit” the
changes.
Cellular Network/
Internet
BulletPlus
WAN IP:
74.198.186.193
(Cellular Carrier)
LAN IP: 192.168.0.1
PC2: 192.168.0.20
Webserver on port 80
Wireless Cellular
Connection
PC1: Connected to
internet.
PLC/RTU: 192.168.0.30
Webserver on port 80
Modbus on port 502
IP Camera: 192.168.0.40
Webserver on Port 80
Wired or Wireless
Devices