351
PRO6 Live Audio System
Owner’s Manual
Appendix F: Replacing A Module
This appendix provides instructions on replacing a module on the rear panel of the
PRO6 Control Centre.
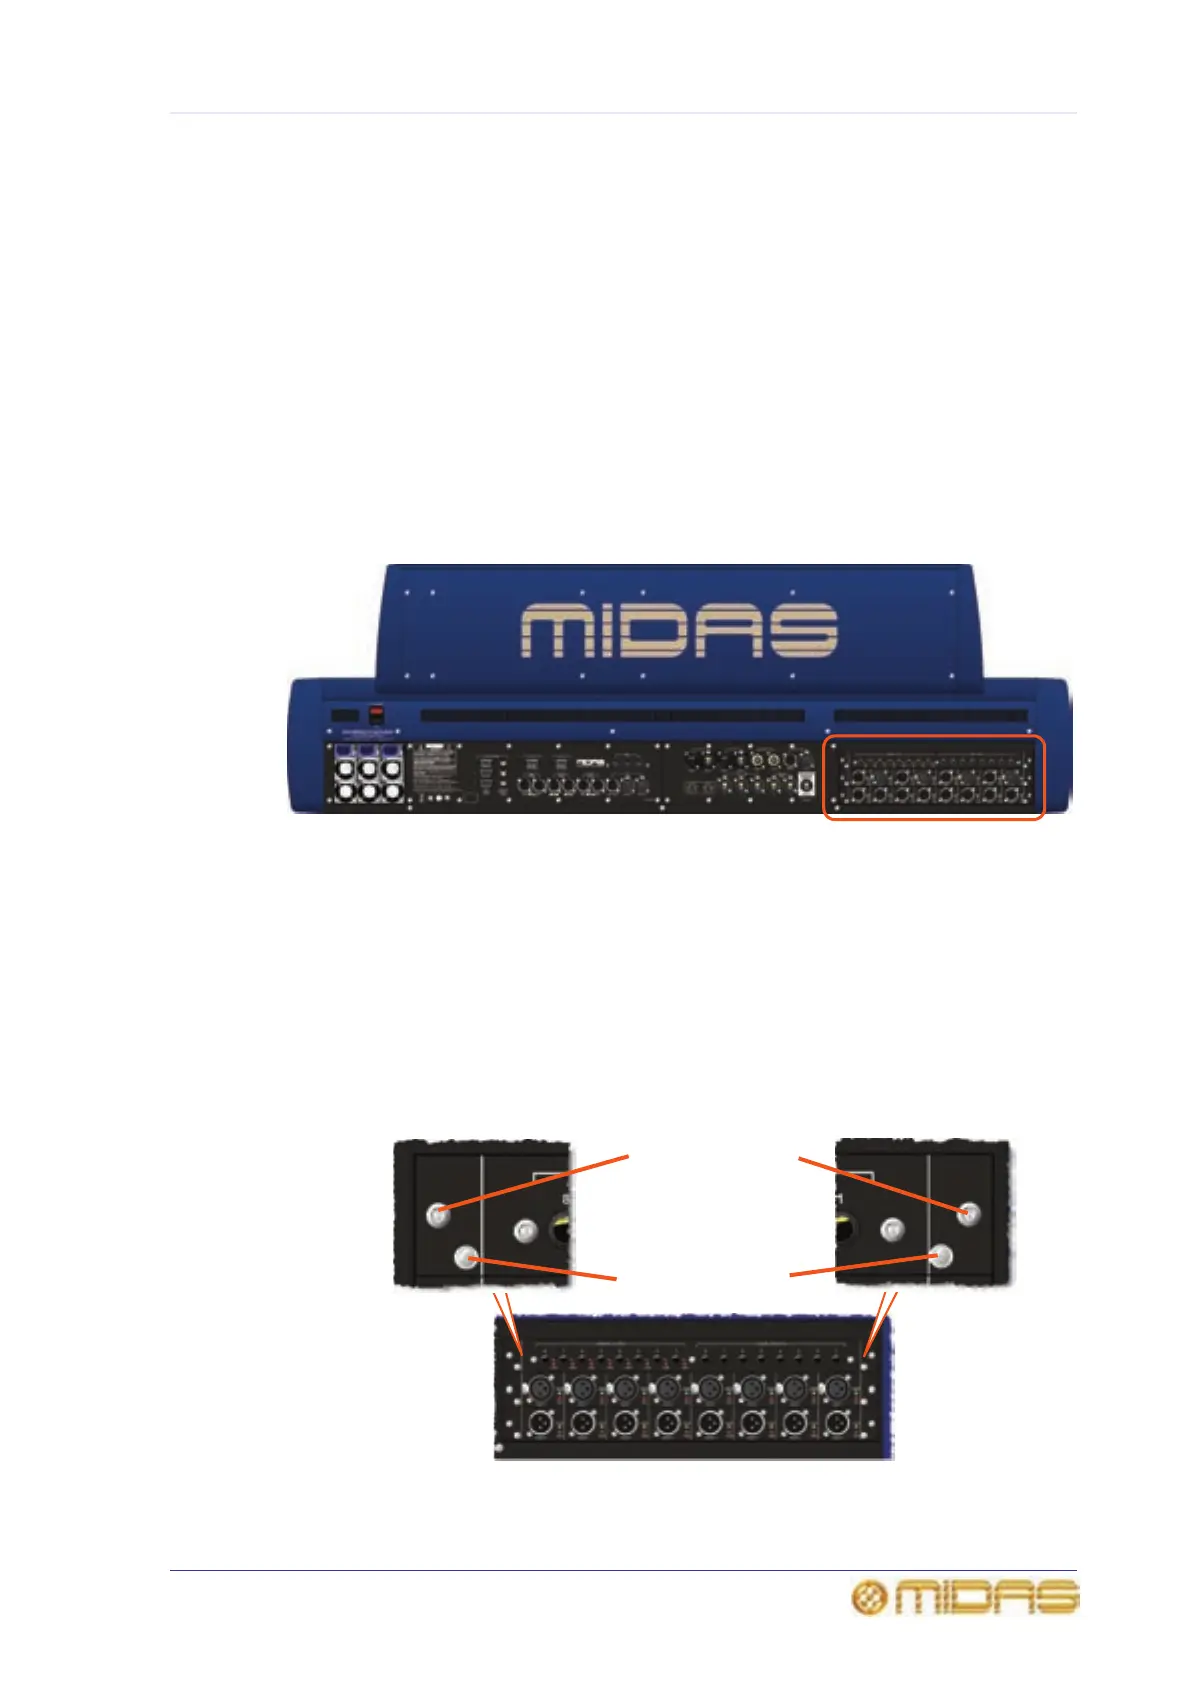
Replacing a module
The design of the PRO6 Control Centre makes I/O module replacement very easy and
straightforward. The I/O modules are situated at the rightmost side of the rear panel of
the PRO6 Control Centre, as shown below.
There are three module positions and any of the modules mentioned in Chapter E “I/O
Modules” can be fitted. Each position has rack guides so that the modules can slide
easily in and out. Each module is securing with two screws.
>> To remove a module
1 Switch off and electrically isolate the PRO6 Control Centre, as detailed in
“Powering the PRO6 system” on page 30.
2 Remove the two securing screws from the left and right sides of the module you
want to remove, as shown in the diagram below.
3 Using both hands, take hold of the circular machined posts and ease the module
out of the slot.
I/O modules (3-off)
Rear of PRO6 Control Centre
Module securing screws
Circular machined post
I/O modules
(3-off)