353
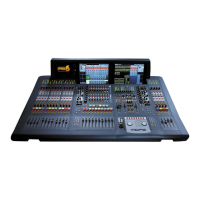
PRO6 Live Audio System
Owner’s Manual
Appendix G: Troubleshooting
This appendix gives details of PRO6 Control Centre problem diagnosis and rectification,
and also testing.
To help guarantee system robustness and reliability — probably the fundamental
requirements for live performance consoles — it is imperative to be able to test and
diagnose problems with any part of the system easily. The software of the PRO6 has
built-in tests to cater for this, but there are also external diagnostic facilities available
when these tests are cannot be carried out.
No audio
If you have set up the PRO6 and followed all of the instructions for obtaining audio, but
you are not hearing anything through the speakers, check the following:
• Make sure the appropriate ST buttons in the input fast strips are on (see “Masters
sections and pan control” on page 281).
• Make sure the appropriate ST buttons in the source a/b panels (monitors section of
the master bay) are on (see “source (a and b) sections” on page 202).
• Make sure nothing is muted.
• Make sure no faders are set to minimum.
• Check that the VCA/group master faders are at unity gain.
• Use solo at selected points in the signal path to try and pinpoint where the signal is
being lost.
• Check for correct signal routing by making sure channel sources/destinations are
correctly assigned.
If you still don’t have any audio, contact Midas Technical Support.
Diagnostics
You can view the Diagnostics screen to get an overview of the current health and
status of the system. The Diagnostics screen shows real-time connectivity of the
system, the health of connected nodes and whether a device is configured or not. The
Diagnostics screen also includes a SWAP HYPERMAC button for changing the current
network from X to Y, and vice versa.
The status LED at the top of the screen, which is constantly displayed while the PRO6 is
switched on, is linked to the status of individual items on the Diagnostics screen. You
can click on it to see what is causing the error.