358 Appendix G: Troubleshooting
PRO6 Live Audio System
Owner’s Manual
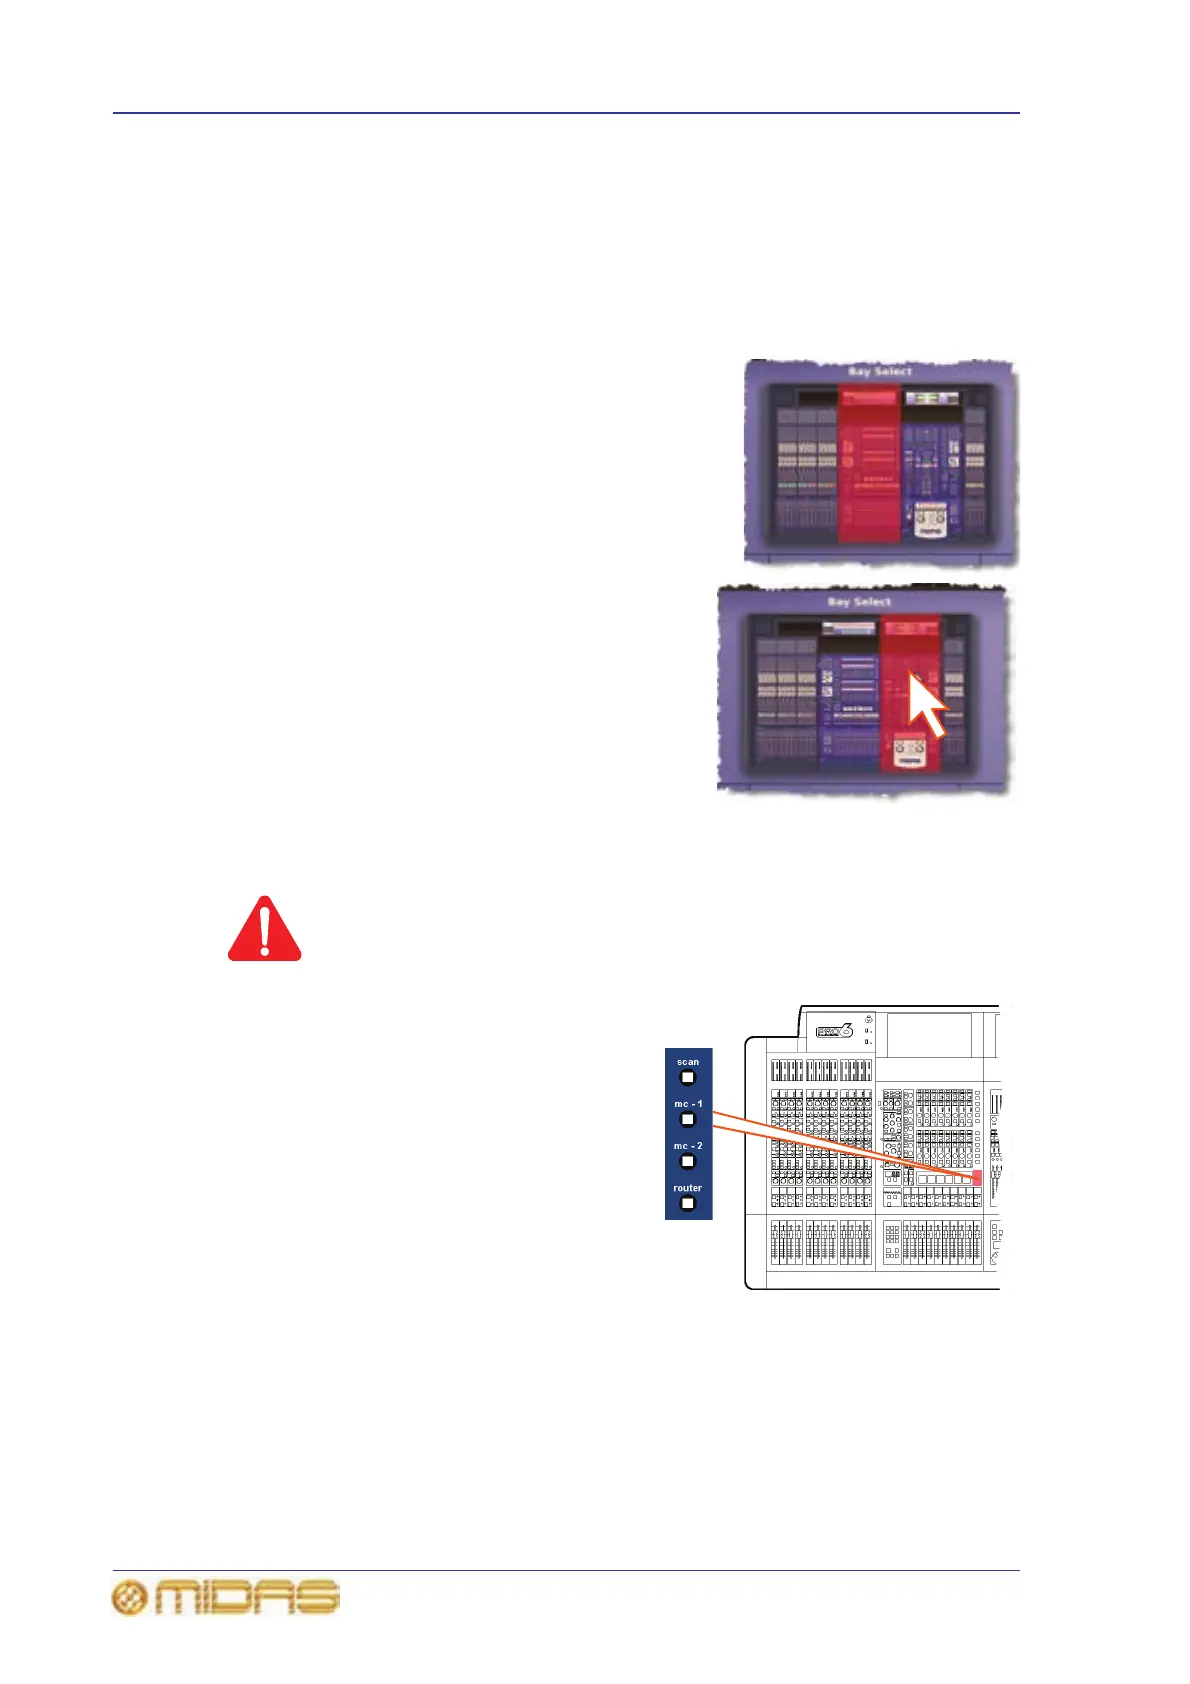
Mapping a GUI screen to another bay
An important redundancy feature of the PRO6 lets you map either of the GUI screens to
its adjacent bay (mix or master). So, in the unlikely event either of the GUI screens
should fail, the other one can take its place if necessary.
>> To re-map a GUI screen
1 At the GUI screen you want to re-map, choose
home
PreferencesGeneral. Current
mapping is indicated by the translucent red
rectangle. For example, in the diagram right the
GUI screen is currently mapped to the mix bay.
2 In the Bay Select section diagram, click within
the other by area. For example, click the
master bay (shown right). The red translucent
highlight will now move to the master bay.
3 Choose homeDefault.
Reset switches
Caution!
Do not operate any of these switches during normal operation, as
they are for fault correction purposes only.
There are four reset switches, which are for
service use only. They are used for resetting
the X and Y master controllers, scan processor
and router.