12
4-3. Calibration procedures
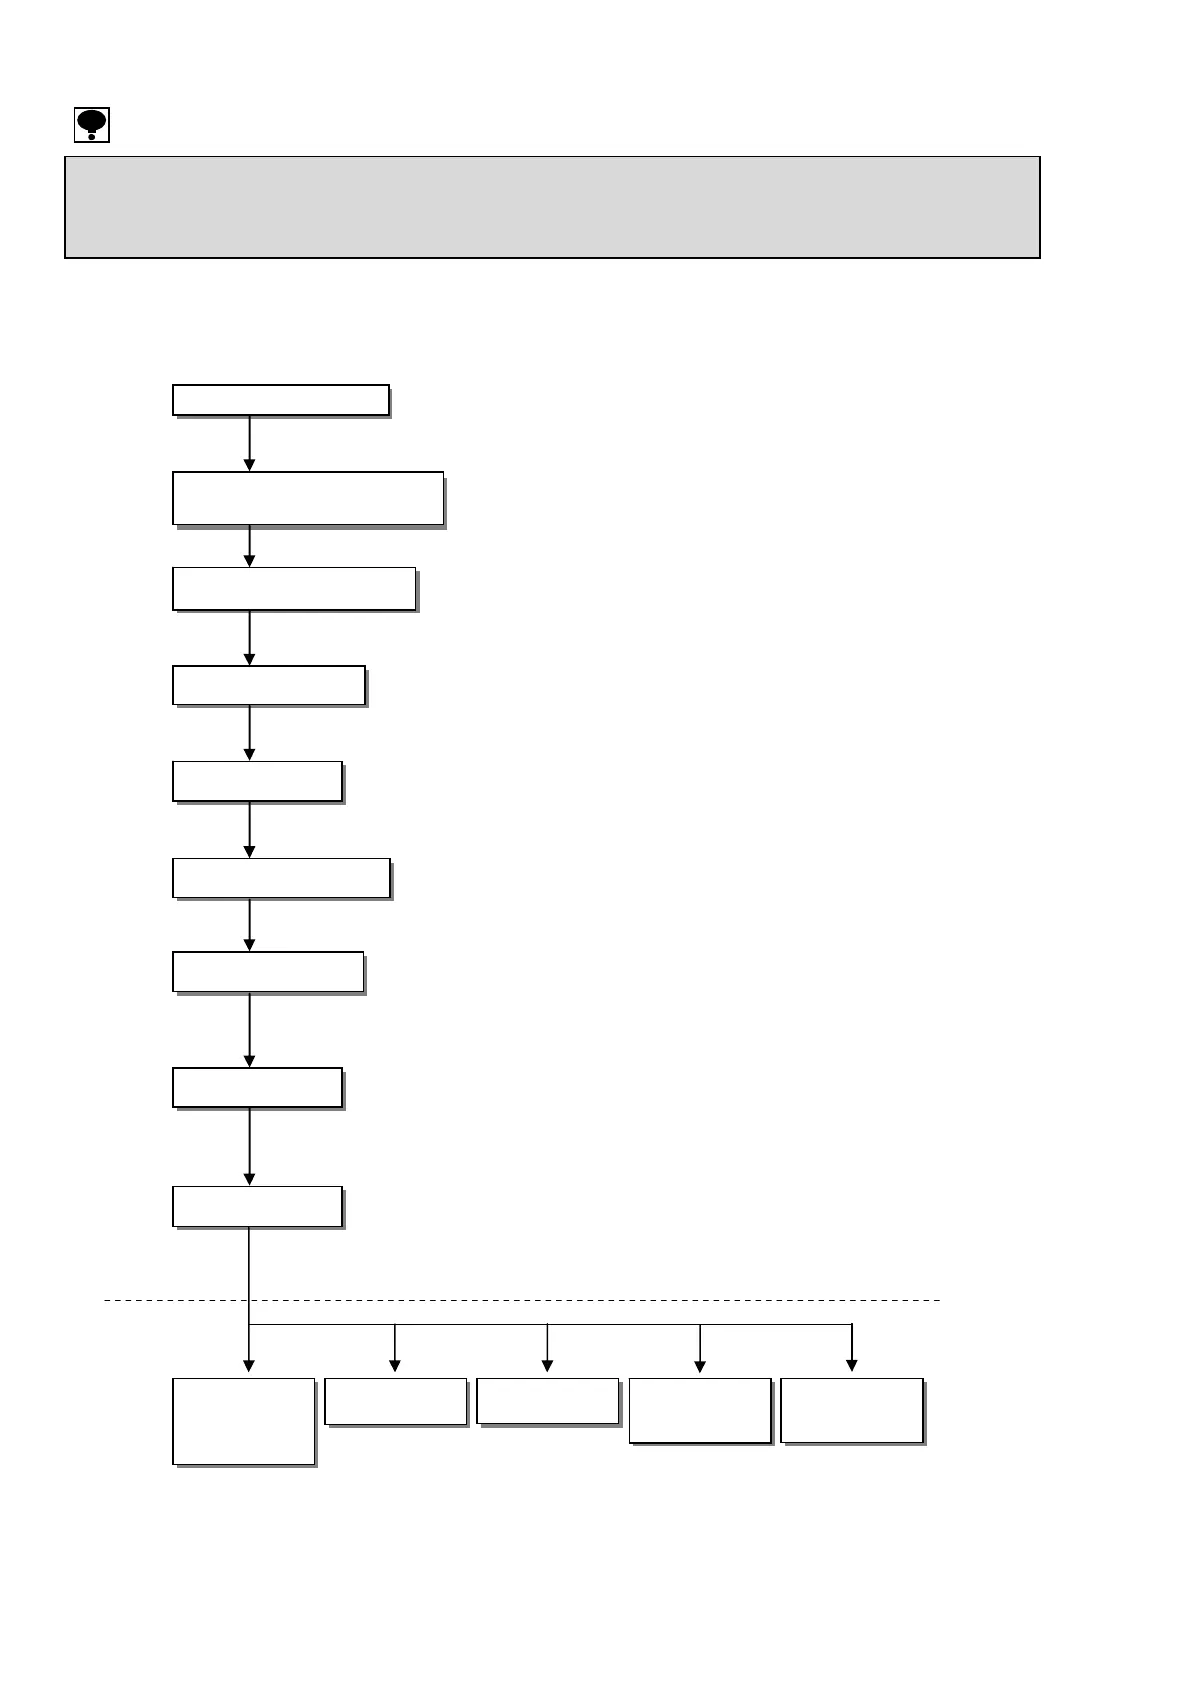
4-3-1. Flow of calibration
Step 1 Connect the load cell with this instrument.
Step 2 To stabilize this unit and the measuring section(load cell), please
make the instrument to the status of energizing for about 10 min.
Step 3 Please switch the mode to the calibration mode.
Step 4 Please set the scale interval.
Step 5 Please set weighting.
Step 6 Please set the mass of the weight put on the measuring section.
Step 7 Please execute the calibration of the zero point with nothing put on
the measuring section, or by setting the output voltage value of
the zero point of the load cell.
Step 8 Please execute the calibration of span by putting the weight on the
measuring section, or by setting the output voltage value of the
span point of the load cell.
Step 9 Please quit from the calibration mode. Proceed the setting since
following step 10 if necessary.
● Please execute the calibration if necessary when the environment to be used changes.
● The display resolution that the performance becomes effective is 10 000 or less.
The display resolution is a value into which weighting is divided by the scale interval of the first range.
● The mass of the weight used in the span calibration must use the one of 2/3 or more of weighting to reduce the calibration error.
Paragraph 4-3-2
Switch to the calibration mode
Paragraph 4-3-3
Set the scale interval
Paragraph 4-3-4
Set the weighting
Paragraph 4-3-6
Calibration at zero point
Paragraph 4-3-7
Calibration at span
Connection with load cell
Paragraph 4-3-8
Quit the calibration
Paragraph 4-3-5
Set the mass of the weight
Energe for 10 min after power is
turned on.
to Paragraph 6-1
Set the display
position of
decimal point
to Paragraph 6-3
Set of the unit
to Paragraph 4-5
Digital linearize
to Paragraph 6-9
Automatic range
switch
to Paragraph 6-8
Gravity
acceleration
Step 10
Step 11 Step 12 Step 13
Step 14