FX Series Programmable Controllers Points Of Technique 10
10-9
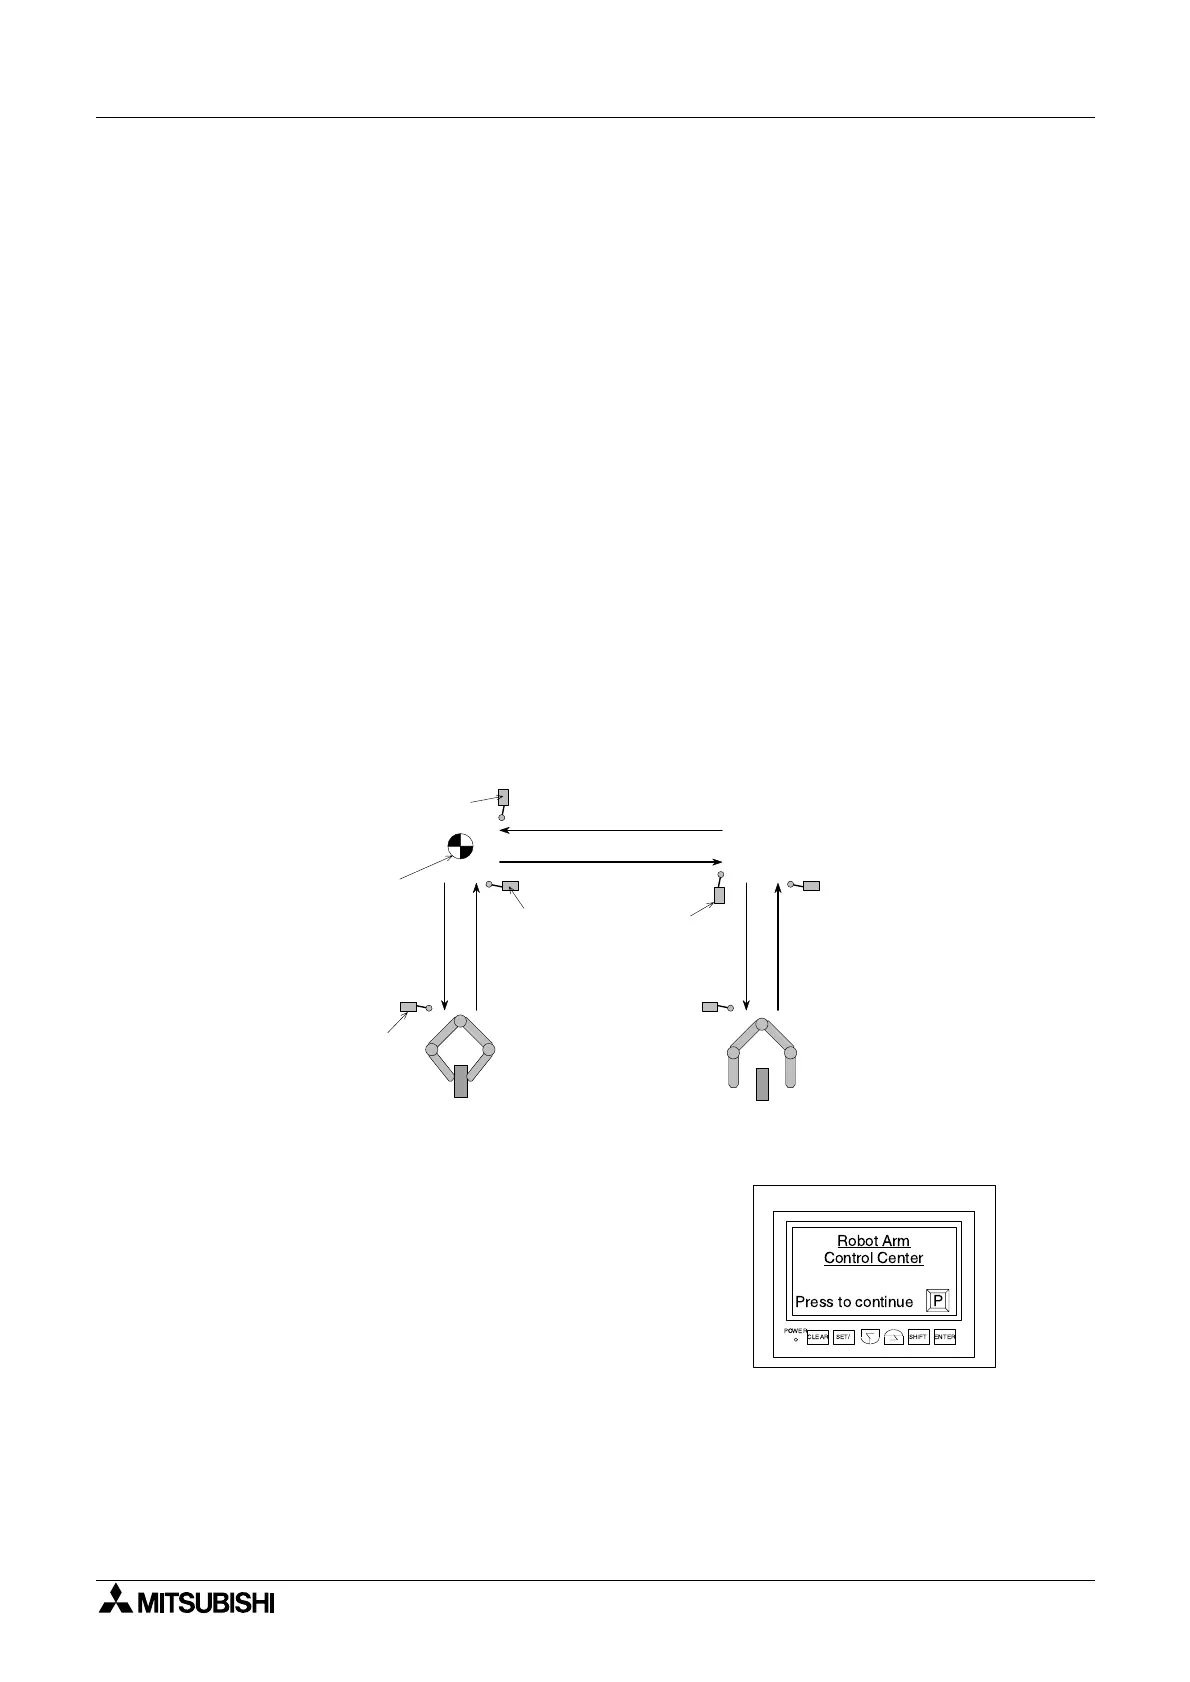
3) The grip, now holding the product, is raised to its upper limit
- output Y2: ON, input X2: ON, output Y2: OFF.
4) The robot arm traverses to its right most position
- output Y3: ON, input X3: ON, output Y3: OFF.
5) The grip and product are lowered to the bottom limit
- output Y0: ON, input X1: ON, output Y0: OFF.
6) The grip is unclamped and the product is released at point B
- output Y1: OFF.
7) The grip is retrieved back to its upper limit
- output Y0: ON, input X2: ON, output Y0: OFF.
8) The arm traverses back to its zero point by moving to the left most limit
- output Y4: ON, input X4: ON, output Y4: OFF.
The cycle can then start again.
System parameters
1) Double solenoid valves are used to control the
up (Y2)/down (Y0) and right (Y3)/left (Y4)
motion.
2) A single solenoid valve is used for the clamp
(Y1)/unclamp operation.
3) The system uses an FX-40DU-TK to interface
with the operator.
The FX-40DU-TK is a touch screen data access
unit.
X2
X2
X1 X1
X4
X3
Y4
Y3
Y0 Y2 Y0 Y2
0
Y1 Y1
Operation 8
Operation 4
Left most arm position
Zero point
Lower
grip limit
Operation 1
Operation 3
Operation 5
Operation 7
Operation 2
Operation 6
Left most
arm position
Upper
grip limit
POWER
CLEAR
SET/
SHIFT
ENTER
Robot Arm
Control Center
Press to continue
P
 Loading...