Modification mode
[12]-41
Designating the modification position without using jog keys (Handy for newly
creating data.)
Steps 1 to 3 are the same as for designating the modification position with the jog keys. Steps 4 and
following are explained below. (Refer to section "Designating the modification position without using jog
keys" in Modifying a block 2.)
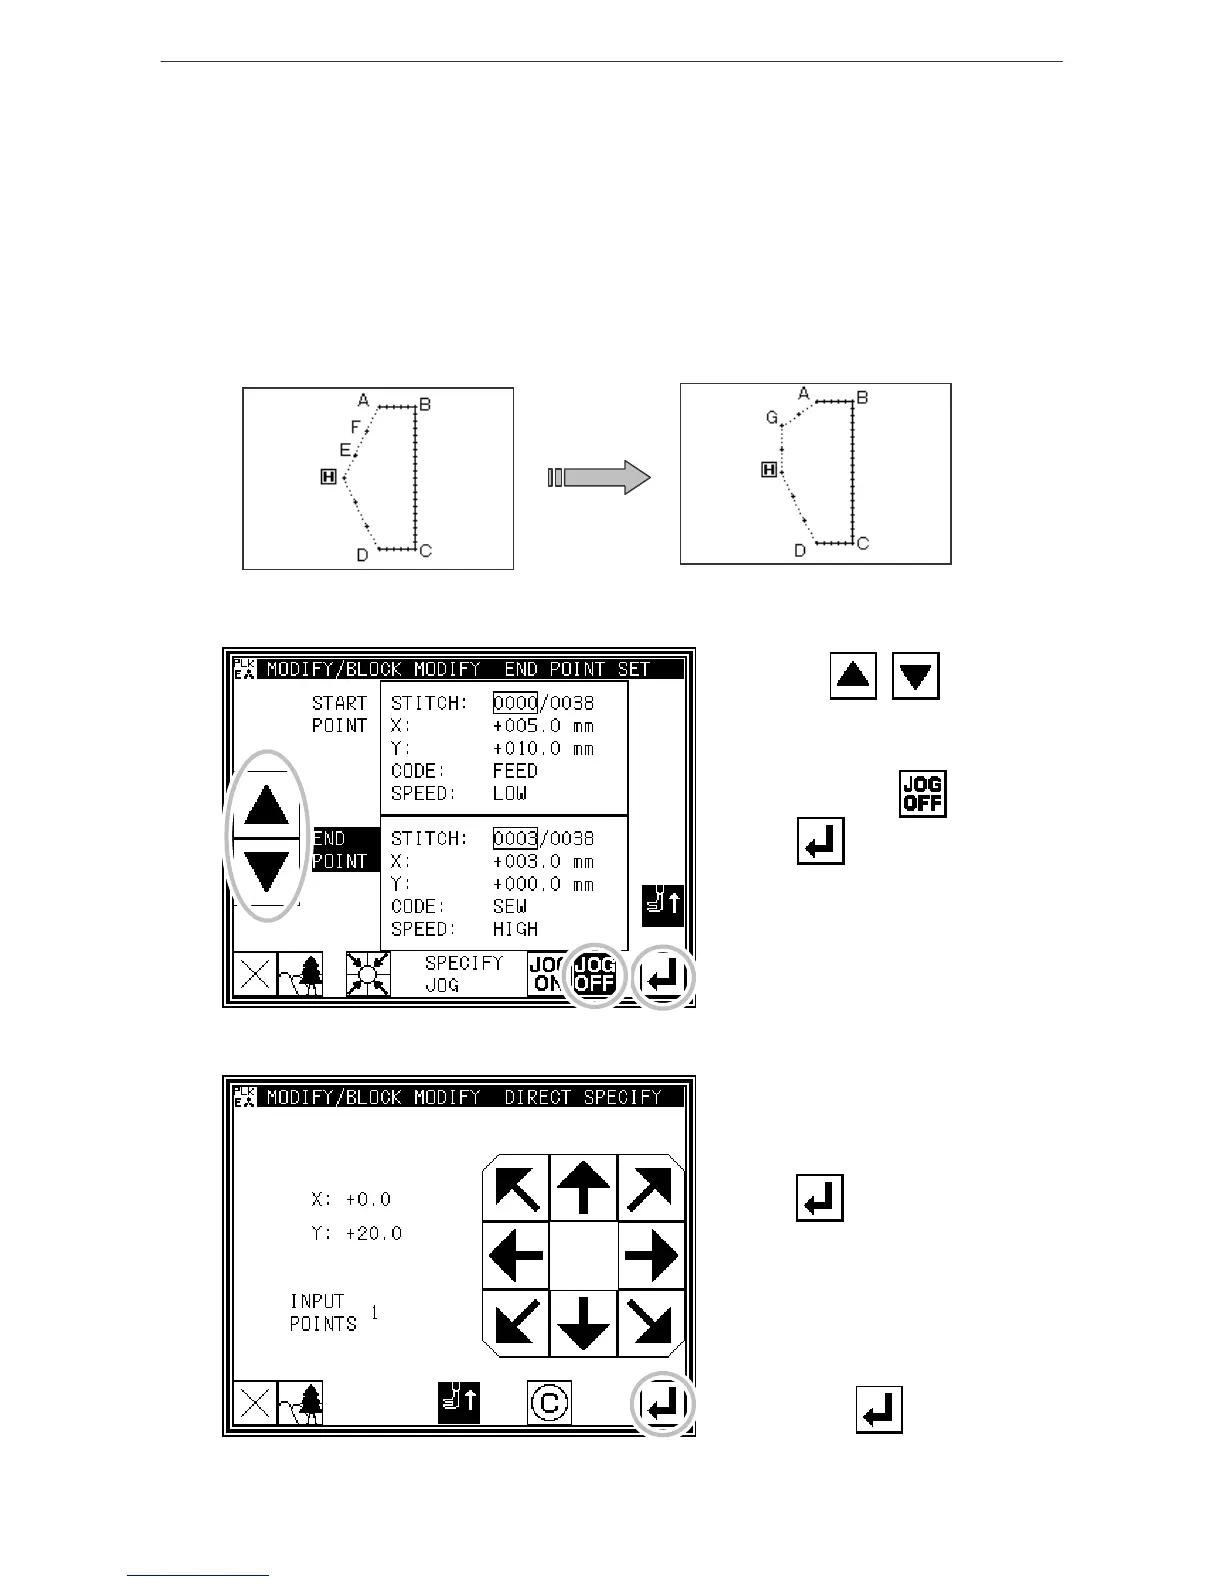
[Example] The E point and F point in the following type of stitching data will be deleted, the G point will
be newly created, and the feed data will be modified.
Steps 1 to 3 same as previous section "Designating the modification position using jog keys".
4. Determining the block modification range
* Using Jog , , determine
the start point(Home position) and
end point(A point).
* Press Jog Validity .
* Press .
5. Moving and determining the modification position
* Using the arrow keys, modify the
position.
(Move to G point in this example.)
* Press .
* If there are several positions to be
modified, repeat step 5.
(The number of input points will
increase.)
* When all modifications have been
made, press again.
 Loading...