Methods of creating stitching data
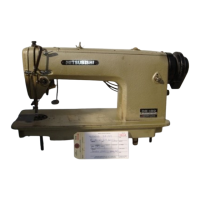
3. Designating circle input
* Press .
* Press and set the data.
* The system will return to the arrow
input screen.
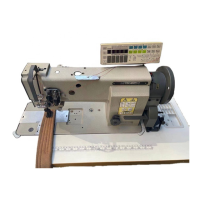
4. Setting B point and C point
* Using the arrow keys, move to the B
point.
* Press to determine point B.
* The Arrow Input screen will reappear,
so press the arrow keys and move to
the C point.
* Press to determine point C.
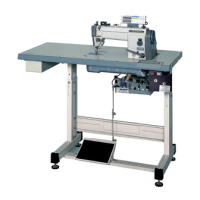
5. Creating the circle input data
* The confirmation message "Create
circle" will appear.
* Press to return to the point C
data entry panel.
* Press and start creation of
the circle input data.
* A message indicating that the data is
being created will appear.
(The circle will be created.)
Note that the work holder will move to
the current position after the data is
created.

 Loading...