Getting Started 1 - 3
Setting Up the Digital Scanner
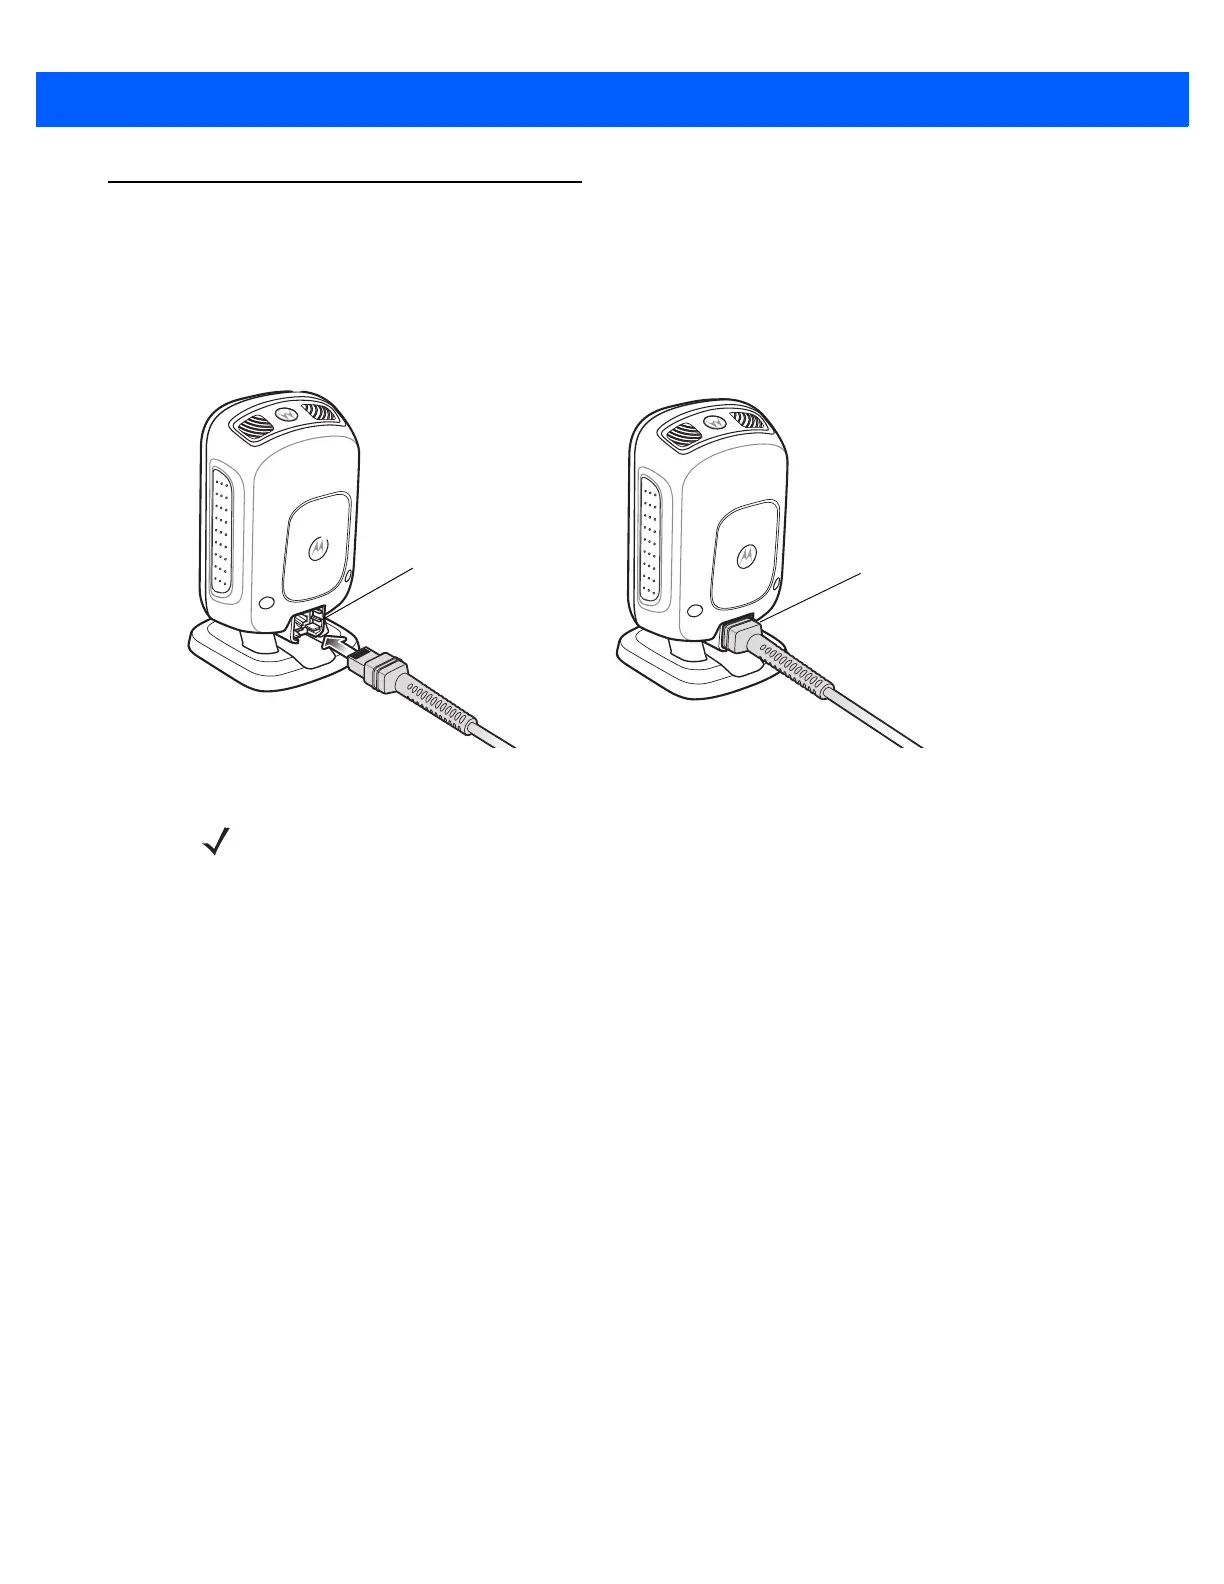
Installing the Interface Cable
1. Insert the interface cable modular connector into the interface cable port on the rear of the digital scanner
until you hear a click. The green LED lights and low/medium/high beeps sound, indicating that the scanner
is operational.
Figure 1-2
Installing the Cable
2. Gently tug the cable to ensure the connector is secure.
3. Connect the other end of the interface cable to the host (see the specific host chapter for information on
host connections).
Removing the Interface Cable
1. Tilt the scanner fully forward.
2. Using the tip of a small screwdriver, depress the cable’s modular connector clip and carefully slide out the
cable.
Connecting Power (if required)
If the host does not provide power to the digital scanner, connect an external power supply.
1. Plug the power supply into the power jack on the interface cable.
2. Plug the other end of the power supply into an AC outlet.
Configuring the Digital Scanner
To configure the digital scanner use the bar codes included in this manual, or use the 123Scan
2
configuration
program. See Chapter 4, User Preferences & Miscellaneous Options, Chapter 5, Imaging Preferences, and
Chapter 10, Symbologies for information about programming the digital scanner using bar code menus. See
Chapter 11, 123Scan2 for information on using this configuration program. Also see each host-specific chapter
to set up connection to a specific host type.
Interface cable
modular connector
To host
Cable interface port
NOTE Different hosts require different cables. The connectors illustrated in each host chapter are examples only.
Connectors vary from those illustrated, but the steps to connect the digital scanner are the same.

 Loading...