EasyManuals Logo

Motorola DS9208 Product Reference Guide

Motorola DS9208
440 pages
To Next Page IconTo Next Page
To Previous Page IconTo Previous Page
Page #25 background imageLoading...
Page #25 background image
Getting Started 1 - 5
3. Slide the base of the digital scanner into the bracket, oriented so the scan window faces down.
Figure 1-4
Inserting the DS9208 into the Wall Mount Bracket
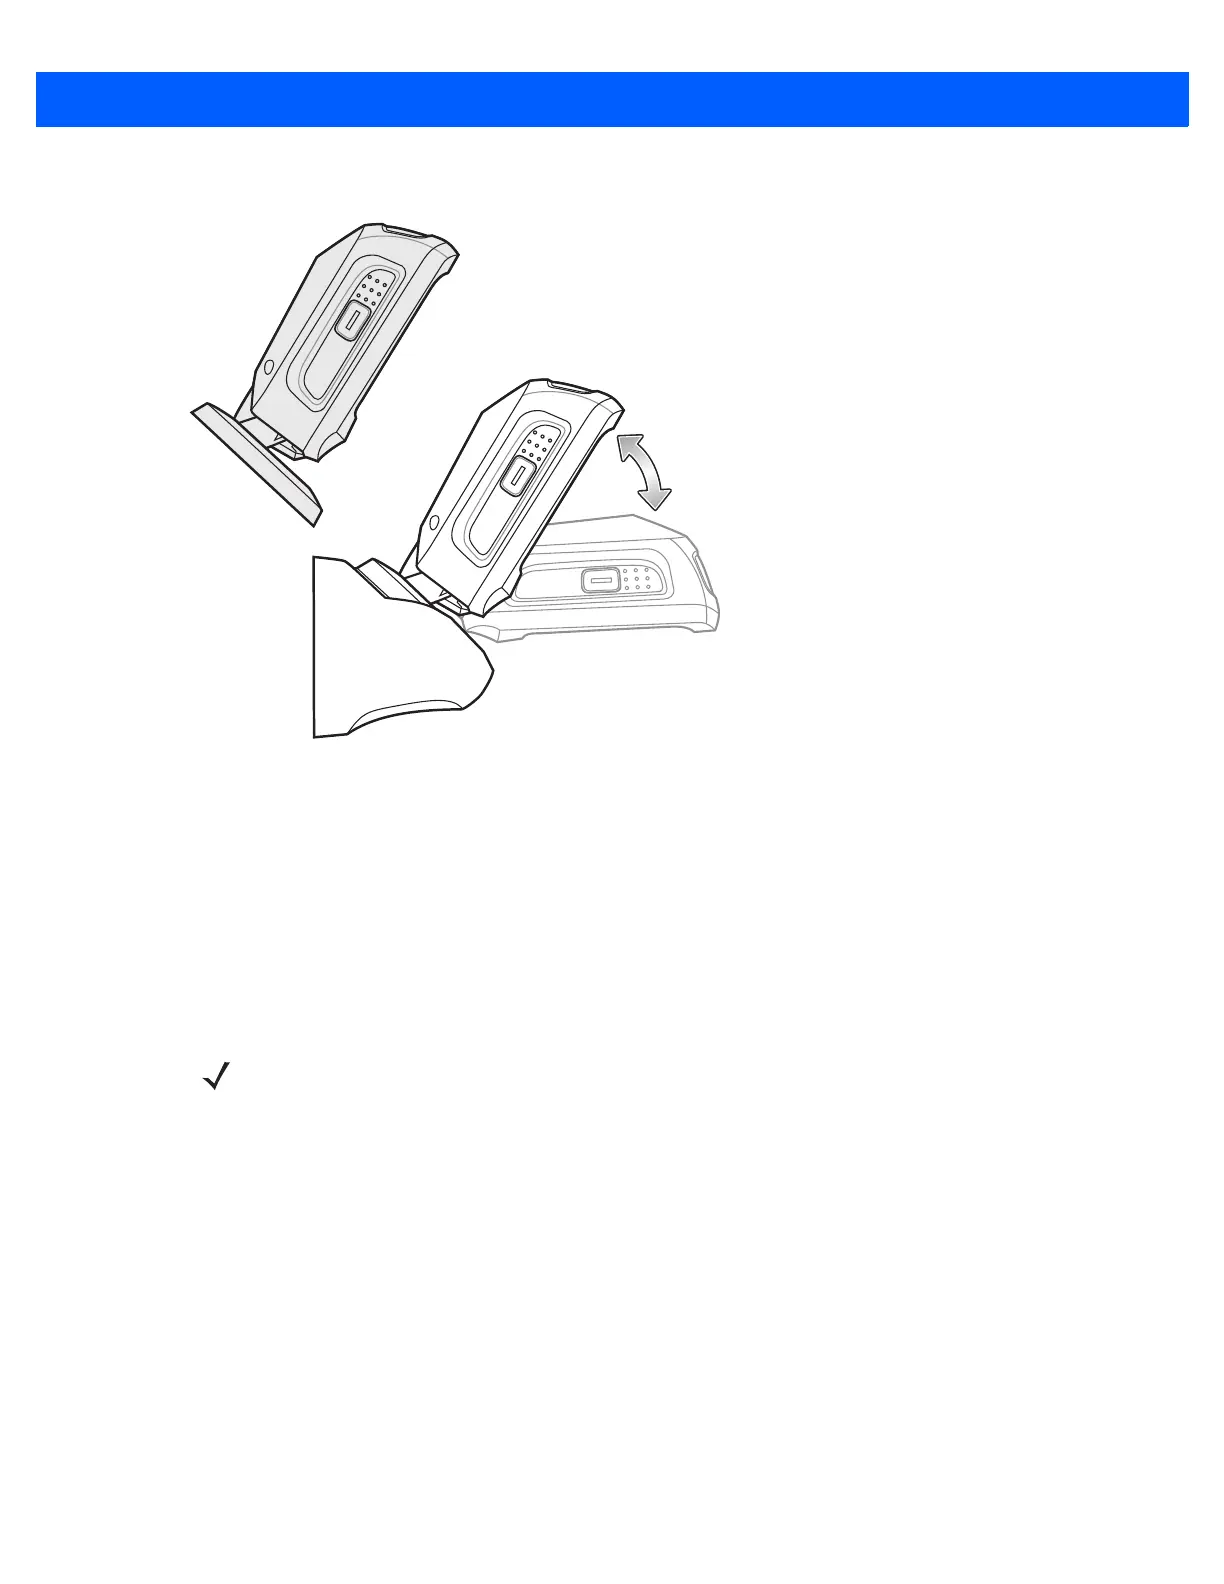
Desk Mount Bracket
An optional desk mount bracket is available for mounting the scanner to a desk or other horizontal surface. For
a template that facilitates screw placement, see Mounting Templates on page 1-9.
To mount the DS9208:
1. Place the bracket in its desired location, and insert two #8 screws through each screw hole in the bracket.
2. Tighten the screws to secure the bracket to the surface.
3. Slide the base of the digital scanner forward into the bracket.
NOTE Select a screw type and length appropriate for the surface material.

Table of Contents

Other manuals for Motorola DS9208

Questions and Answers:

Question and Answer IconNeed help?

Do you have a question about the Motorola DS9208 and is the answer not in the manual?

Motorola DS9208 Specifications

General IconGeneral
Drop SpecificationWithstands multiple 5 ft./1.5 m drops to concrete
Scanning TechnologyImager
Tilt Angle± 65°
Skew Angle± 60°
ConnectivityUSB, RS232, Keyboard Wedge
Decode Capability1D, 2D and PDF417
Light Source650nm visible laser diode
Operating Temperature32° to 104° F/0° to 40° C
Print Contrast25% minimum reflectance
Pitch Angle60°
Storage Temperature-40° to 158° F (-40° to 70° C)
Humidity5% to 95% relative humidity, non-condensing
Electrical SafetyUL
EMCFCC Part 15 Class B
Cable Length6 ft (1.8m)
Power Consumption2.5 Watts (500mA @ 5V)
Scan PatternOmnidirectional

Related product manuals