Checking the printing area 51
This section explains about when the checking method is set to “Step”.
2. How to check the printing area
Note
When it is set to “Auto”, the following steps 2 to 5 are skipped. After step 1, the LED pointer moves from the “position1” to “position4” in order
[1]
• When the media is loaded and the print data is sent to the printer, the left
message is displayed.
•Tap [Enter].
Note
If you tap , the printer starts printing without showing printing area.
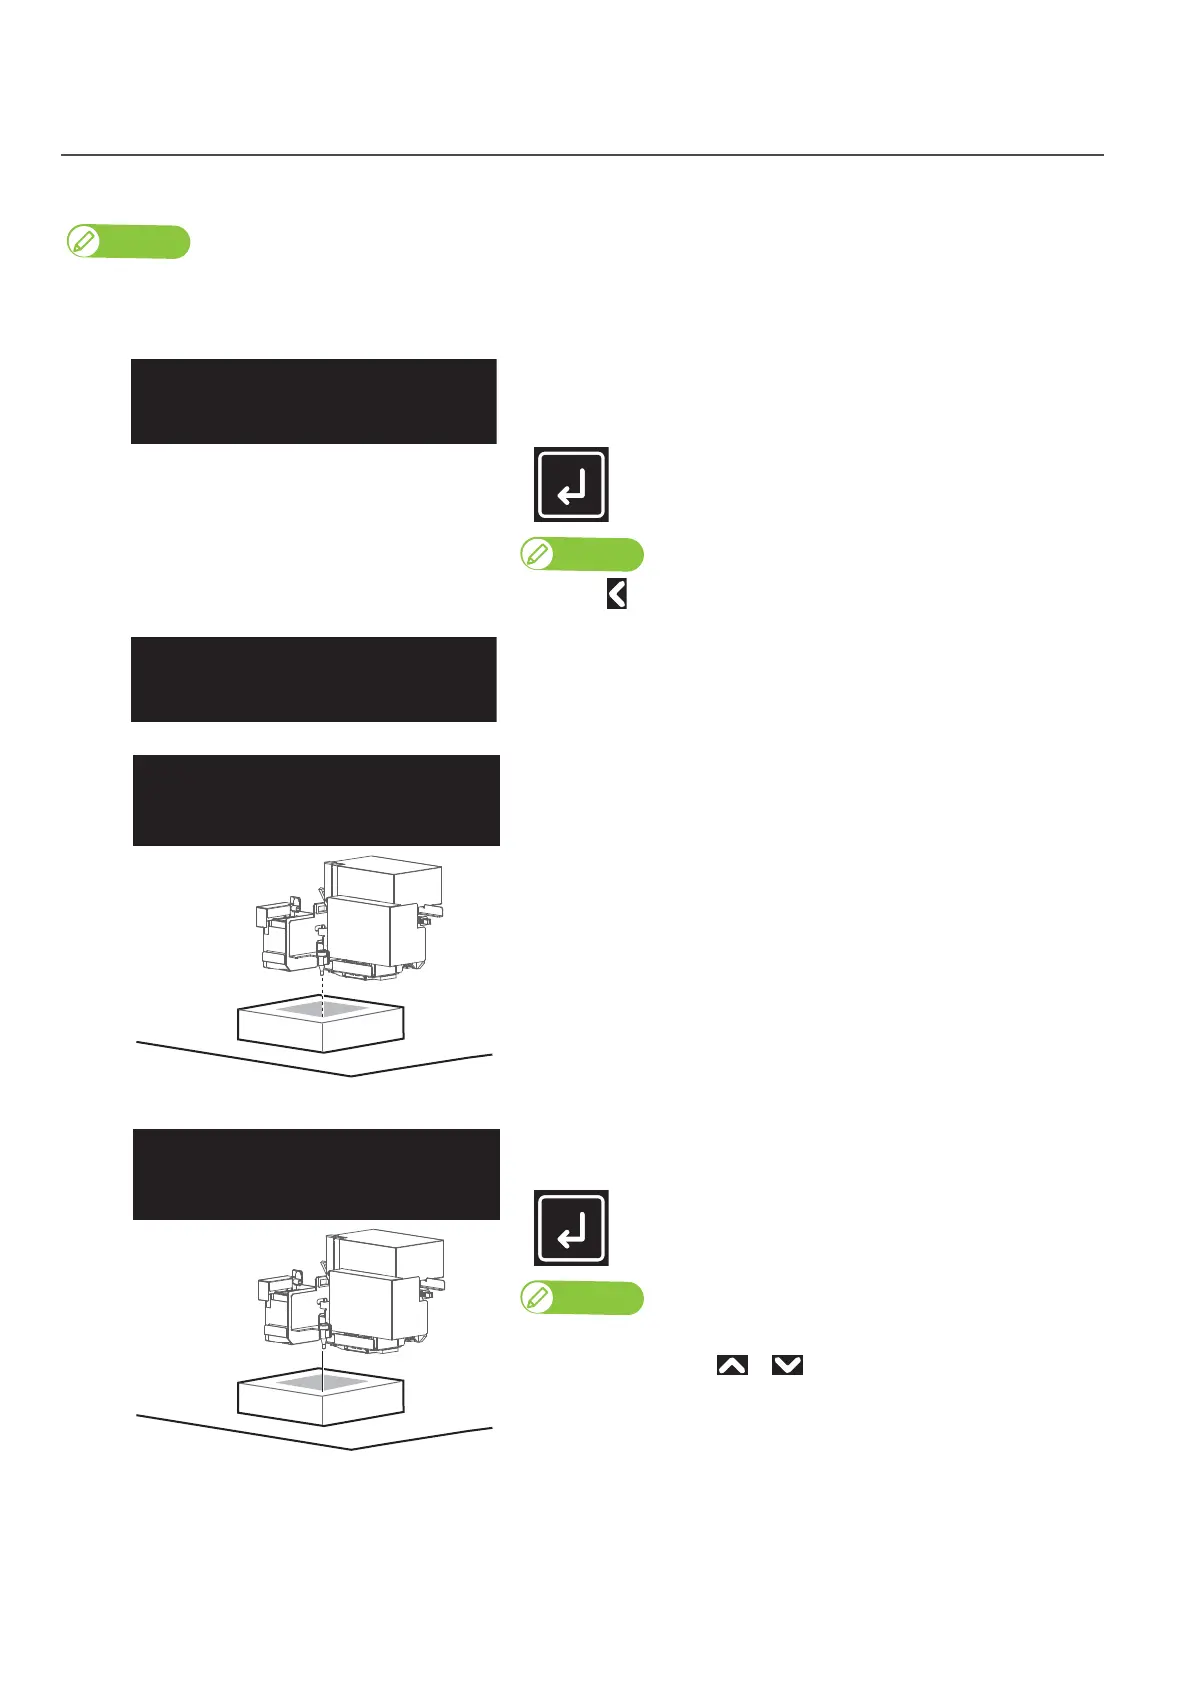
• The LED pointer moves to the bottom right corner of the print range
(position1) while the LED is turned off.
• After moving, the LED pointer flashes every second, for a total of 3
times.
[2]
Check that the LED pointer’s position is not misaligned with the media
position, and then tap [Enter].
• The LED pointer remains on until [Enter] is tapped.
• To cancel the job, use or to choose "No", then tap [Enter].
ShowEdges
Start ー>Enter
Position1OK?
Yes