This document is an Operations and Maintenance Manual for the MUTOH XPJ-1682D printer, covering its functions, technical specifications, usage, and maintenance procedures.
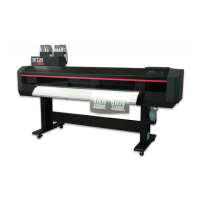
The MUTOH XPJ-1682D is a large-format inkjet printer designed for high-quality image printing on various media. It utilizes an on-demand piezo print method with a firmware servo/DC motor drive for precise media feeding and printing. The printer supports 7 ink colors (Black, Cyan, Magenta, Yellow, Light Cyan, Light Magenta, White) and uses either 300 ml or 1,000 ml ink bags.
Important Technical Specifications:
- Model Name: XPJ-1682D
- Print Method: On demand piezo method
- Drive Method: Firmware servo/DC motor drive
- Media Feed Method: Multipoint pressurizing Grid roller system
- Media Hold Down System: Pressure roller down system by manual lever
- Conditions of Usable Media:
- Media outer diameter: Φ150 mm or less
- Media core diameter: 2 inches or 3 inches
- Weight: 30 kg or less
- Width: 500 mm to 1,625 mm
- Maximum thickness: 0.3 mm (Low head height), 1.3 mm (Mid head height), 2.8 mm (High head height)
- Maximum Printable Width: 1,615 mm
- Maximum Print Length: 1,500 m
- Head Height Adjustment: Three-level adjustment (Low, Mid, High)
- Interface: Gb-Ethernet (1000BASE-T)
- Waste Ink Tank: 2,000 ml capacity
- Ink Colors: Black, Cyan, Magenta, Yellow, Light Cyan, Light Magenta, White (7 colors)
- Ink Type: 300 ml / 1,000 ml ink bag
- Environmental Conditions (Printer Operation):
- Temperature: 20 to 32 °C
- Humidity: 40 to 60%, No condensation
- Recommended Printing Environment:
- Temperature: 22 to 30 °C
- Humidity: 40 to 60%, No condensation
- Change rate: Temperature: No more than 2 °C per 1 hour; Humidity: No more than 5% per 1 hour
- Power Supply Specifications:
- Voltage: AC 100V to AC 120V ±10% / AC 200V to 240V ±10%
- Frequency: 50/60Hz ±1Hz
- Power Consumption:
- Power off: AC100V to 120V, 1.0 W or below; AC200V to 240V, 3.8 W or below
- Standby: 45 W or below
- Sleep Mode: 30 W or below
- Operation (Printer): 1100 W or below
- Operation (Heater): 1200W or below
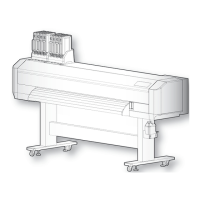
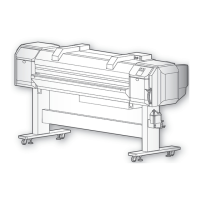
- Dimensions:
- Height: 1,504 mm
- Width: 2,770 mm
- Depth: 895 mm
- Weight: Main body: 144 kg; Stand: 32 kg
Usage Features:
The printer is operated via a touch-screen front panel with illuminated keys for guidance.
- Powering ON/OFF: A long press of the Power button turns the printer on or off. The Power LED indicates the status. It is recommended to keep the printer powered on and in sleep mode when not in use to prevent ink coagulation and maintain print quality.
- Media Loading: Roll media is loaded by attaching flanges to the media core, placing it on the roll media holder, and feeding it through the media guide and slot. The media feed lever controls pressure rollers to keep media flat. Holddown pressure can be adjusted between High and Normal. Edge holders prevent media curl.
- Nozzle Check and Cleaning: Before daily operation, a nozzle check pattern can be printed to verify nozzle health. If missing or thin lines are found, head cleaning (Short, Normal, Long, Little Charge, Initial Charge) can be performed from the front panel.
- Printer Calibration:
- Head Alignment: Adjusts print head misalignment for optimal image quality. Standard alignment is for the currently selected user type, while Custom alignment allows adjustment for other print modes.
- Print Quality Calibration: Calibrates dot placement for bidirectional printing. Options include Standard, Custom, and Auto (using an embedded color sensor).
- Media Feed Adjustment: Corrects media feeding issues like image overlapping or horizontal white lines, especially when using new media types or after changing holddown pressure.
- Advanced Settings:
- Head Height Adjustment: Allows changing the print head height (Low, Mid, High) to prevent contact with warped or high-density media. Print quality calibration is required after this adjustment.
- Holddown Pressure Adjustment: The media feed lever adjusts pressure across the entire media width (Normal for typical media, High for heavy media).
- Pressure Roller Cancellation/Reduction: Individual pressure rollers can be set to Normal, Low, or Cancel using slide lock levers to prevent cockling on thin or stiff media.
- Operating from Front Panel (During Printing): Users can feed media, pause/restart printing, cancel printing, start printing during warming up, and cut media. Various menus (Temperature, Pre Heater, Platen Heater, Dryer, PF Micro Adjustment, Backup, Job Status, MPS) are accessible during printing to monitor and adjust settings.
- User Types: Up to 15 user type groups can be configured, each saving specific settings for print mode, effect, adjustment values, heater settings, vacuum fan, and thickness.
- Spitting: This maintenance operation prevents nozzle clogging by spitting ink into a dedicated box. It can be set to On (every shuttle), On Media (on page margins for faster printing), or Off.
- Standby Heating: Preheats heaters during standby mode.
- Head Travel: Sets the range of print head movement during printing (Data, Machine, Media).
- Multi Strike: Sets the overwrite count per line.
- Strike Wait: Sets waiting time during overwrite printing.
- Slant Check: Detects media slanting during loading.
- Auto Cleaning: Configures automatic head cleaning intervals during standby, while printing, or before printing.
- Ink Status: Displays ink levels for each ink bag.
- Roll Length Management: Allows printing remaining roll length information with a scannable code, scanning existing codes, or manually setting roll length.
- Heater Control: Adjusts heater mode (Normal, Fixer, Dryer) to reduce media cockling.
- Start Feed: Adjusts margin setting between images.
- Alert Buzzer: Configures beep sound for errors.
- Internal LED Lights: Controls internal LED lights for inspecting the printer and print.
- Front Interlace: Fine-tunes media feeding for the first print swath to improve print quality.
- Temporary Menu: Displays temporarily hidden menus from "Menu 4: Menu Option."
- System Info: Displays firmware versions, model name, serial number, ink type, ink configuration, and total printed area.
- Sleep Mode: Configures head cleaning intervals and timer for sleep mode.
Maintenance Features:
Regular maintenance is crucial for optimal printer performance.
- Daily Maintenance (Before and After Printing): Run a nozzle check and perform head cleaning if necessary.
- Weekly Maintenance: Clean the cleaning wiper and around the print head. If the printer is unused for an extended period (1-4 weeks), run head cleaning weekly or perform "Longstore" for longer storage.
- Monthly Maintenance: Clean the inside of the printer.
- Regular Checks: Regularly check and empty the waste ink tank.
- Agitating Ink: Invert ink bags back and forth before installation and periodically when prompted to prevent ink settling.
- Checking Ink Level and Replacing Ink Bags: Monitor ink levels and replace ink bags and S/C cards when empty.
- Emptying Waste Ink Tank: Drain waste ink into a container when the tank is half full or full.
- Cleaning Procedures:
- Head Cleaning: Various modes (Short, Normal, Long, Little Charge, Initial Charge) are available to clear clogged nozzles.
- Cleaning Wiper: Clean weekly or when print blurring occurs.
- Capping Unit: Clean weekly to remove ink deposits and dust.
- Print Head: Clean around the print head when blurring or dot missing persists.
- Color Sensor: Clean with ethanol if auto print quality calibration repeatedly fails.
- Inside Cleaning: Monthly cleaning of pressure rollers, platen, media guide, and edge holder to remove dust and ink stains.
- Replacing Consumable Parts:
- Absorption Material for Flushing Box: Replace periodically (approx. every two months) when lumps of ink rise from the frame.
- Cutter: Replace when media is not cut smoothly or the cut surface is feathered.
- Cleaning Wiper: Replace approximately every six months.
- Adapter’s Plug: Replace when the "Change Plug" message appears on the operation panel.
- Moving or Transporting the Printer: Requires specific preparation steps including turning off the printer, disposing of waste fluid, removing cables, loosening adjusters, and packing securely. For long-term storage (more than one month), execute "Longstore" to wash the print head with cleaning fluid and remove ink pack adapters.
- Initial Charging After Head Cleaning: Involves inserting new ink bags and performing an ink charge.
- Troubleshooting: Provides solutions for installation, boot-up, media-related, and printing-related issues, as well as error messages and their remedies.