22 Loading a roll media
1 Loading a roll media
Items Required:
•Roll media
•Media flange: ×2
Important!
Depending on the size of media, two or more people are required.
Load a roll media into the printer
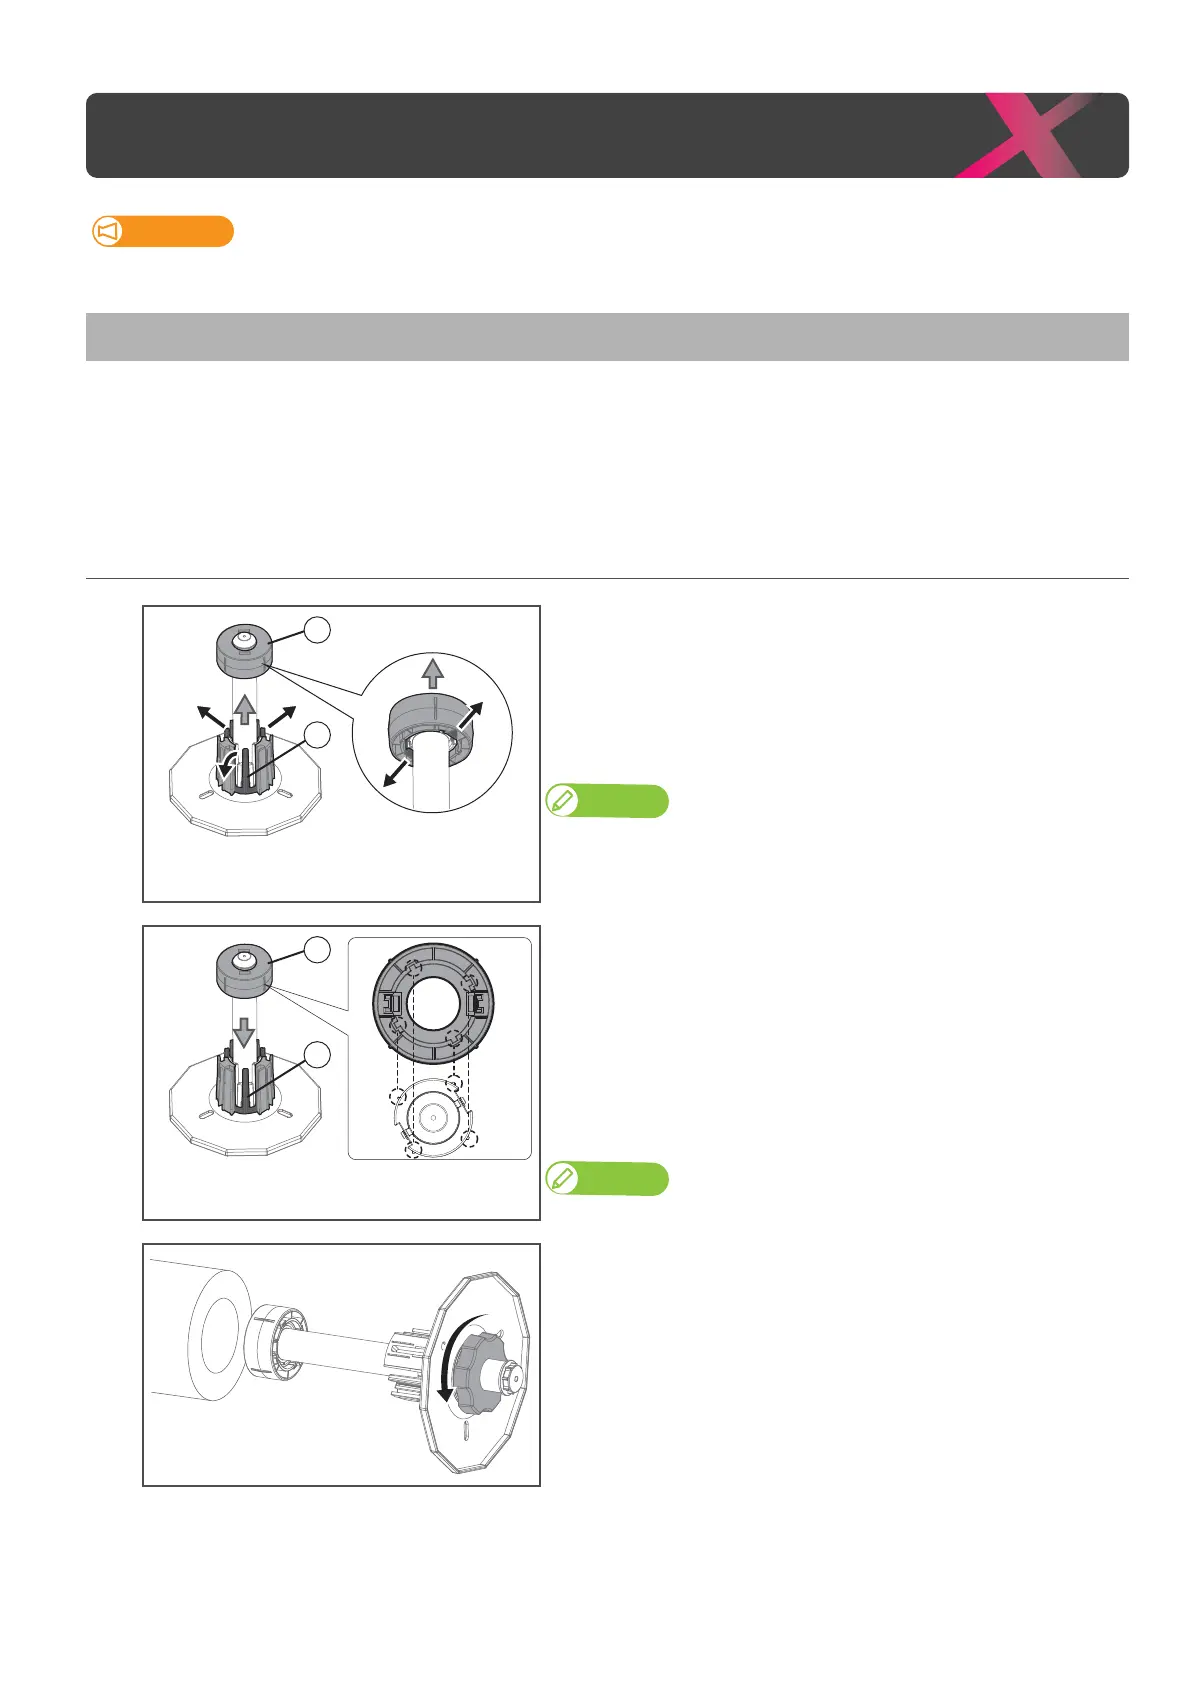
1. Attach flanges to the media
[1]
(If you are using 2-inch core roll media) Remove the 3-inch adapter
from the media flange.
: Pull two tabs on the adapter outward, then remove it from the
flange.
: Pull three tabs on the adapter outward, then remove it from the
flange.
Note
•If
adaptor cannot be removed, turn the handle on the flange anti-clockwise
to loose (see Step 2), then remove it.
• If you are using 3-inch core roll media, skip this step.
(When replacing 2-inch core roll media with 3-inch core roll media)
Attach the 3-inch adapters to the media flange.
: Align the tabs (x3) on the adapter with the dents on the base of
flange to click into place.
: Align the notches (x4) on the inside of adapter with the protrusions
(x4) on the leading edge of media flange as shown to the left to attach
it to the edge of the media flange.
Note
•If ② adapter is misaligned, it will not be properly fixed to the media flange.
[2]
Push the media flange (×2) into the both ends of the media core.
• Before inserting, twist the handle on the flange anticlockwise to unlock it.