Menu 2: Test Print 97
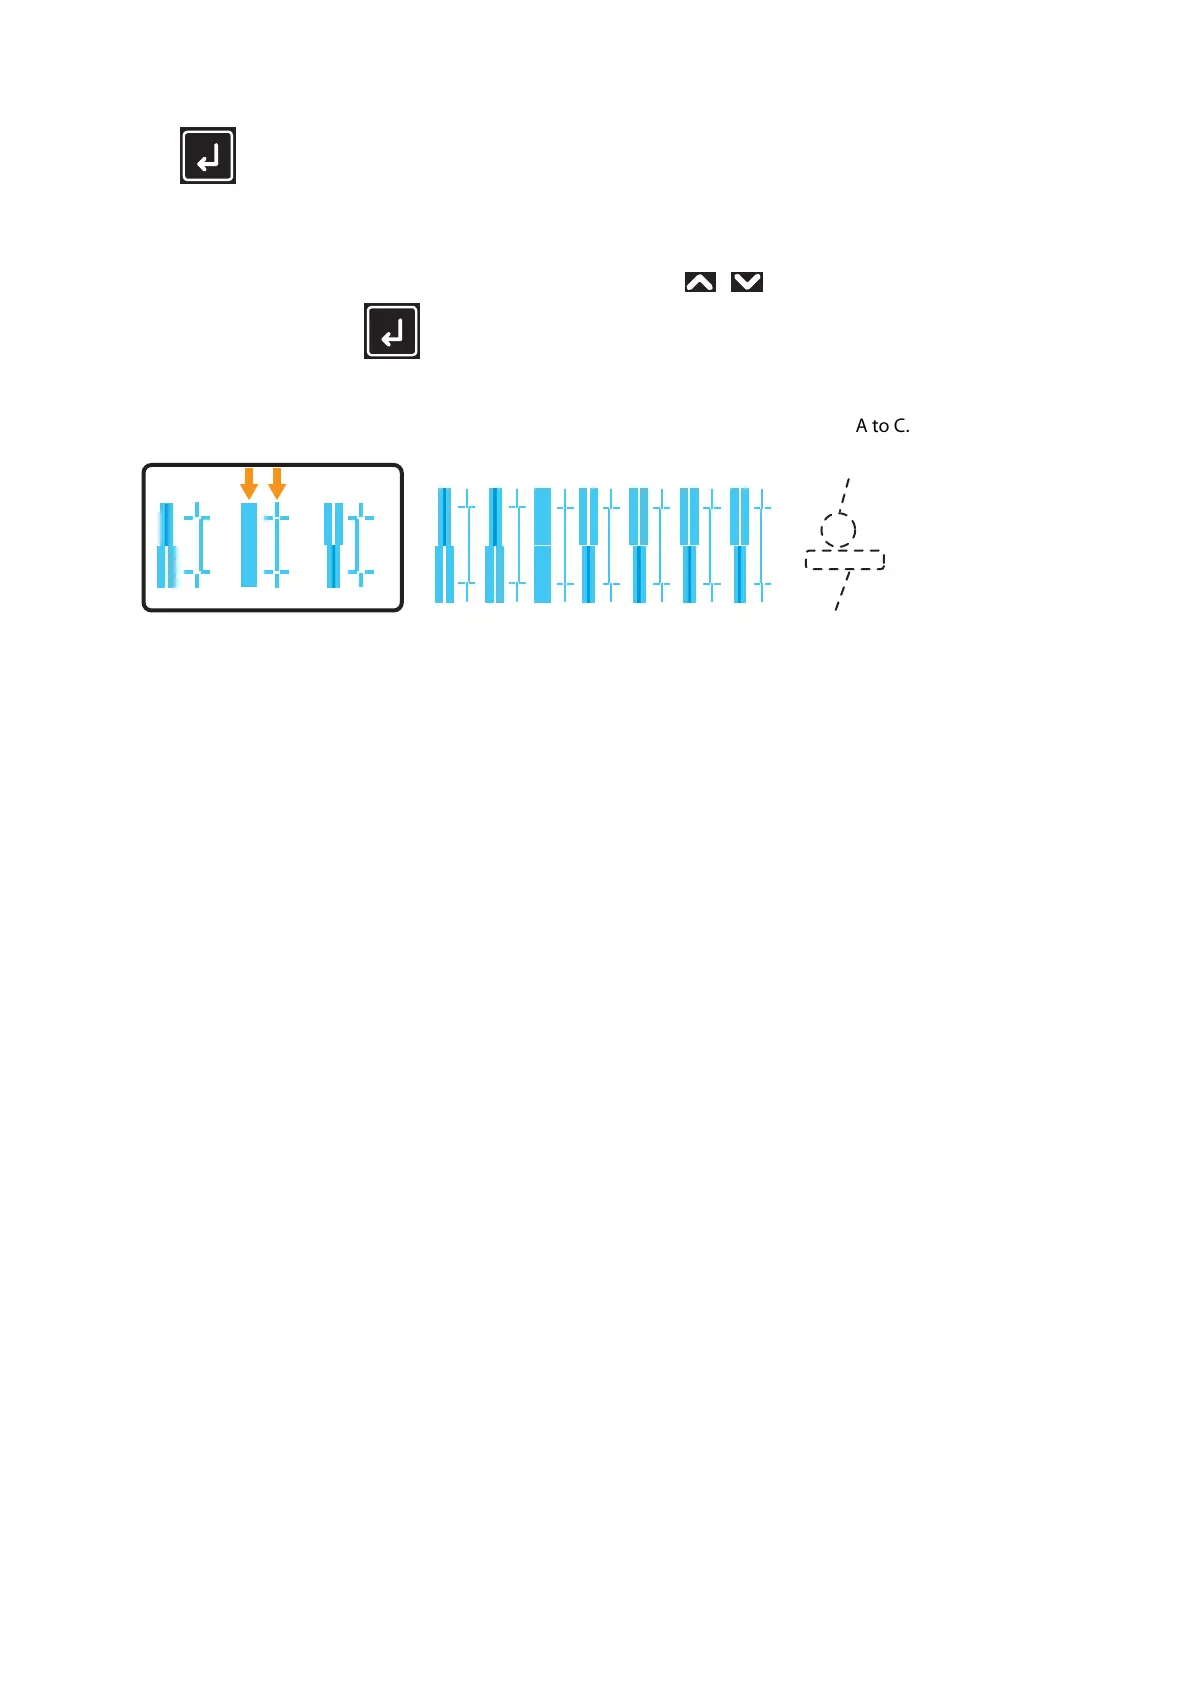
Head adjustment pattern
• Press the (Enter) key to carry out printing. For the Head adjustment pattern, the same patterns will be printed on
both sides and center of the media.
• Check the print results and select the number that looks most aligned between 1 and 7.
• Pattern names such as “Pattern B: 4” are shown on the display. Use the / key to enter the number of the best-
adjusted pattern, and press the (Enter) key.
• In the case of the picture below, enter “5”, so that the display reads “Pattern B: 5”.
• If you selected “Head Adj. 2: Custom” and “Fine Pattern ALL”, enter the adjustment value for A to C.
1234567
456
Q3/Q4/G1/G2
B
Pattern Name
Current Print Mode
(If you carried out the adjustment with Custom settings,
the head height and the printing information will also be printed.)