NetApp AltaVault Cloud Integrated Storage Administration Guide 207
Beta Draft
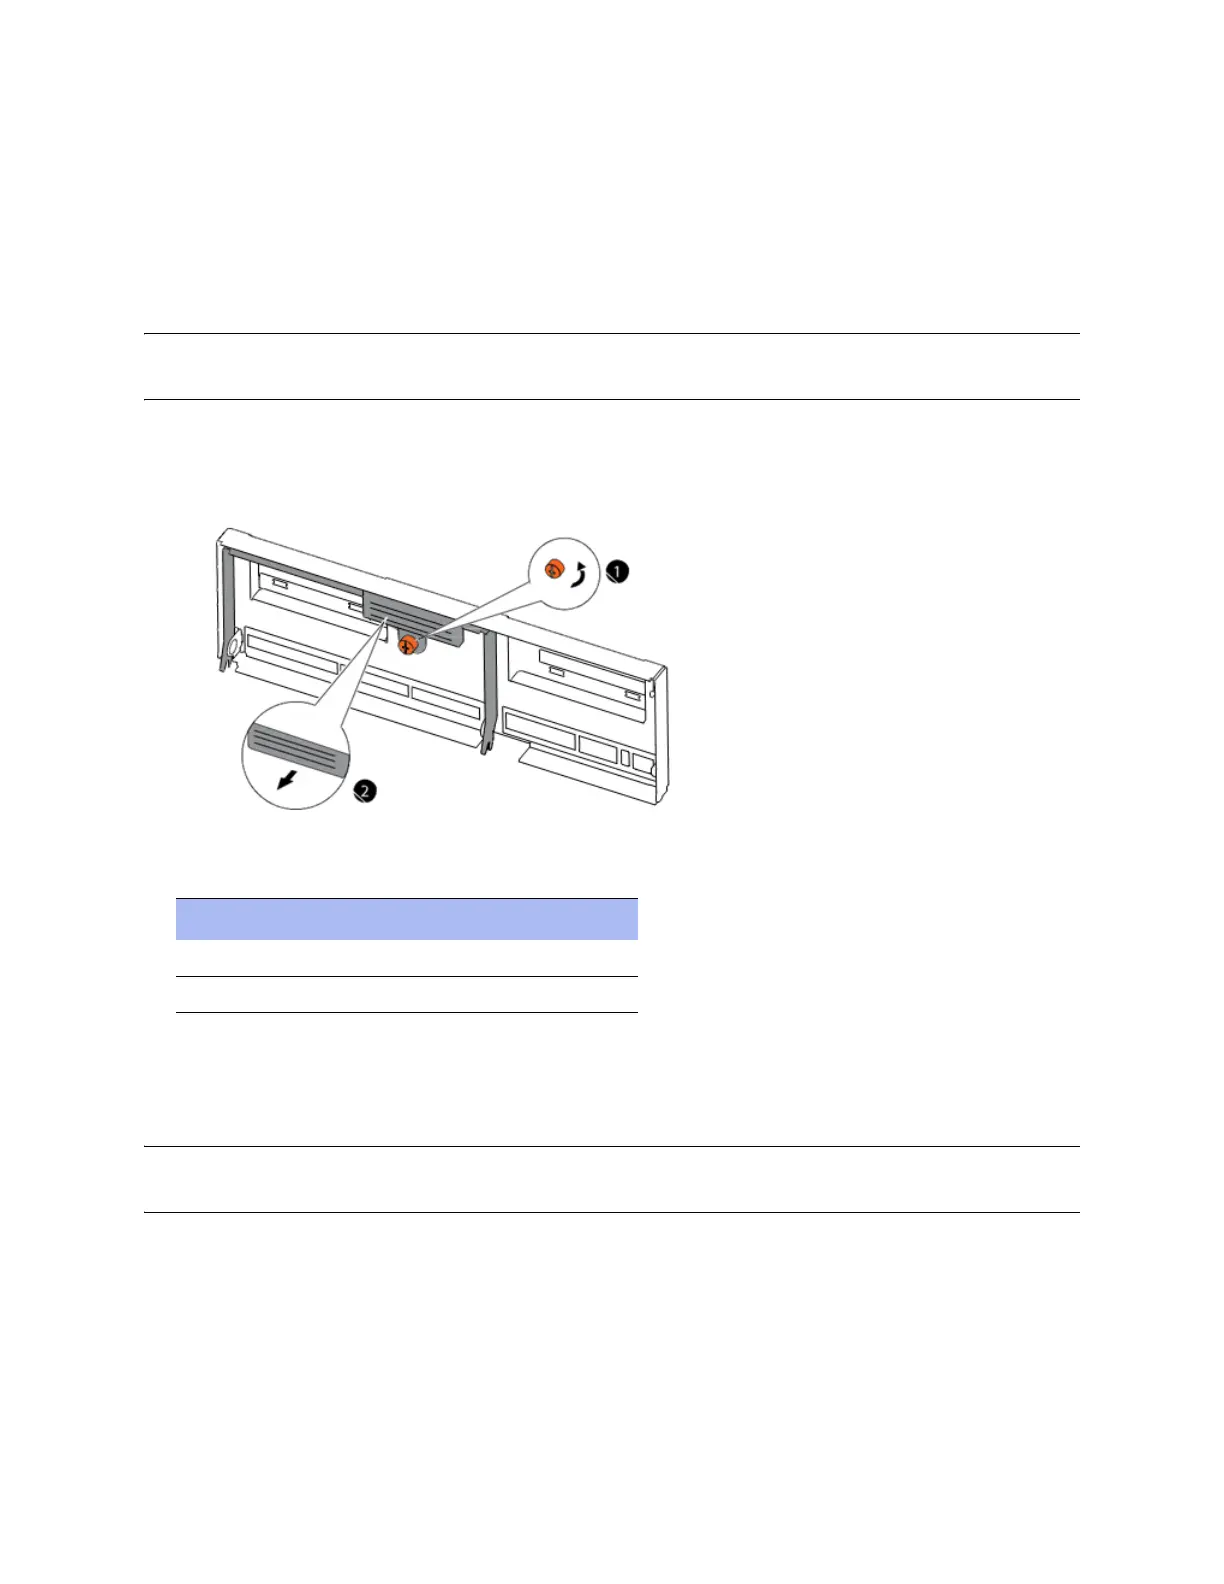
Installing a controller in a chassis System maintenance AVA-400, AVA-800
Re-cable the QSFP connections to the disk shelf and the mini-SASHD connections to the controller.
Remember to reinstall the media converters (SFPs) for FC cables.
Re-cable the management and console port connections.
3. With the cam handle in the open position, firmly push the controller module into the chassis until the controller
module meets the mid-plane.
Note: Do not use excessive force when sliding the controller module into the chassis; you might damage the connectors on the rear
of the module.
4. Close the cam handle so that the latch clicks into the locked position and the controller module is fully seated in
the chassis. Tighten the thumbscrew.
5. Identify components as described in this table:
6. Reconnect the power cables to the power supplies and secure them using the cable retaining clips.
7. Reconnect the power cables to the power source.
Note: Power on the disk shelf attached to the AltaVault system and set the disk shelf ID before powering on the controller. For
information on setting the disk shelf ID, see the “NetApp AltaVault Cloud Integrated Storage Poster.”
8. Turn the on/off switch on the power source and the power supply to the ON (|) position to start the boot process
for the system.
Component Description
1 Thumbscrew
2 Cam handle