216 NetApp AltaVault Cloud Integrated Storage Administration Guide
Beta Draft
System maintenance AVA-400, AVA-800 Adding an additional RAID group to a configured appliance
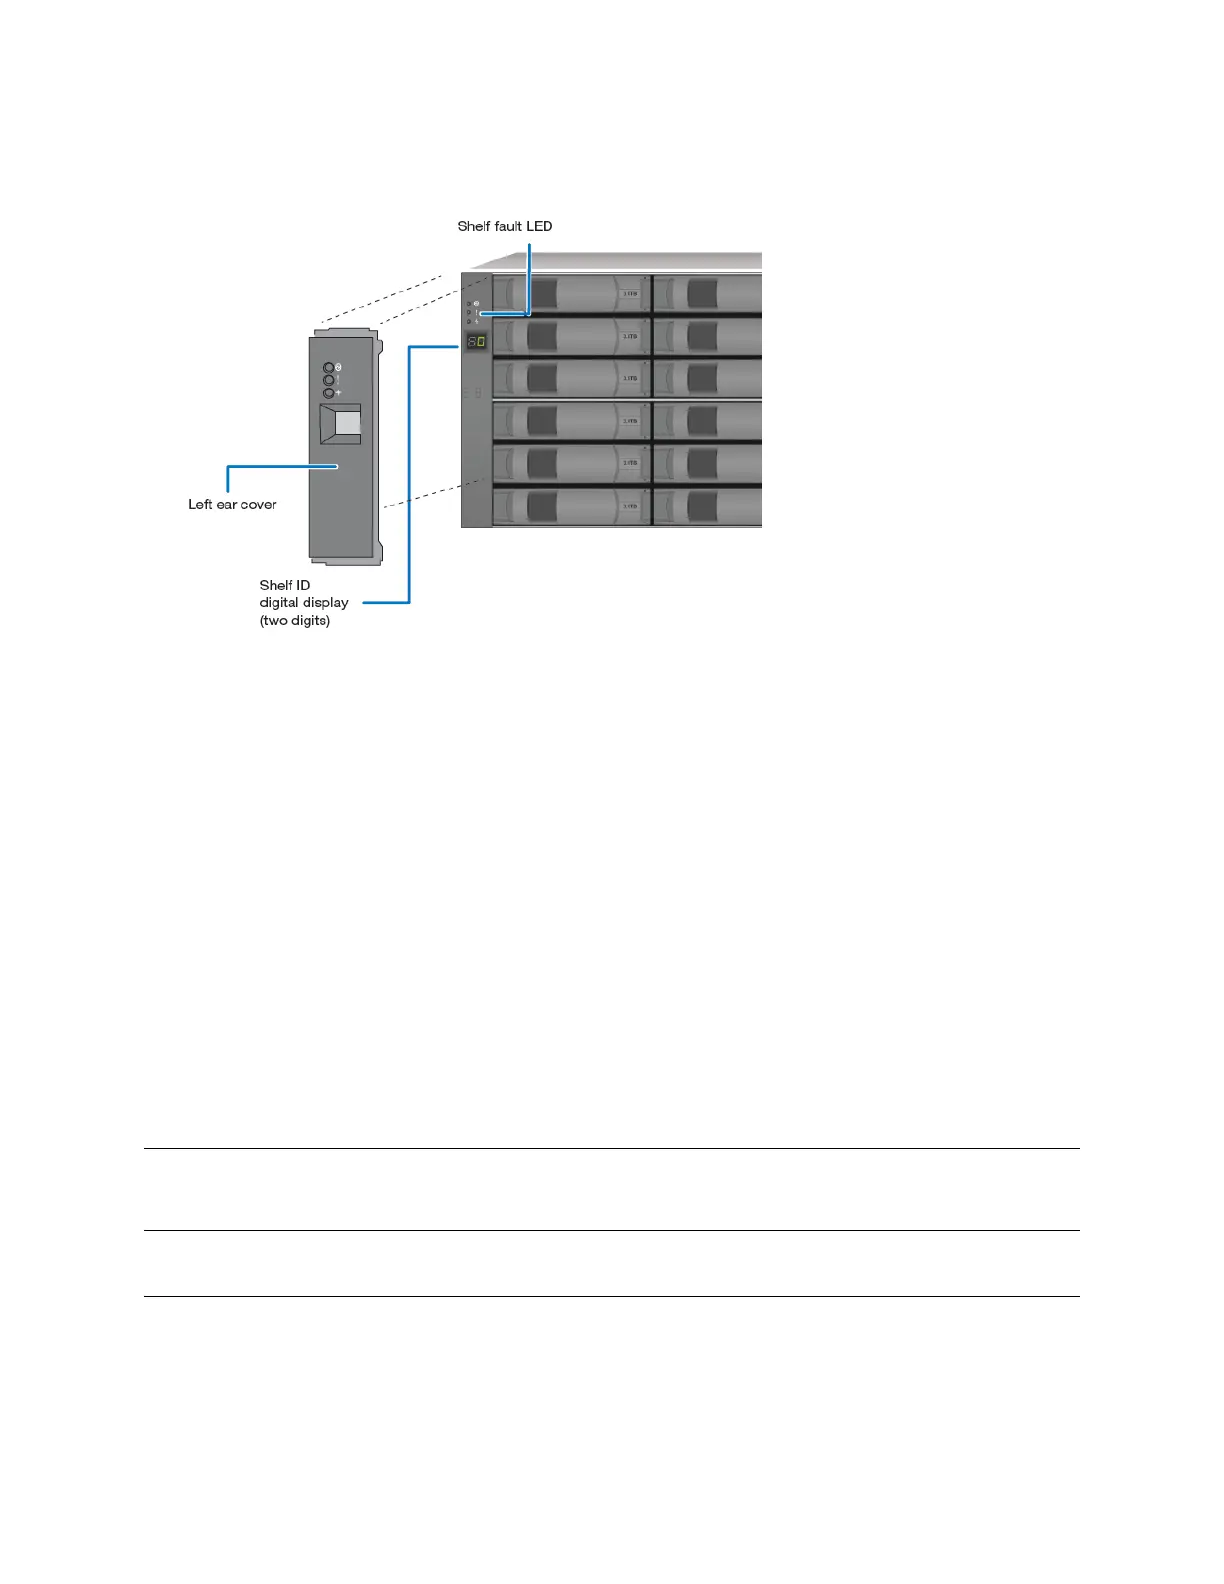
b. Pull either the top or the bottom of the cover until one end is released, then, pull off the left ear cover, as
displayed below.
4. Press and hold the shelf ID button until the first digit on the digital display blinks.
5. Press the button until a number between 0 and 9 displays. This number continues to blink.
6. Repeat steps b and c for the second digit.
7. Press and hold the button until the second number stops blinking.
Both numbers on the digital display should blink and the shelf fault LED illuminates within five seconds.
The fault LED stays lit until you power-cycle the shelf.
8. To power-cycle the disk shelf to ensure the new disk shelf ID takes effect, flip the Power Switch to the off position,
wait several seconds, then flip it back to the on position.
9. Replace the left ear cover.
10. Reconnect and power on the system.
Adding an additional RAID group to a configured appliance
Note: Removing a drive out of a RAID group and moving it to a different RAID group is not supported. The disk drives have been
formatted to a unique RAID configuration and should not be reused for hot-swappable drive replacements.
Refer to HW Universe for drive information.