180
GS748T Smart Switch
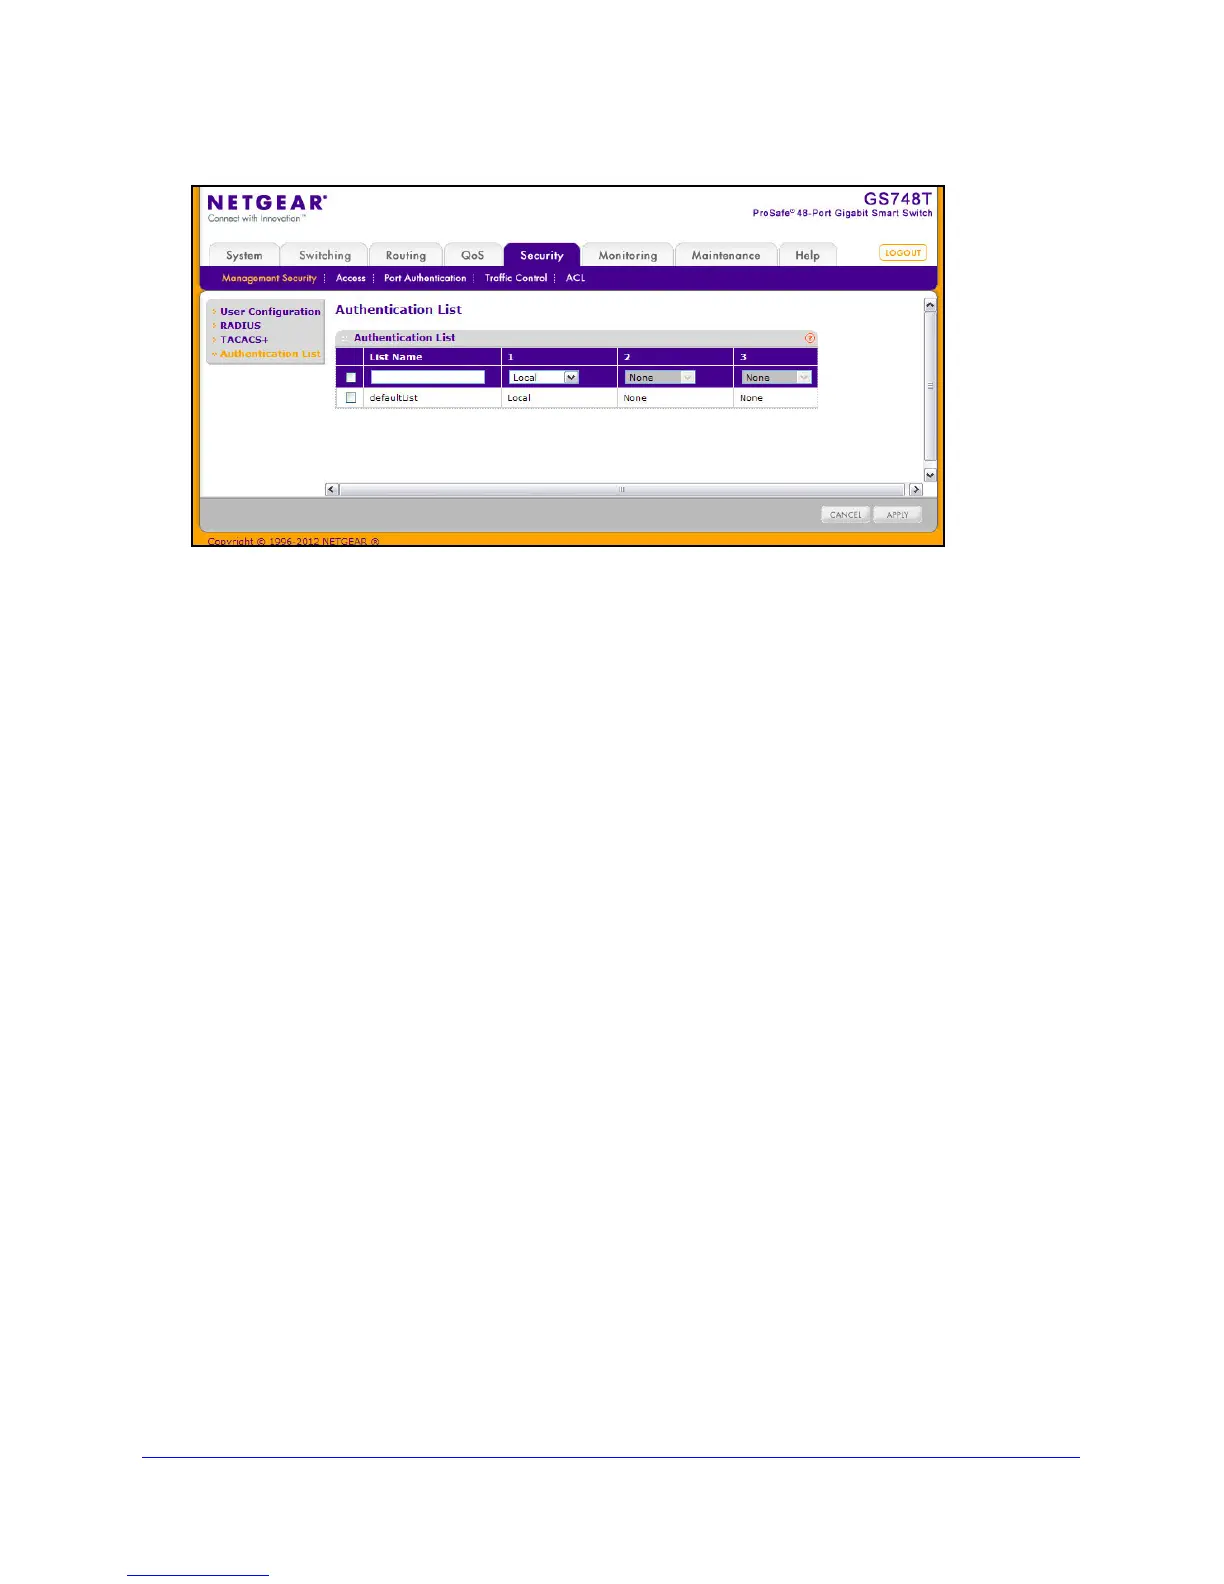
To change the authentication method for the defaultList:
1. Select the check box next
to the defaultList name
2. Use
the drop down menu in the 1 column to select the authentication method that should
appear first in the selected authentication login list. If you select a method that does not time
out as the first method, such as ‘local’, no other method will be tried, even if you have
specified more than one method. This parameter will not appear when you first create a new
login list. User authentication occurs in the order the methods are selected. Possible
methods are as follows:
• Local: The user's locally stored ID a
nd password will be used for authentication.
Since the local method does not time out, if you select this option as the first method,
no other method will be tried, even if you have specified more than one method.
• RA
DIUS: The user's ID and password will be authenticated using the RADIUS server.
If you select RADIUS or TACACS+ as the first method and an error occurs during the
authentication, the switch uses Method 2 to authenticate the user.
• T
ACACS+: The user's ID and password will be authenticated using the TACACS+
server. If you select RADIUS or TACACS+ as the first method and an error occurs
during the authentication, the switch attempts user authentication Method 2.
• None: Th
e authentication method is unspecified. This option is only available for
Method 2 and Method 3.
3. Use t
he menu in the 2 column to select the authentication method, if any, that should appear
second in the selected authentication login list. This is the method that will be used if the first
method times out. If you select a method that does not time out as the second method, the
third method will not be tried. This parameter will not appear when you first create a new
login list.
4. Use t
he menu in the 3 column to select the authentication method, if any, that should appear
third in the selected authentication login list. This parameter will not appear when you first
create a new login list.
5. Click Cancel
to cancel the configuration on the screen and reset the data on the screen to
the latest value of the switch.
6. If
you make changes to the page, click Apply to apply the changes to the system.
 Loading...