User Manual N11
Software nSMART™
Industrial PC
www.noax.comPage 80 of 120 3085-US-2.4
3.
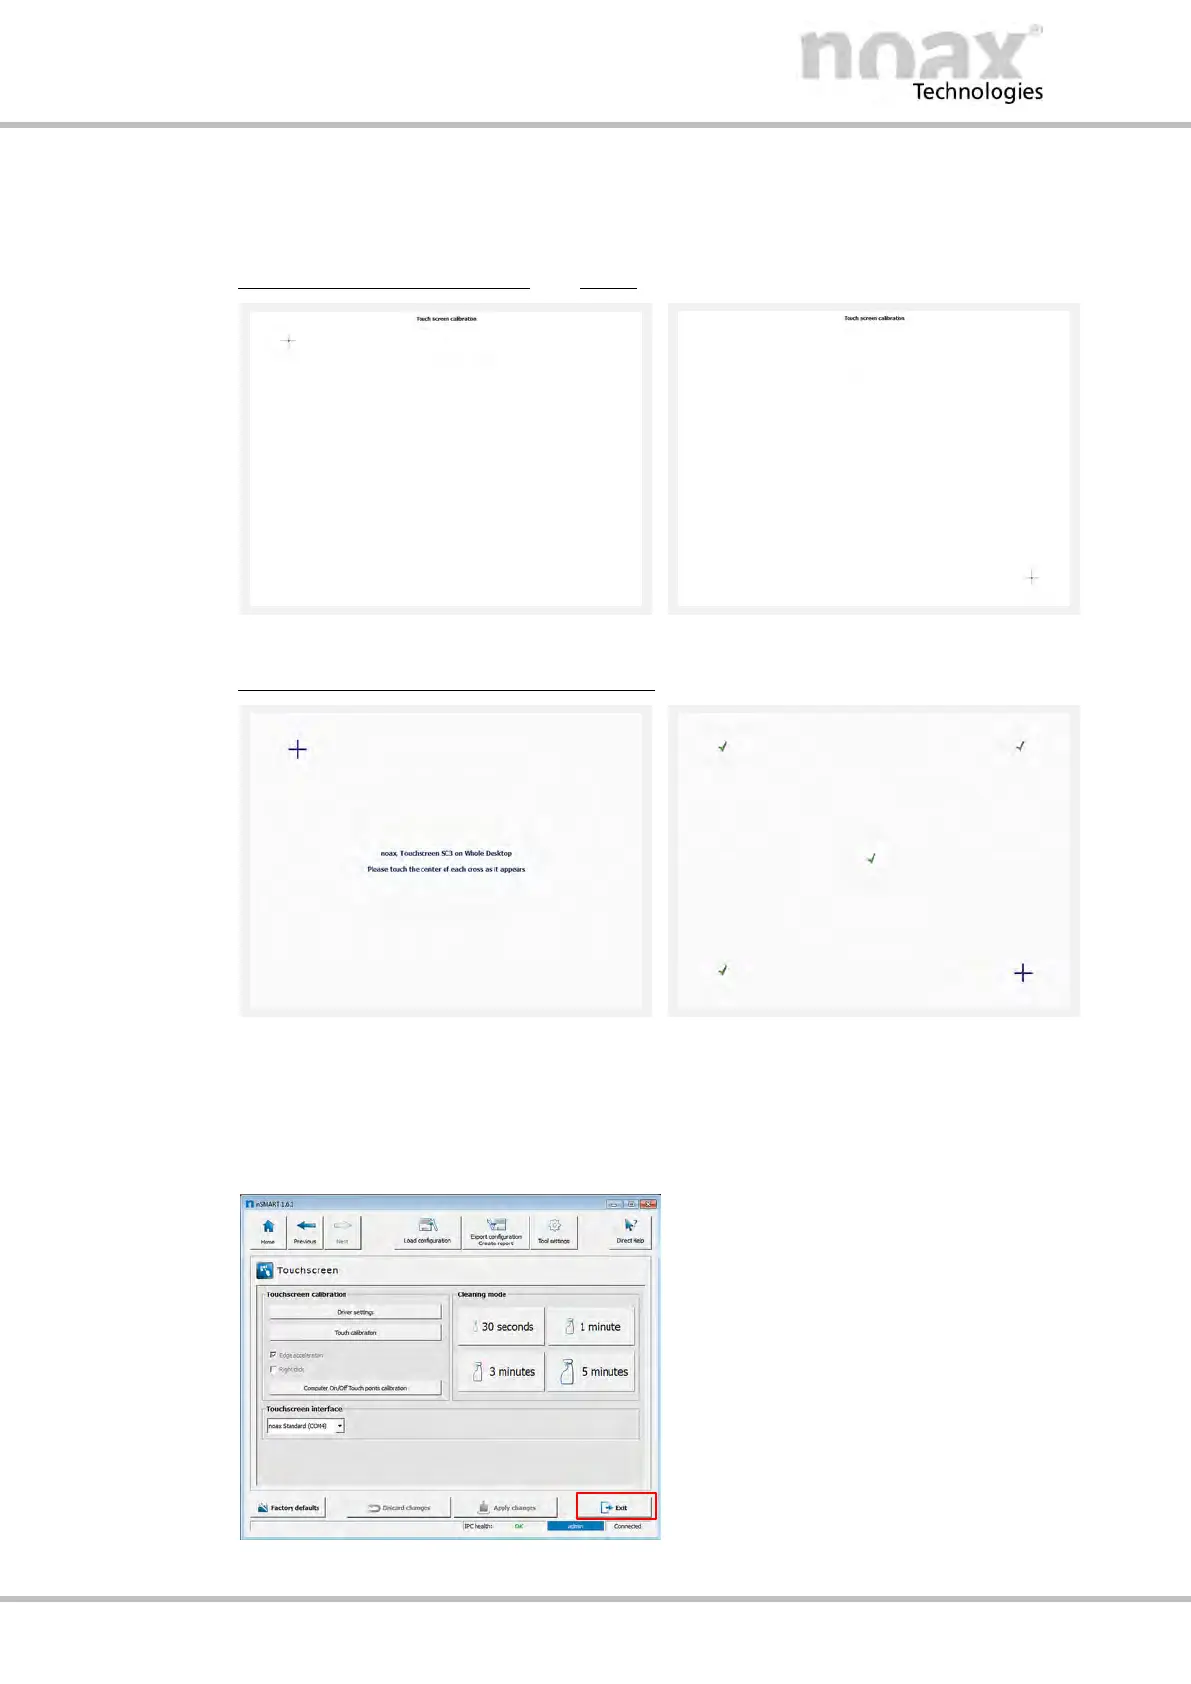
One after the other 9 calibration points will be displayed, starting from the top left.
Press each of the points in the center in the order in which they are displayed.
This is best achieved with the aid of a touch pen.
Calibration screen from the
noax MCU
Fig. 69: First touch calibration point
Fig. 70: Last touch calibration point
Calibration screen from the touch driver
Fig. 71: First touch calibration point
Fig. 72: Last touch calibration point
4. The calibration data for the touchscreen will be applied and saved automatically.
5. Click on Exit and close nSMART™.
Fig. 73: Touchscreen window