44871001TH Rev.6
4-50
Oki Data CONFIDENTIAL
4.REPLACEMENT OF PARTS
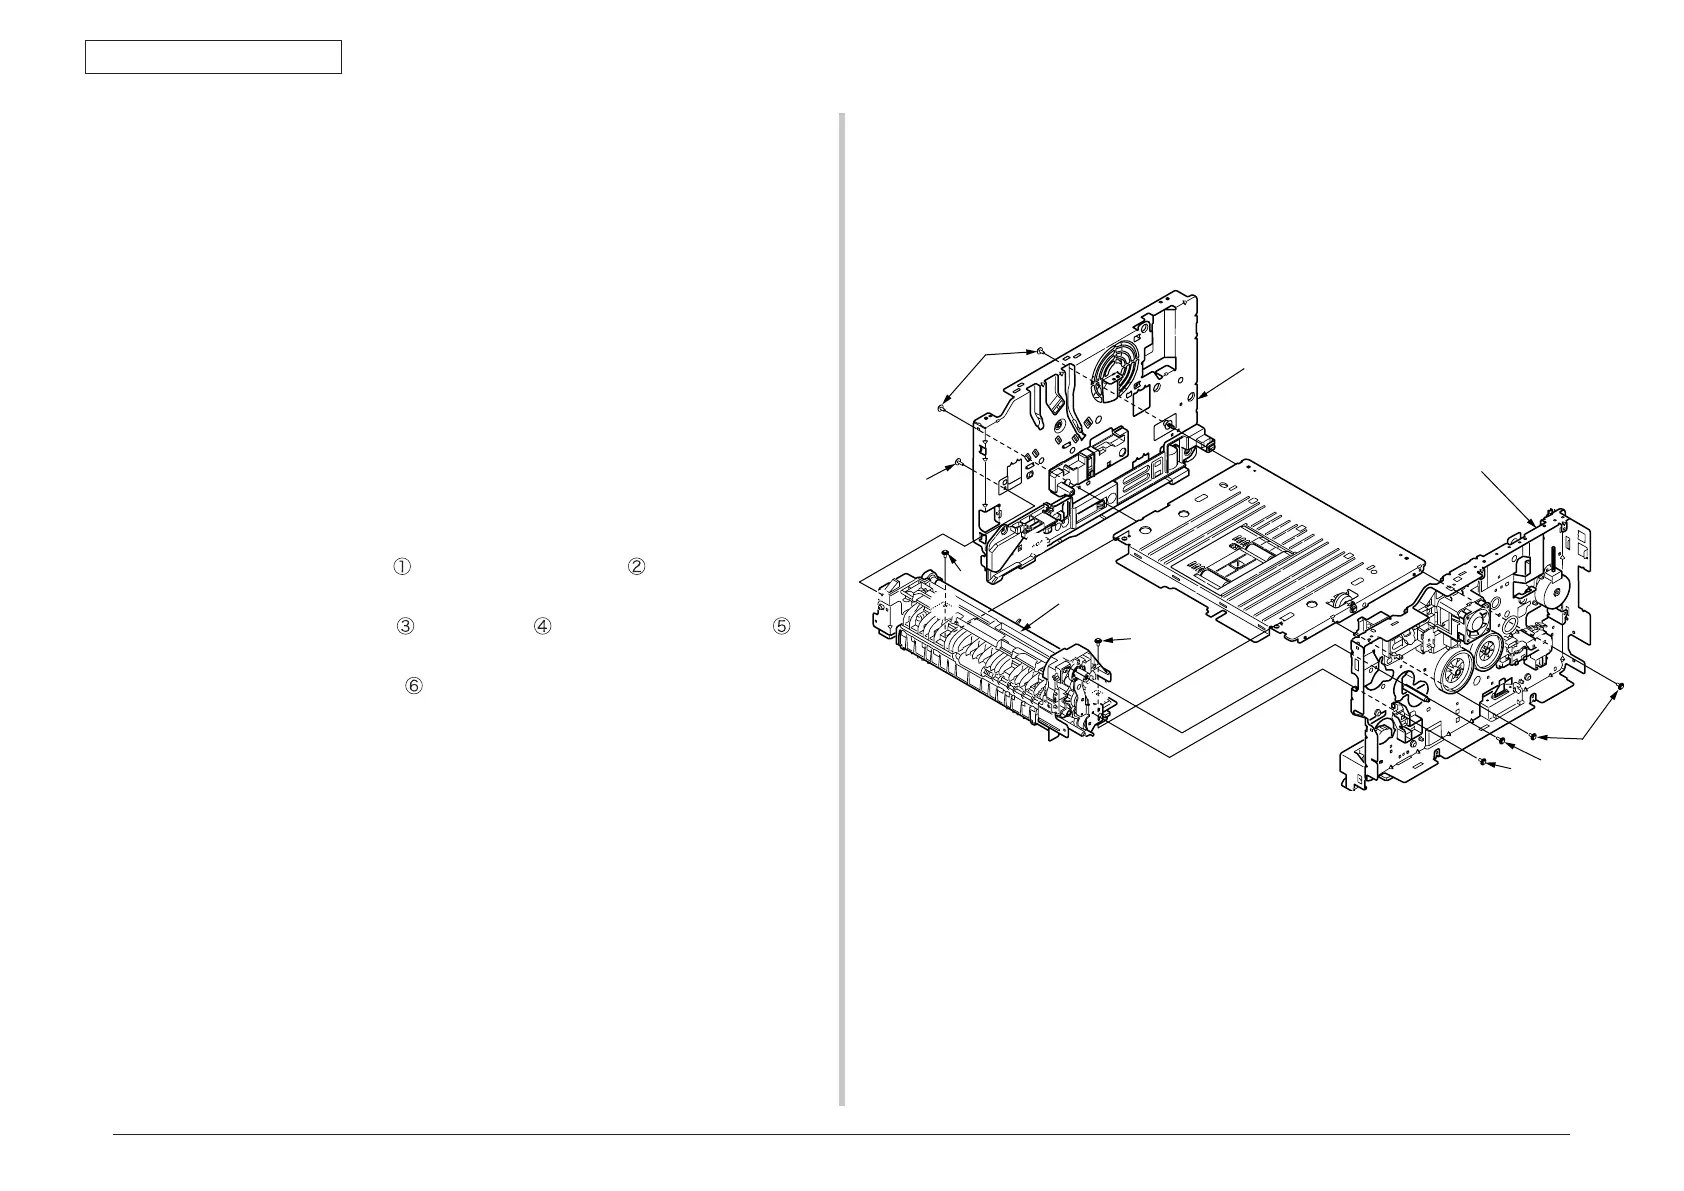
4.2.23 Plate Side R Assy / Plate Side L Assy / Front Assy
(1) Remove the Scanner unit. (Refer to 4.2.8)
(2) Remove the Plate Stay L and Plate Assy Stay R. (Refer to 4.2.9)
(3) Remove the CU/PU Board. (Refer to 4.2.3)
(4) Remove the Power Supply Unit. (Refer to 4.2.4)
(5) Remove the DC Motor. (Refer to 4.2.13)
(6) Remove the Hoppng / MPT / Regist Clutch. (Refer to 4.2.14)
(7) Remove the HV-Board / Motor-FAN. (Refer to 4.2.15)
(8) Remove the Cover Assy Stacker. (Refer to 4.2.16)
(9) Remove the Fuser Assy. (Refer to 4.2.18)
(10) Remove the MPT Assy, Manual Assy. (Refer to 4.2.19)
(11) Remove the Cover Assy Rear. (Refer to 4.2.20)
(12) Remove the Guide Eject Lower Assy. (Refer to 4.2.21)
(13) Remove the screw (Black)
and the two screws (Silver) and separate the Plate
Side L Assy.
(14) Remove the screw (Silver)
, screw (Black) and the two screws (Silver) and
separate the Plate Side R Assy.
(15) Remove two screws (Silver)
. Remove the Front Assy.
(16) Installing is performed by the inverse procedure with removing.
Note!
1. Beware of not to touch the DC motor inattentively (Do not rotate motor).
①
②
③
⑥
⑥
⑤
④
Plate Side R Assy
Front Assy
Plate Side L Assy