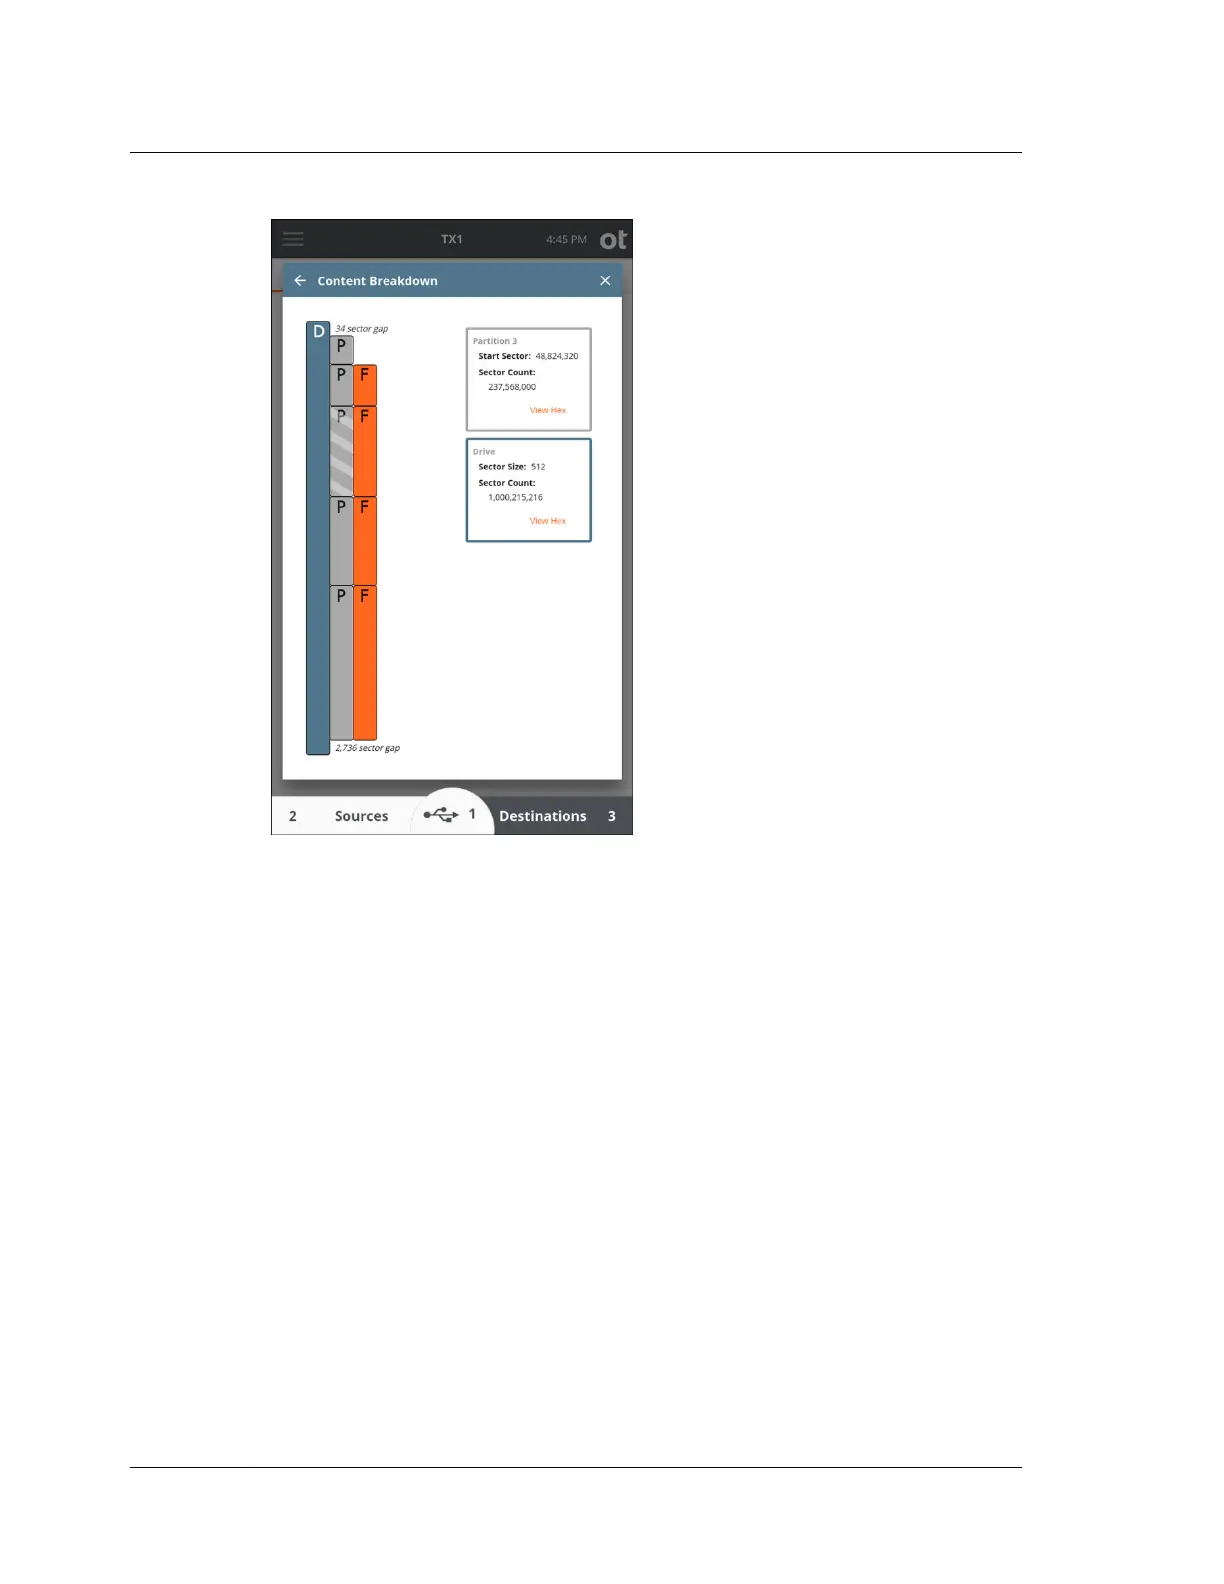
To view the raw hex data for a given drive/partition, tap the View Hex button
within the information box. A sample hex view window is shown below. Each row
shows 16 bytes of hex data, along with each byte's ASCII equivalent on the right
side. The number with the plus sign to the left of each row represents the byte value
offset from the start of the shown sector. The initial sector number (shown in the top
blue header) is always the starting sector for the selected drive or partition. This
starting sector number is also shown as the initial value in the rectangular box near
the bottom of the screen (between the orange arrows). It is easy to navigate through
the sectors within a given drive/partition and even into adjacent sectors by tapping
the orange arrows. The single arrows will take you either one sector forward (right
arrow) or one sector backward (left arrow). The double arrows will jump you to the
next (or previous) boundary. That is to say, if you are in the middle of a given
partition, the double-right arrow will jump to the end of that partition. Tapping the
double-right arrow again in that scenario will take you to the beginning of the next
partition or gap area (whichever happens to be there). These double-arrows make it
easy to peruse an entire drive and see the very beginning and end of each drive
element (partition or gap area) without having to go back to the map view to select a
different element. Note that a specific sector number can also be entered in the box
at the bottom of the screen. Simply tap the box, enter the desired sector number, and
tap outside the entry field to go directly to that sector.
Chapter 3 Configuring TX1
46
OpenText™ Tableau™ Forensic TX1 Imager
ISTX240300-UGD-EN-1