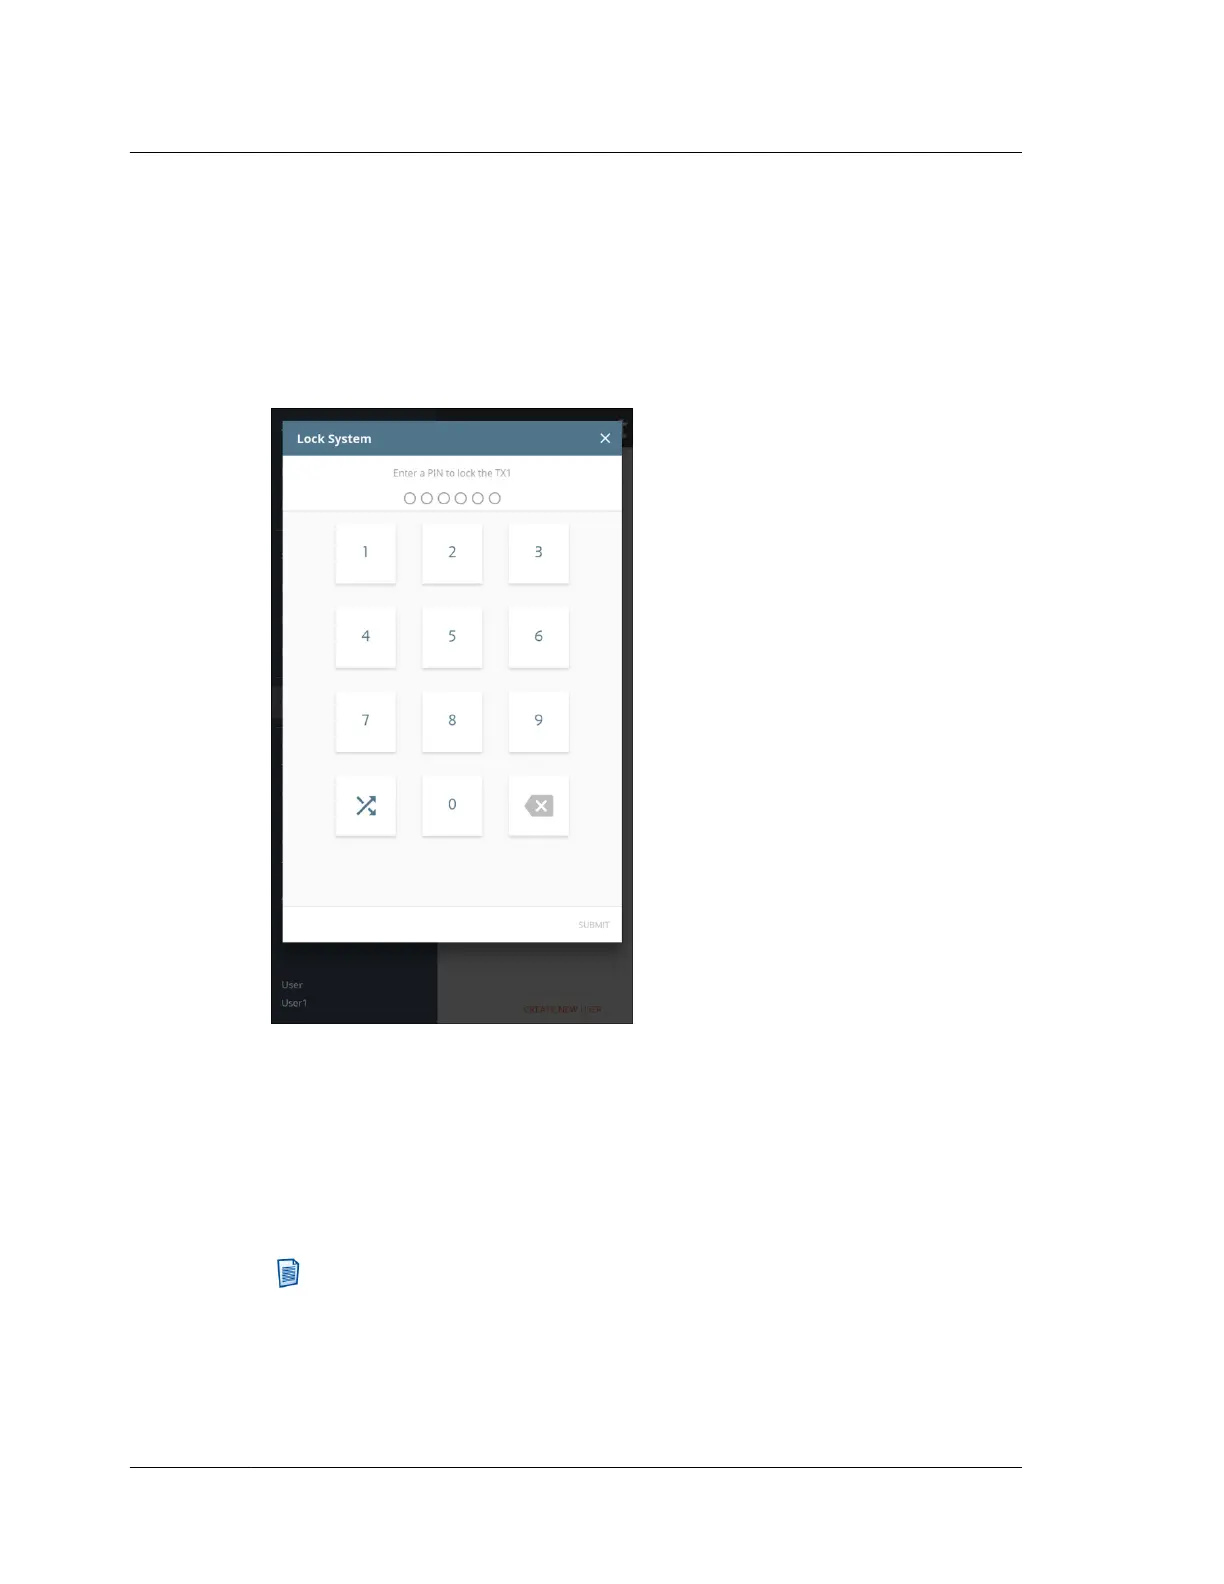
3.2.5 Locking the system
It may be desirable to lock your TX1 system while unattended to ensure no settings
are changed or that your active/queued jobs are not altered in any way. To lock your
system, simply tap on the Lock System item on the side navigation menu. A screen
will appear that allows for entry of a six-digit personal identification number (PIN),
as shown below.
After entering the desired PIN, tap the Submit button in the lower right corner of
the screen to begin the locking process. The system will prompt you for a second
entry of the same PIN to confirm the desired digits have been entered. After
verifying that both PINs match, the system will be locked. A message will appear at
the top of the lock screen stating the time at which the system was locked.
To unlock the system, simply enter the current PIN and tap the Submit button in the
lower right corner of the screen.
Note: The button at the bottom left of the keypad allows for randomizing the
layout of the digits on the keypad. This can be used to ensure that commonly
used PINs do not create a distinct pattern on the screen.
This PIN locking mechanism is temporary in the sense that a power cycle of TX1 will
remove the lock.
Chapter 3 Configuring TX1
38
OpenText™ Tableau™ Forensic TX1 Imager
ISTX240300-UGD-EN-1