:?!
(J)
z
«
:J:
o
w
:?!
=-+~..,
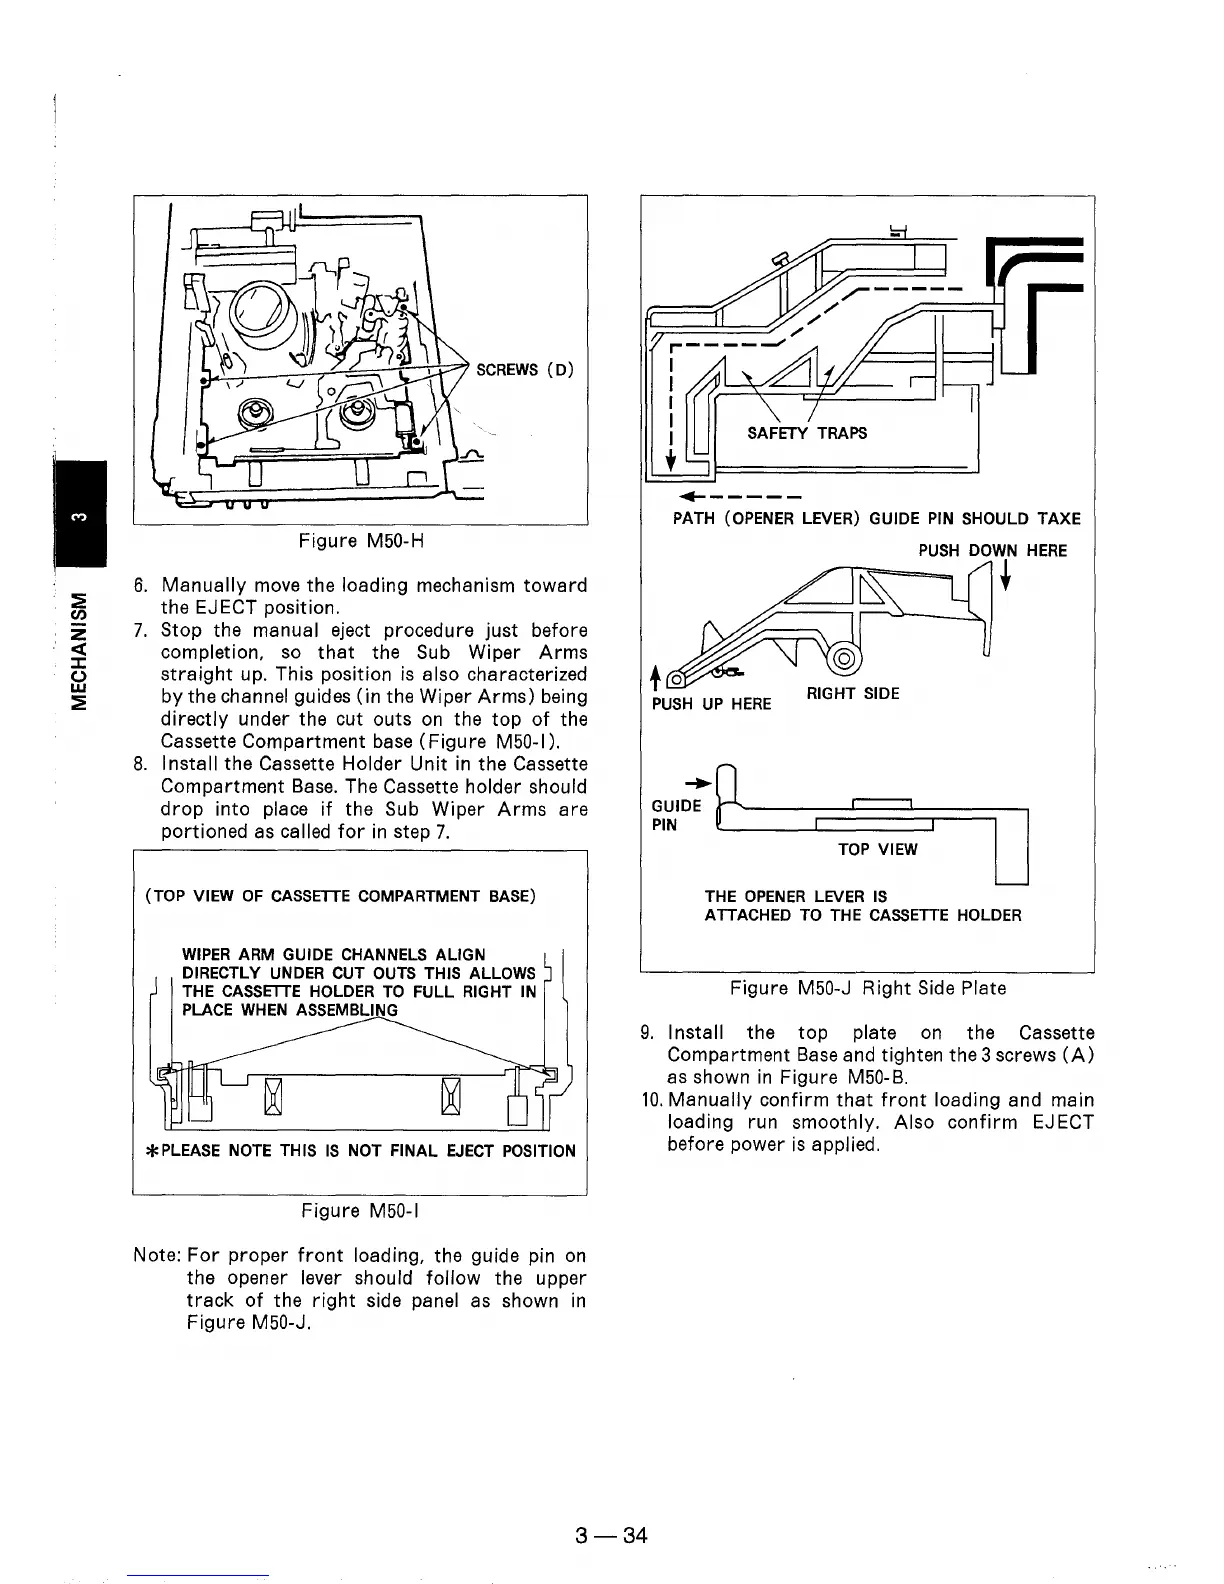
SCREWS
(D)
Figure M50-H
6.
Manually
move
the loading mechanism
toward
the EJECT position.
7.
Stop the manual eject procedure just before
completion,
so
that
the
Sub
Wiper
Arms
straight
up. This position
is
also characterized
by the
channel guides (in the Wiper
Arms)
being
directly under the cut outs
on
the
top
of
the
Cassette Compartment
base
(Figure M50-1).
8.
Install the Cassette Holder Unit
in
the Cassette
Compartment
Base.
The Cassette holder should
drop
into place
if
the
Sub
Wiper
Arms
are
portioned
as
called
for
in
step
7.
(TOP VIEW
OF
CASSETTE
COMPARTMENT BASE)
WIPER
ARM GUIDE CHANNELS ALIGN
DIRECTLY
UNDER
CUT OUTS THIS ALLOWS
THE
CASSETTE
HOLDER
TO
FULL RIGHT IN
PLACE
WHEN
ASSEMBLING
*PLEASE
NOTE
THIS
IS
NOT FINAL
EJECT
POSITION
Figure
M50-1
Note:
For
proper
front
loading, the guide pin
on
the opener lever should follow the upper
track
of
the
right
side panel
as
shown
in
Figure M50-J.
,-----
/'
'n====:::::!:==~;';-
"./'
,-----
/
1
:
fi1
LJ
U I SAFETY
TRAPS
•
....
-----
PATH
(OPENER
LEVER) GUIDE
PIN
SHOULD TAXE
PUSH
DOWN
HERE
t
PUSH
UP
HERE
TOP
VIEW
THE
OPENER
LEVER
IS
ATTACHED TO THE
CASSETTE
HOLDER
Figure M50-J Right
Side
Plate
9.
Install the
top
plate
on
the Cassette
Compartment
Base
and tighten the 3 screws
(A)
as
shown
in
Figure M50-B.
10.
Manually confirm
that
front
loading and main
loading run smoothly. Also confirm
EJ
ECT
before power
is
applied.
3-34