Quantum GX2 microCT Imaging System Manual Chapter 6 | Image Acquisition 42
Set the Save Location:
1.
Connect to a database or create a new database. (See Managing Databases page 9 for details).
2. Follow the instructions in Table 6.1 to select a sample and study for the series.
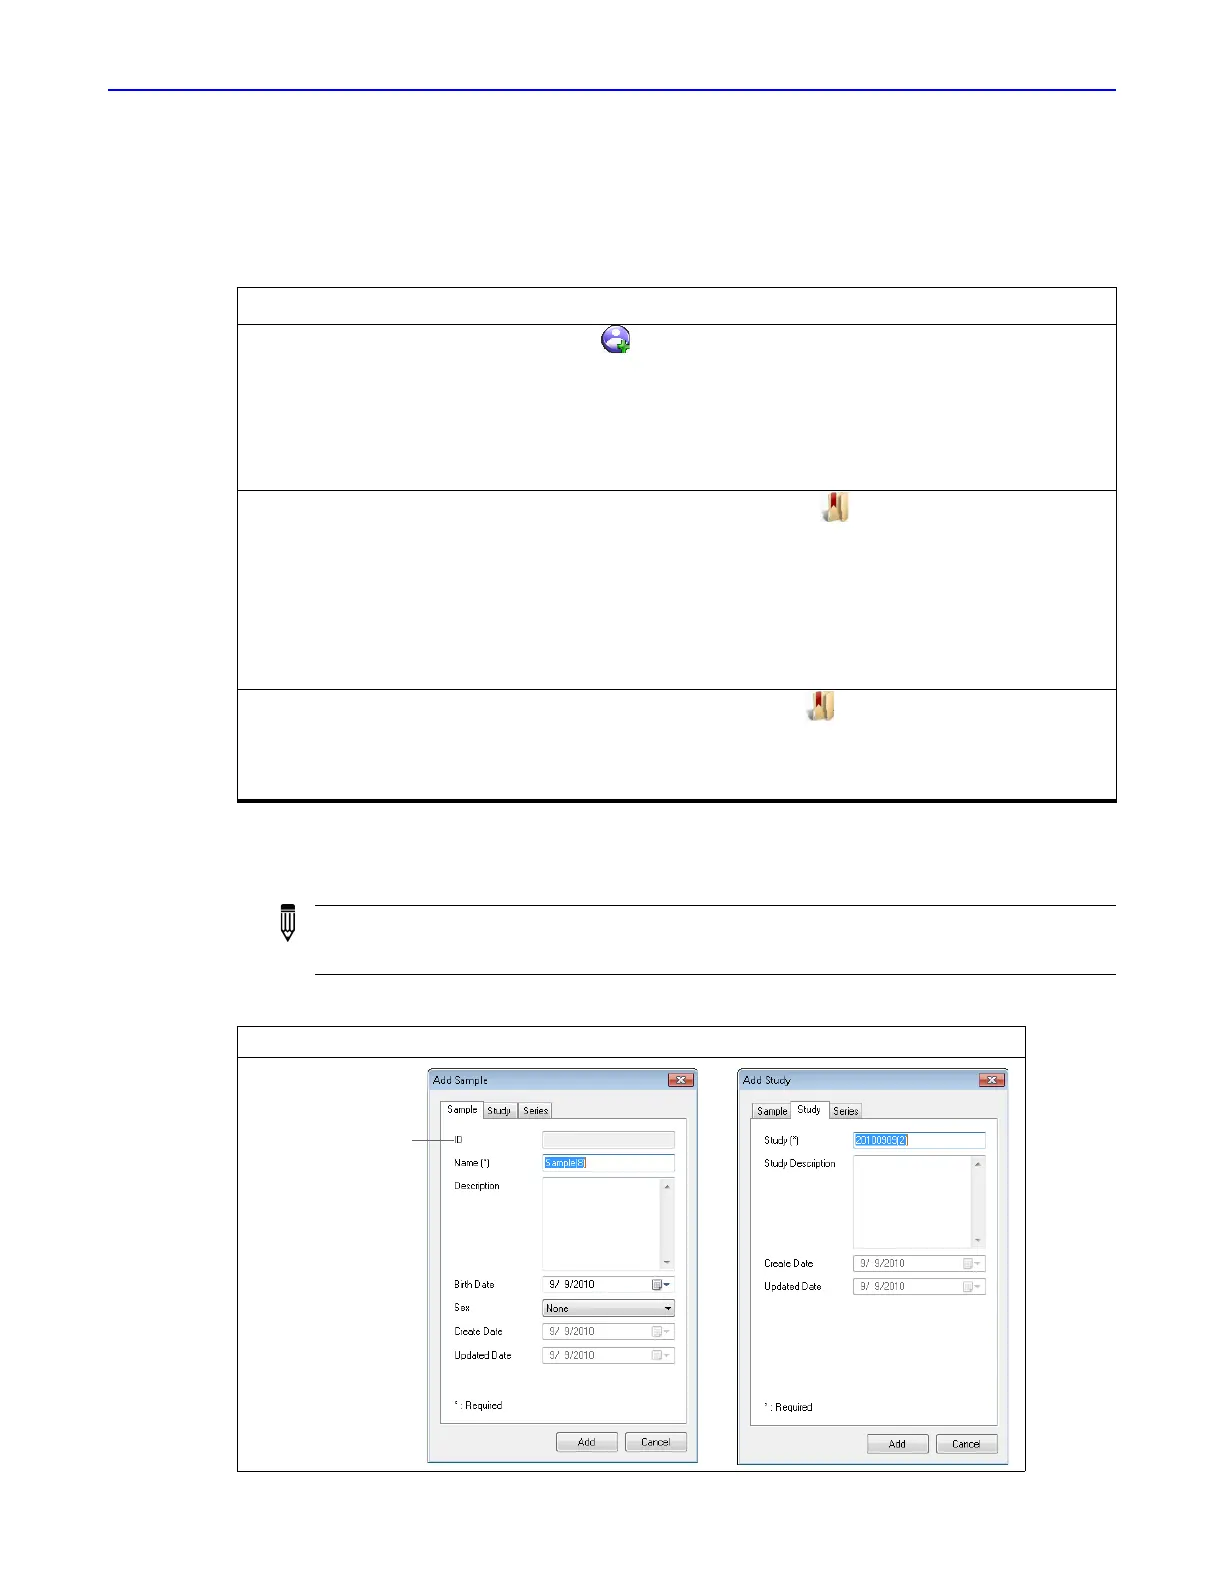
3. Enter the sample and/or study information in the dialog box that appears. Click Add.
For example, edit the default sample name and enter a description of the sample.
Table 6.1 Setting the Save Location in the Database window
To Save the Series to a: Do One of the Following:
New sample and new study Click the toolbar button.
or
Right-click the Database window and select New Sample on the
shortcut menu.
or
Select Sample → New Sample on the menu bar.
Existing sample and new study Select the sample row and click the toolbar button.
or
Right-click the sample row and select New Study on the shortcut
menu.
or
Select the sample row and select Sample → New Study on the
menu bar.
Existing sample and existing
study
Select the study row and click the toolbar button.
or
Right-click the study row and select Set Series Save Location on the
shortcut menu.
NOTE: Depending on the method used to select the save location, the Add Sample or Add
Study dialog box may not automatically appear. To display them, right-click a selected sample
or study in the Database window and choose Update Data from the shortcut menu.
Figure 6.3 Enter Information About a New Sample and/or New Study
A sample identifier
assigned by the
software (cannot be
edited)
 Loading...