Quantum GX2 microCT Imaging System Manual Chapter 6 | Image Acquisition 54
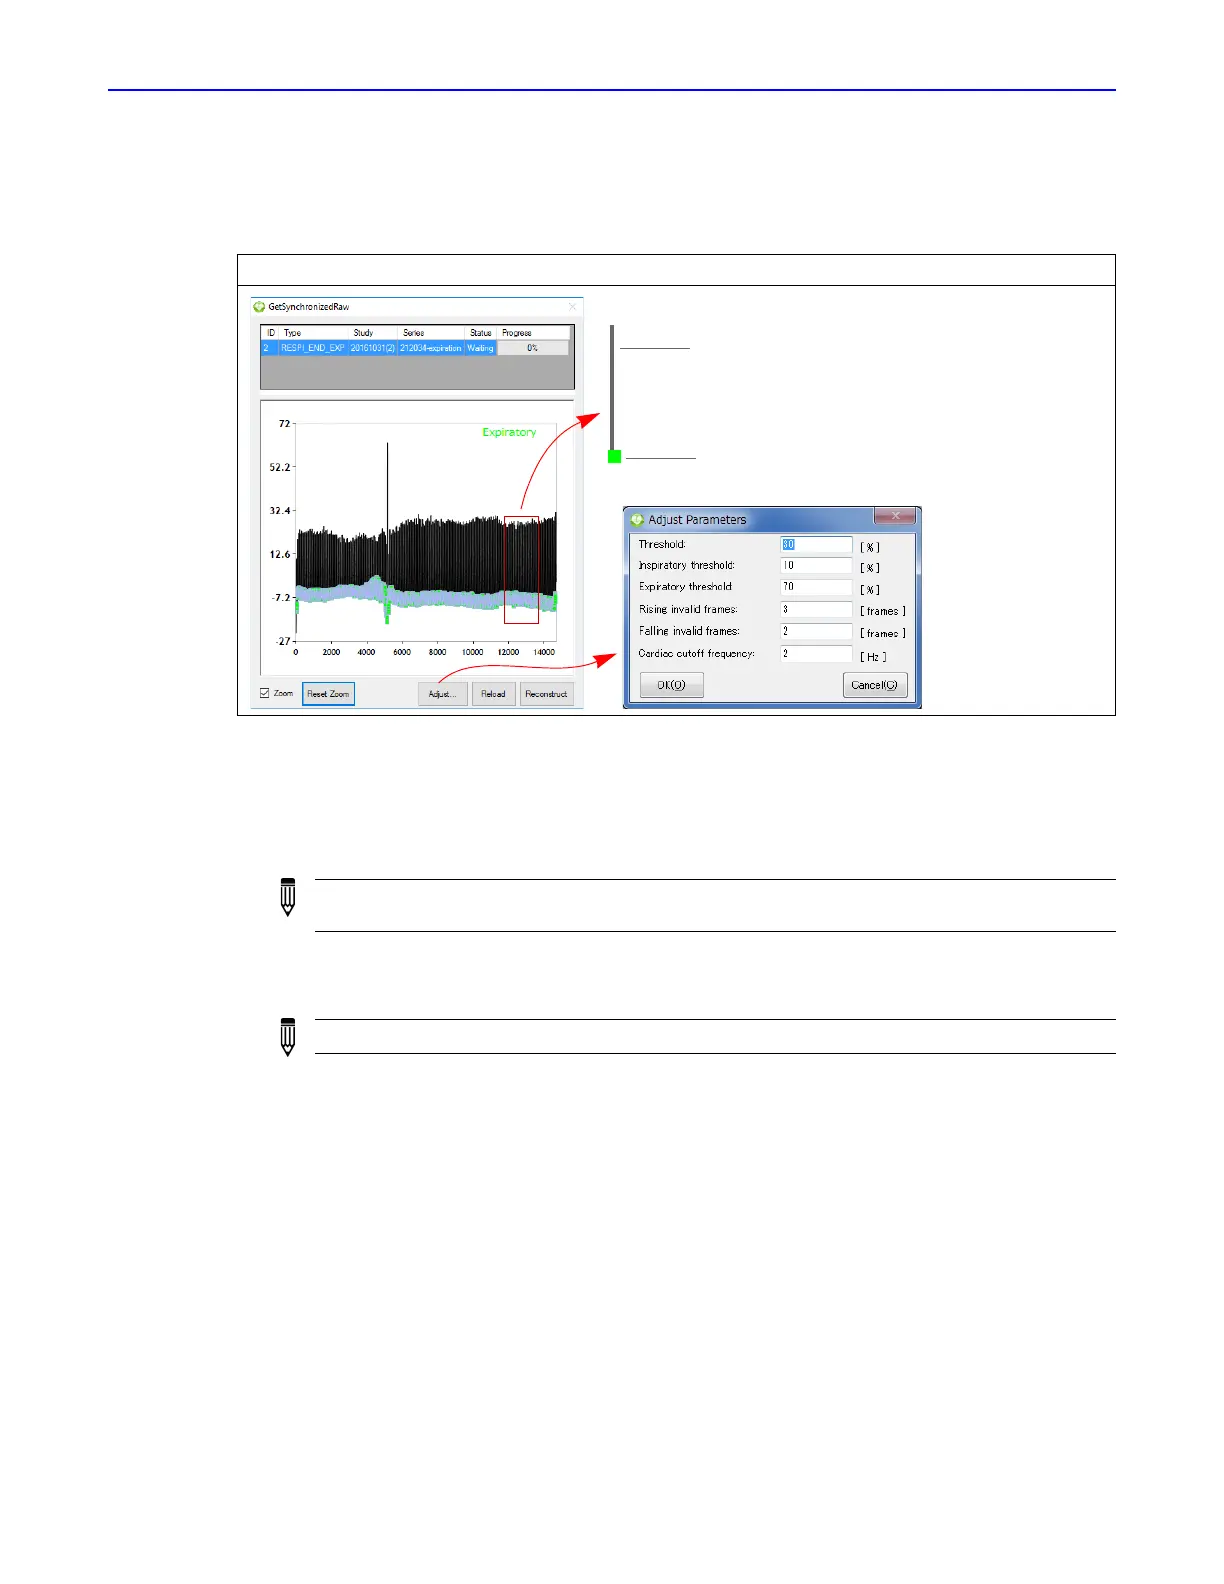
8. Review the raw data in the GetSynchronizedRaw window (Figure 6.19). To magnify the view,
choose the Zoom option an use the left mouse button.
The goal is to obtain green squares with Y-axis values that are as uniform as possible.
9. If you want to filter the data:
a. Click Adjust (Figure 6.19).
b. Enter a new Threshold value (%) in the dialog box that appears and click OK. See Table 6.3
on page 55 for more details on gating parameters.
c. Click Reload and review the data.
If you want to filter the data again, repeat step a to step c.
d. Click Reconstruct when you are satisfied with the data.
The 3D reconstruction proceeds. The AutoViewer displays the 3D reconstruction (Figure 6.15).
See Chapter 7 on page 71 for more information on viewing 3D reconstructions.
Figure 6.19 GetSynchronizedRaw Window – Respiratory Gating
NOTE: If the Threshold value excludes too much data, a good 3D reconstruction will not be
produced.
NOTE: Gating parameter values cannot be edited after the data are reconstructed.
Represents the location
of a selected frame
Black trace shows a plot of the
respiratory signal derived from the
processing the ROI in the scan.
Adjustable gating
parameters
 Loading...