Quantum GX2 microCT Imaging System Manual Chapter 6 | Image Acquisition 61
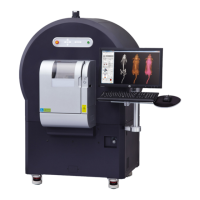
4. Click the button.
An ROI appears on the image (Figure 6.32). ROI size and position can be adjusted to select a
portion of the slice for reconstruction.
5. Confirm the defaults or enter new values for slice thickness, slice pitch (distance between slices),
number of slices to reconstruct.
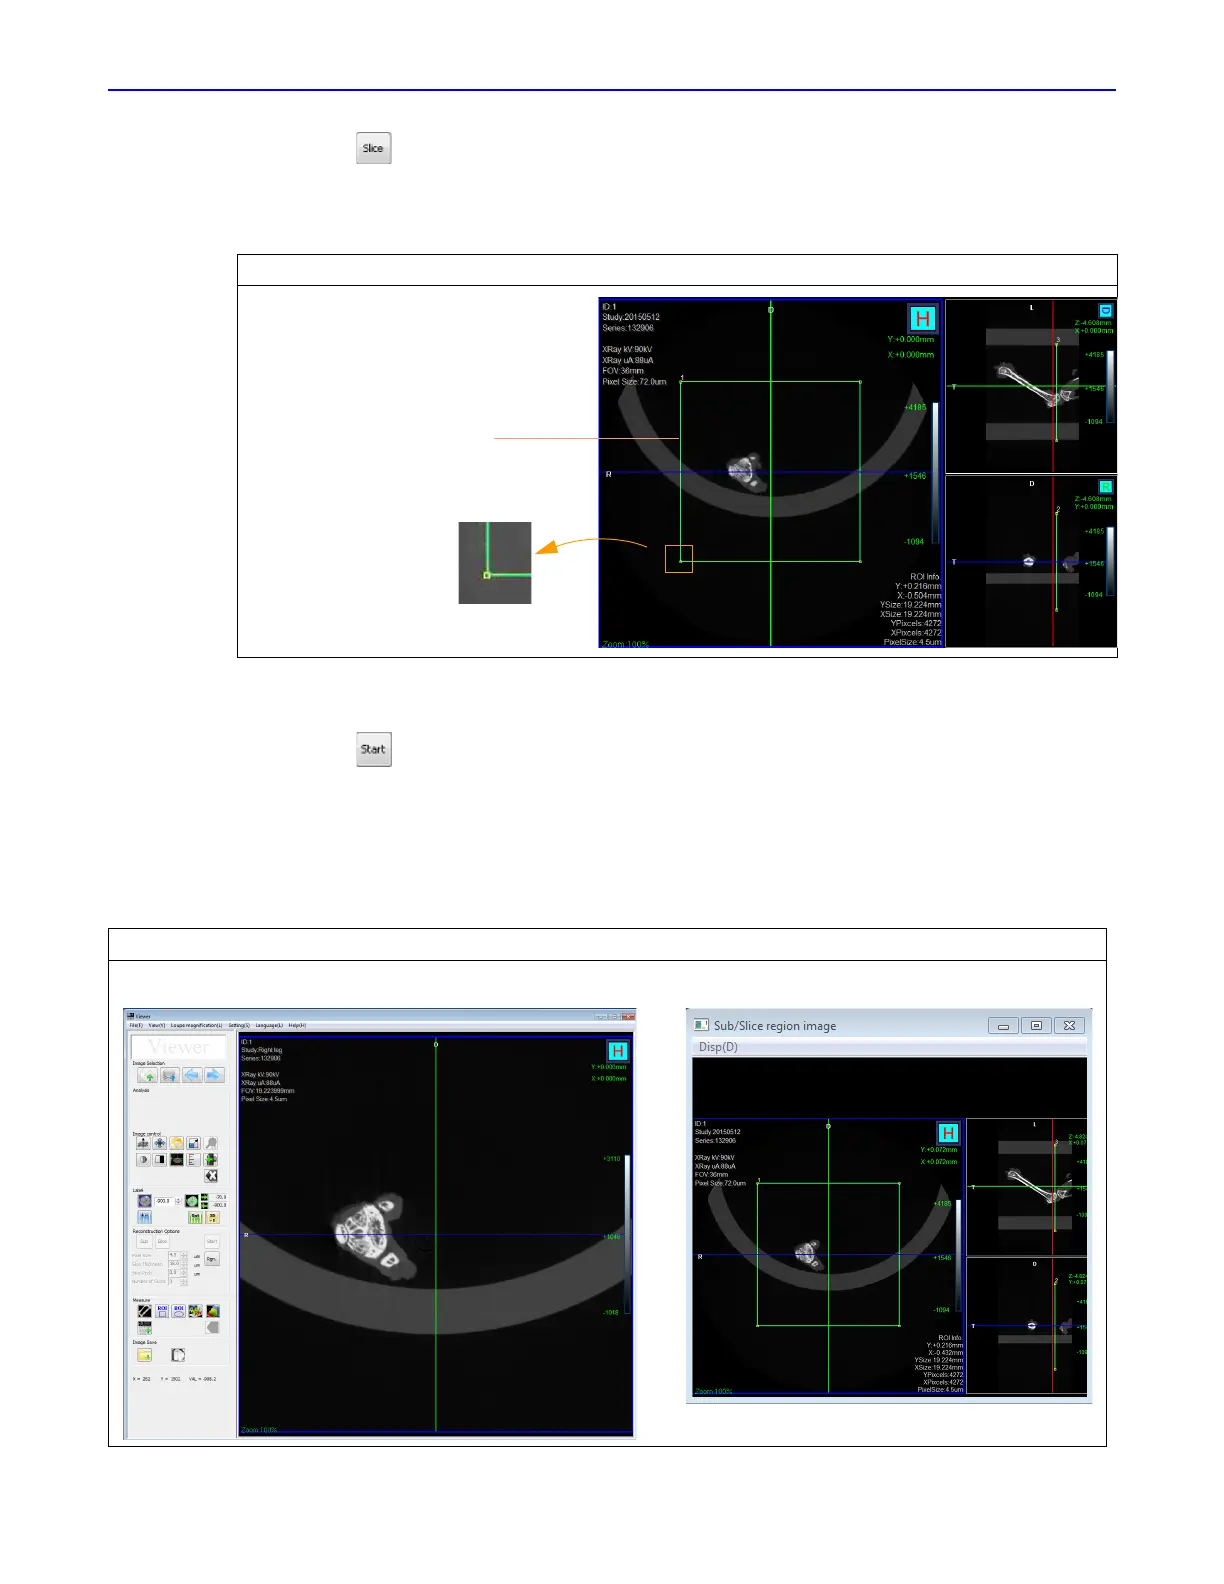
6. Click the button.
A reconstruction progress indicator appears and the AutoViewer displays the CT image when
reconstruction is complete. The image is added to the database (for example, if the series ID is
"12", slice reconstructions will be named consecutively as 12.001, 12.002, and so on).
The Sub/Slice Region window shows the reconstructed slice(s) within the context of the original
image (Figure 6.30).
Figure 6.29 ROI on Image
Figure 6.30 sub/Slice Region window
ROI
Move the ROI by dragging it
Drag a corner to resize
the ROI
Reconstructed slice Original image with ROI and selected slice
 Loading...