User Guide – PERC2000 System Controller
Publication 81-9059-0605-0, Rev. B
November 2010
Proprietary Information of
PESA PESA 8-37
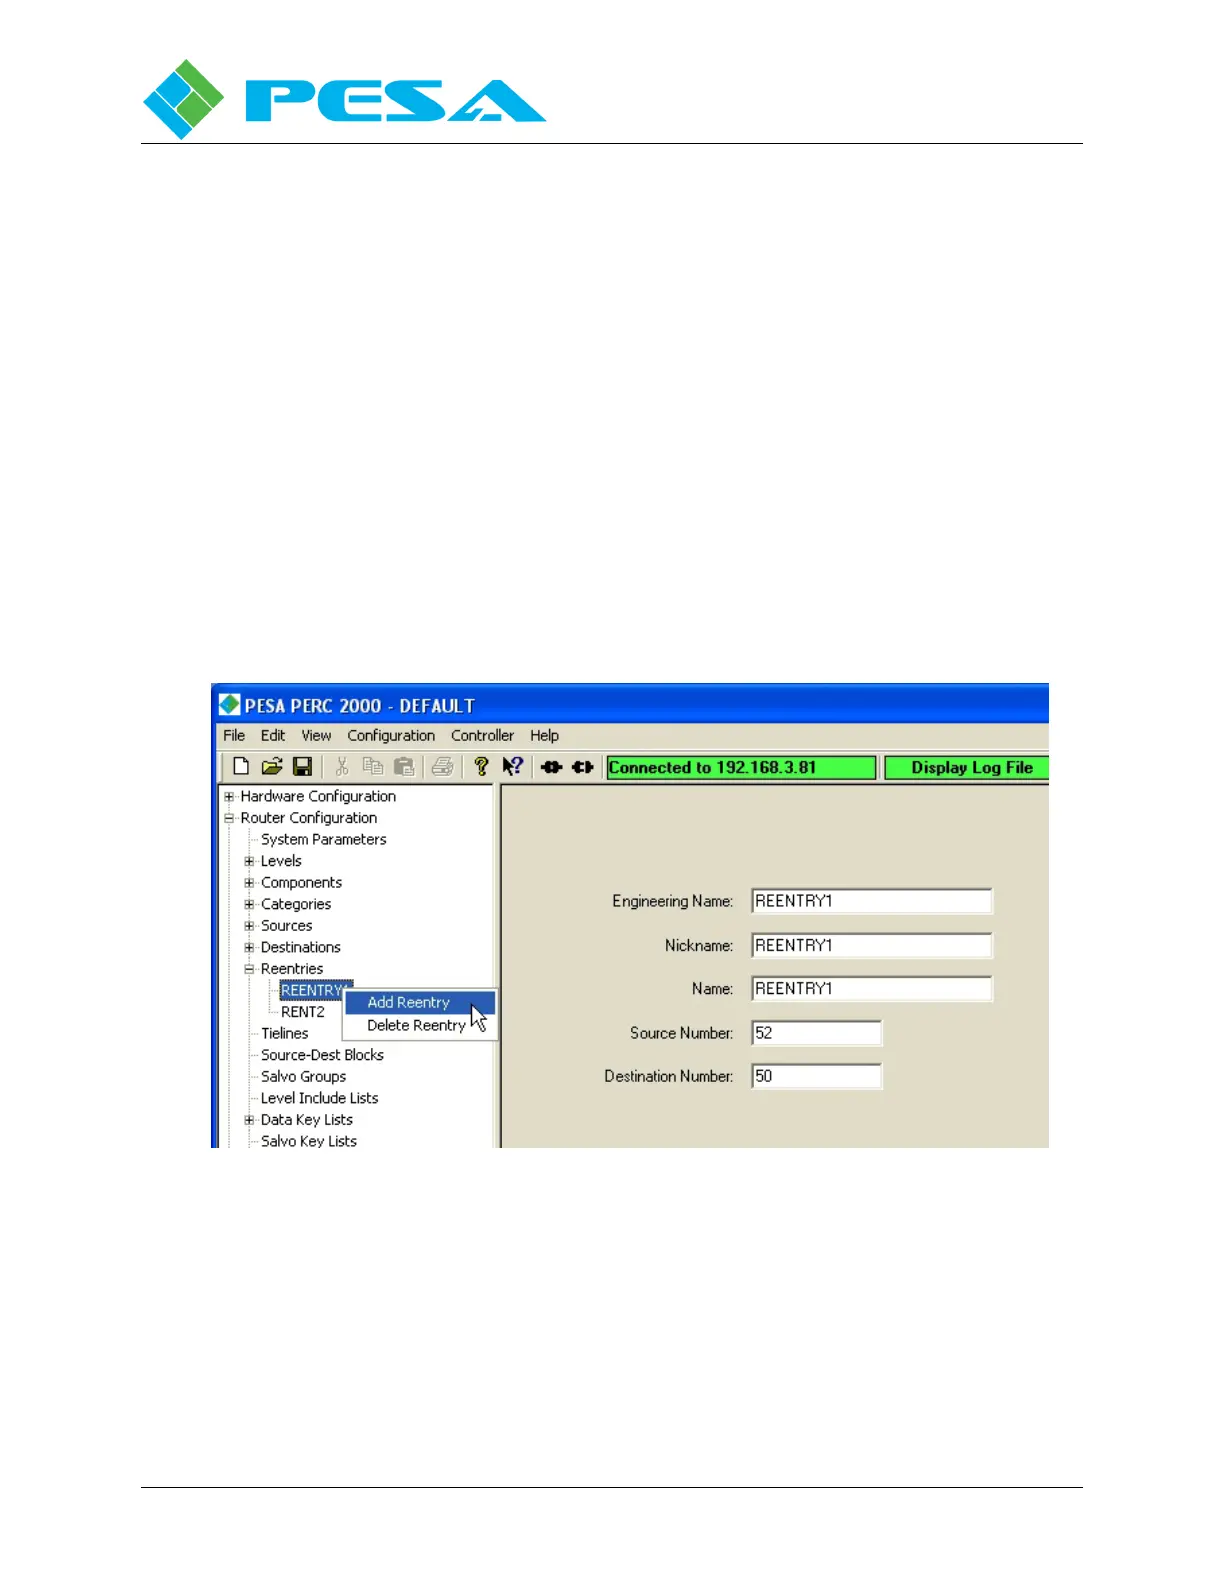
Destination Number – Click the cursor in the Destination Number cell and enter the
Destination Identification Number you wish to assign to the reentry function. The number may
be any number NOT used to identify an actual physical destination. Typically, the way to
choose a valid ID number is to look at the Destinations Configuration Screen and note the last
ID number used for a physical destination. In the example shown Destination Number 50 is
used for the reentry path named REENTRY1. In this configuration file, 48 is the last number
assigned to a physical destination. Therefore 50 is a valid and convenient number to assign to
the reentry destination.
8.9.7.3 Adding or Deleting a Reentry
Add Reentry – Clicking the Add Reentry option, Figure 8-38, opens a new reentry
configuration screen. From this screen a new reentry path can be added to the file
configuration.
Delete Reentry – If you wish to remove a reentry path from the configuration file, move the
cursor to the reentry name beneath the Reentries tab in the Command Screen Window you wish
to delete, Figure 8-38, highlight the reentry to be deleted and right click to open the option box.
Select Delete Reentry and the reentry is removed from the configuration.
Figure 8-38 Adding or Deleting a Reentry
8.9.8 T
IE
-
LINES
C
ONFIGURATION
S
CREEN
A tie-line is a physical connection between two switching levels – one level being the signal
output, or tie-line source; and the other being a signal input, or tie-line destination. An
excellent application example of the use of a tie-line is illustrated within the set-up screens
presented here. Before we discuss the entries necessary in the configuration set-up to establish
a tie-line, let’s take a closer look at the example embedded in these screens.