4:16
27
A
B
Sewing mode
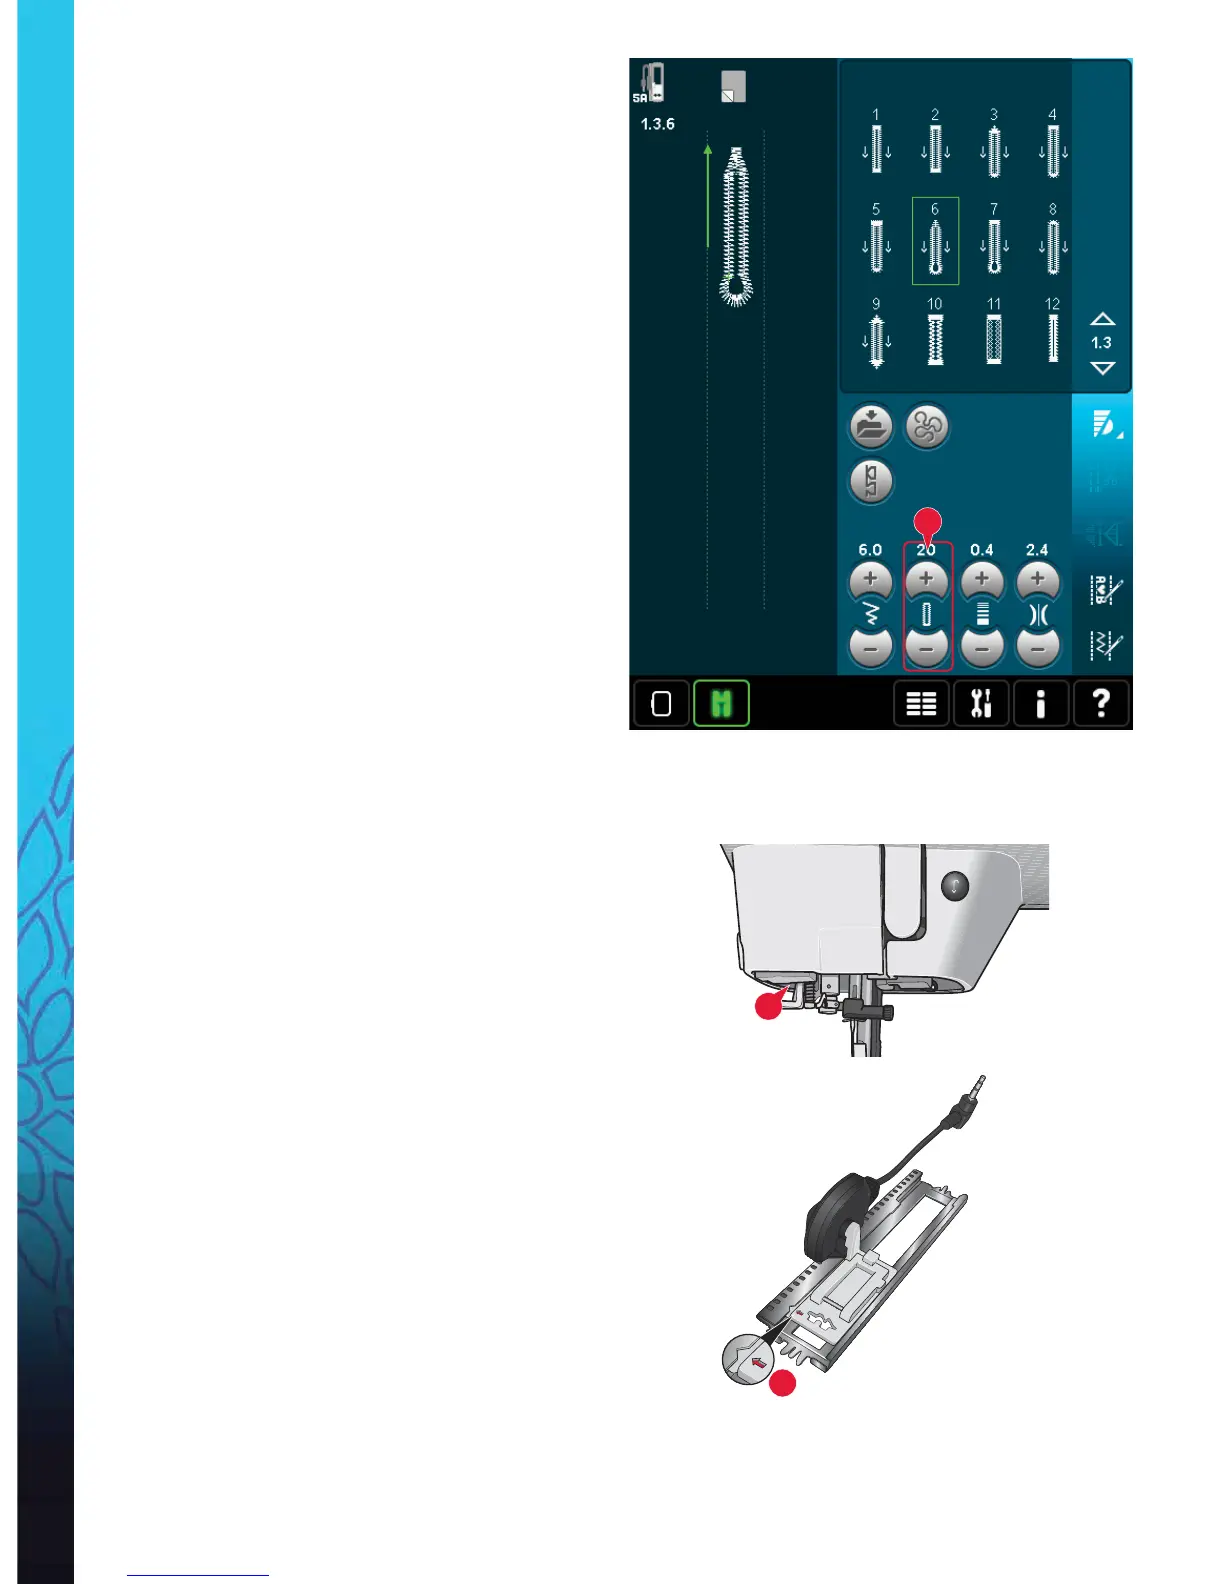
Buttonholes
Buttonholes are found in category 1, subcategory
1.3 in the selection menu. You can also scroll
through the categories in sewing mode to À nd the
buttonhole subcategory.
Note: Buttonholes up to 50 mm can be sewn using
the Sensormatic buttonhole foot. Both sides of the
Sensormatic buttonhole are sewn in the same direction
for a more even result.
Buttonholes over 50 mm are sewn manually in four steps
with presser foot 5M.
The direction of the stitches being sewn will be
indicated on the screen by an arrow next to the
buttonhole.
To sew a buttonhole, À rst attach the correct foot,
then select your buttonhole. To ensure a good
result, start with sewing a test sample on the fabric
and stabilizer you will use.
Note: Make sure that the *%5 system is disengaged.
Attaching the Sensormatic buttonhole foot
1. Snap on the Sensormatic buttonhole foot.
2. Plug the cord into the socket found to the left
underside between the two LED lights (A).
Sensormatic buttonhole
When you sew a buttonhole with the Sensormatic
buttonhole foot, adjust the slit length (27) so that it
is slightly larger than the size of the button. You can
measure your button using the button ruler on the
lid.
Set the slit length and make sure that the red
arrow lines up with the marking on the foot (B).
Start sewing by pressing the foot control or start/
stop button. The buttonhole will be completed
automatically and the threads are cut. You can
repeat the buttonhole as many times as you wish.