9:2
2
3
A
6
5
4
7
8
9
10
11
12
14
1
B
C
A
13
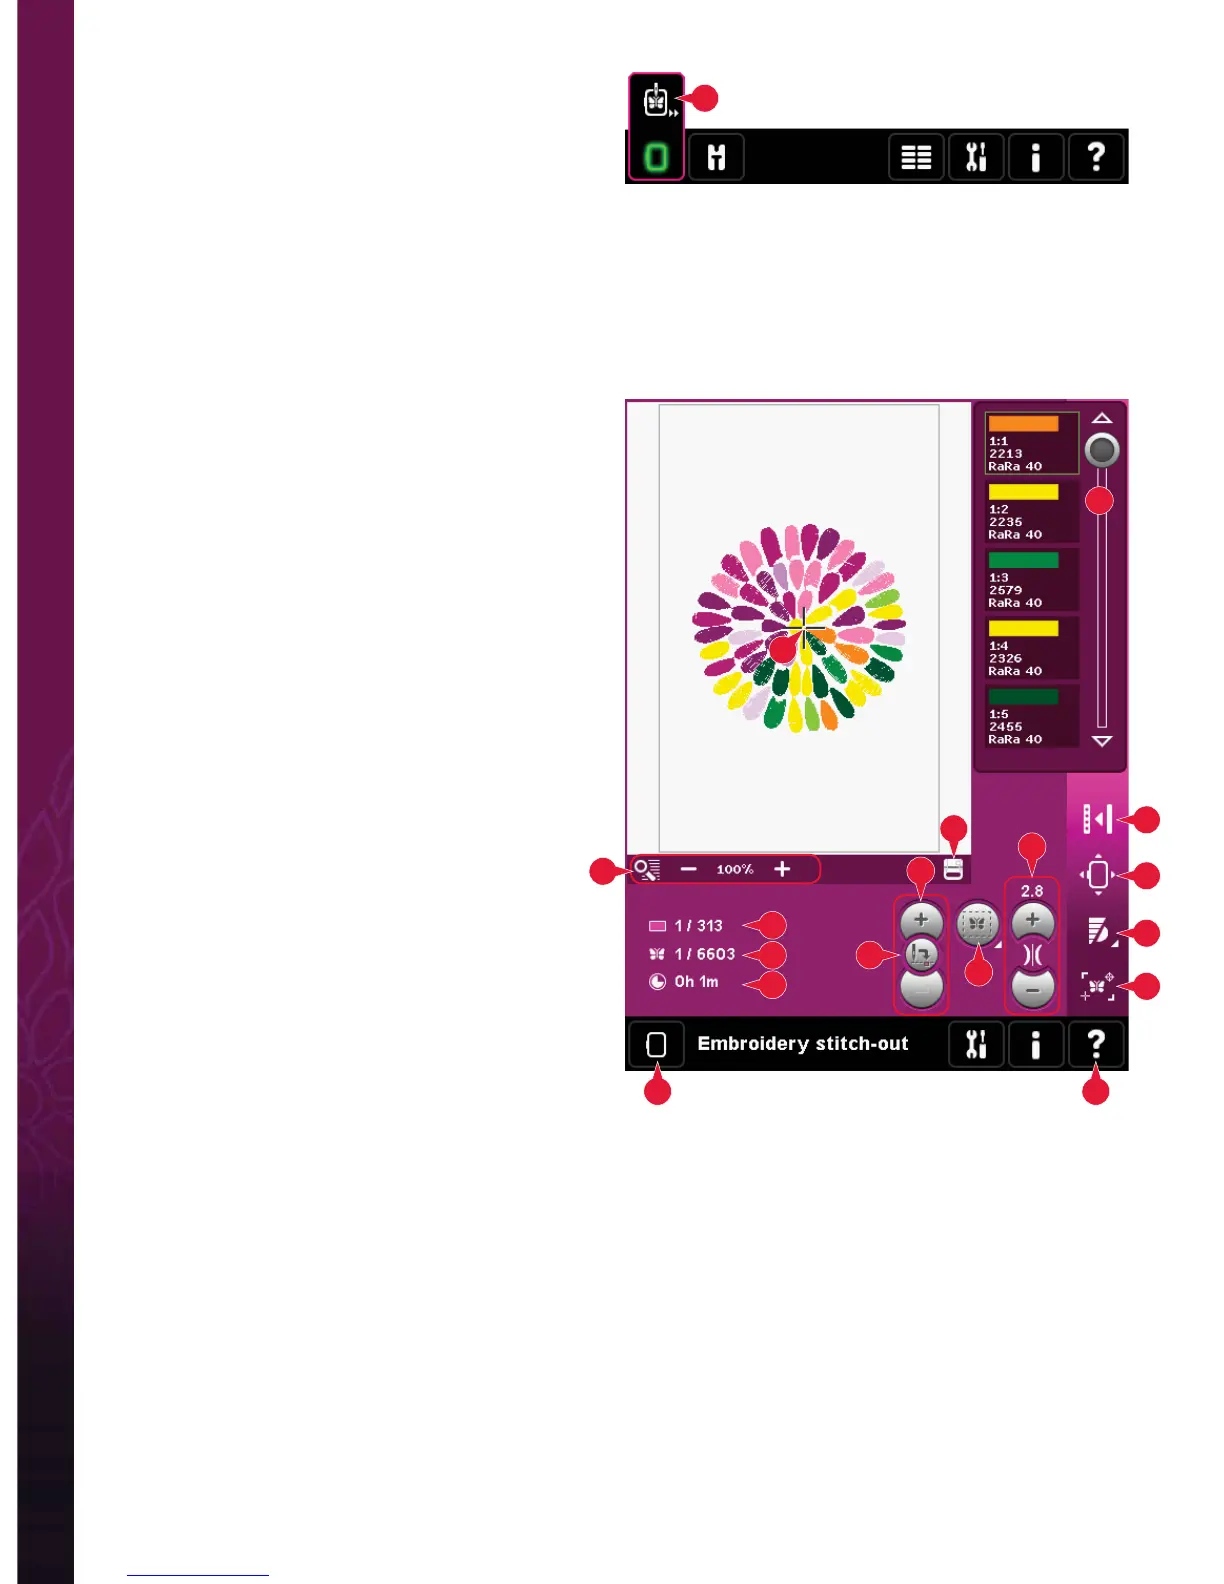
Embroidery mode - stitch-out
Embroidery stitch-out - overview
1. Crosshair
2. Color list and scroll bar
3. Zoom
4. Presser foot recommendation
5. Current stitch
6. Go to stitch
7. Basting
8. Thread tension
9. More options
10. Hoop position
11. Speed control
12. Precise Positioning
13. Return to Embroidery Edit
14. Quick help
Quick help (14)
Use Quick help to receive instant information about
any icon or part of the screen. Touch the Quick help
icon (14) and then the icon or the part of the screen
you want information about.
To enter Embroidery stitch-out
To embroider your design(s), enter Embroidery
stitch-out. Make sure the embroidery unit is
connected and the selected hoop is securely
attached to the embroidery arm. Toggle to
Embroidery stitch-out by touching the Embroidery
stitch-out icon (A) above the embroidery mode icon
on the task bar. Functions used when embroidering
a design are now shown.
In Embroidery stitch-out, the pan function is always
active. Use the stylus to pan on screen.
Embroidery mode - edit
Embroidery information (A, B, C)
The current stitch in the current color block is shown next to the picture (A). The number after the slash
shows the total number of stitches in the current color block.
The current stitch in the design or combination is shown next to the picture (B). The number after the slash
shows the total number of stitches in the design or combination.
An estimation of the embroidery time for the current color block is shown next to the picture (C).
If Monochrome is activated, the estimated remaining embroidery time for the whole embroidery is
displayed.