9:7
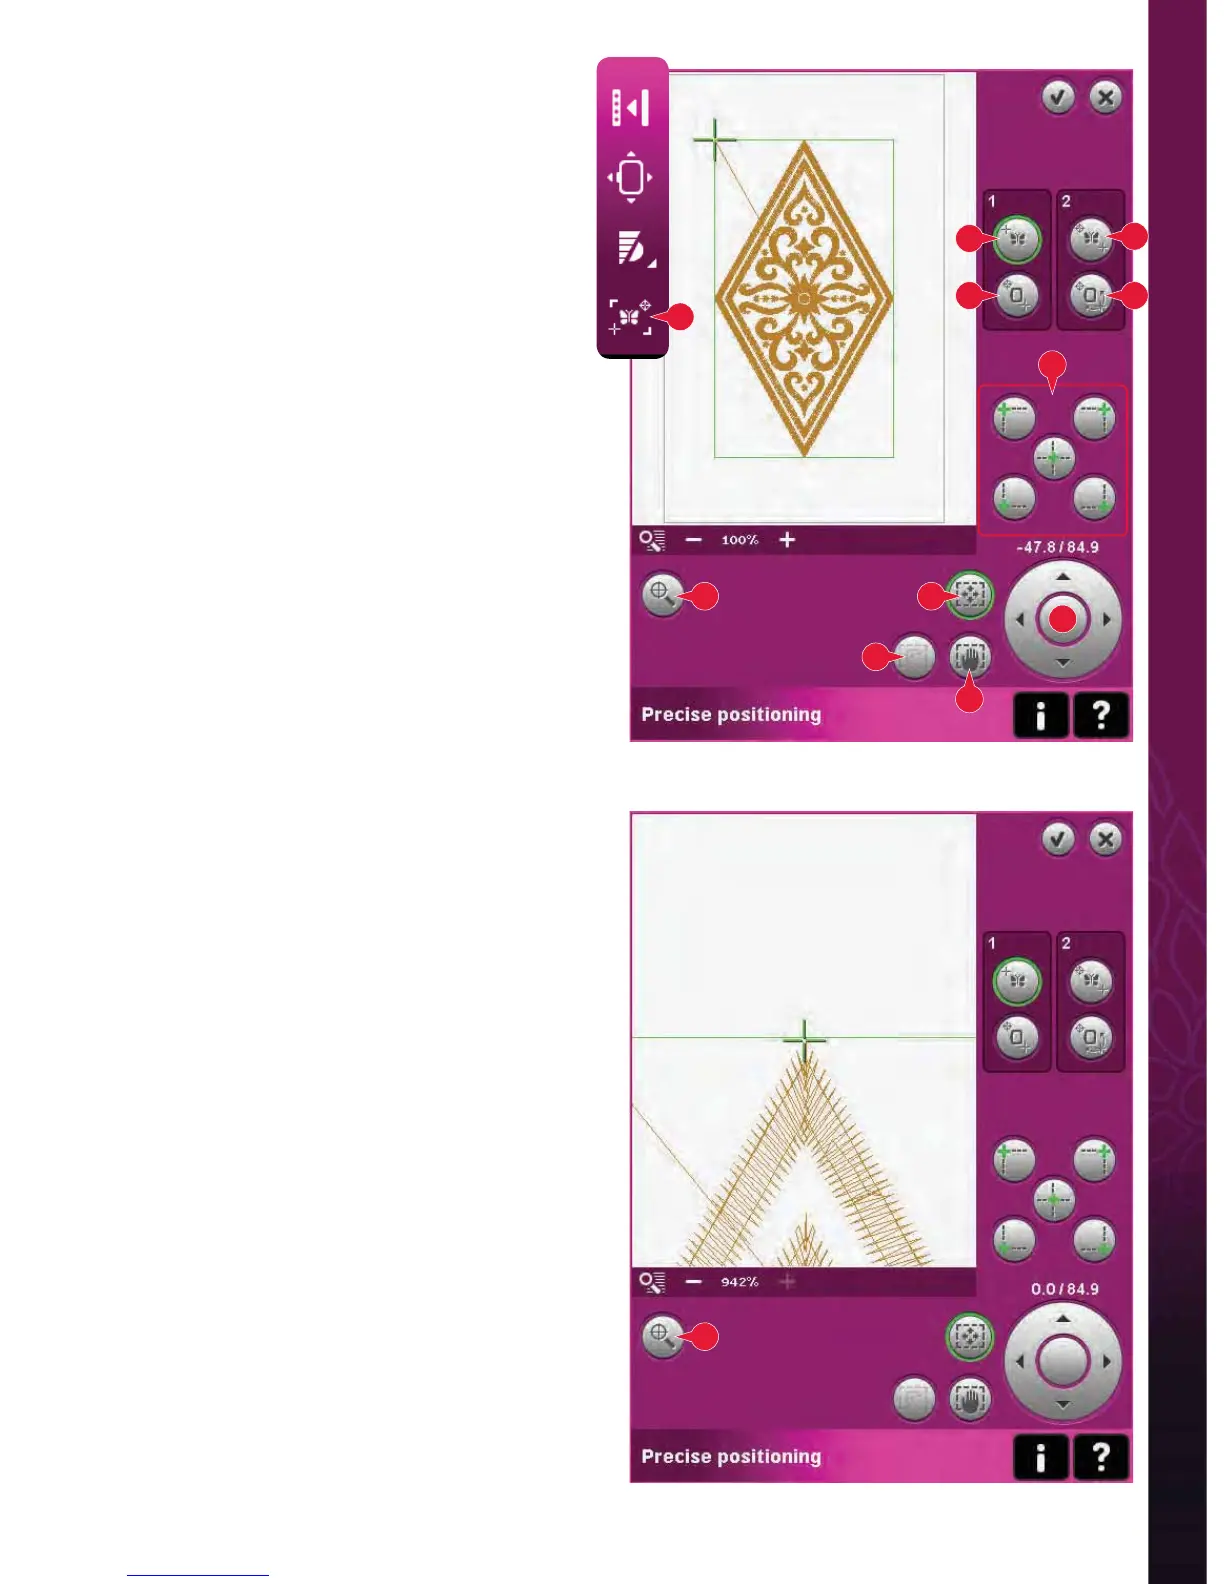
Precise positioning (12)
Precise positioning allows you to place a design
on an exact spot on your fabric. It is also used
when you want to embroider a design next to a
previously embroidered design.
Use zoom and pan to be sure that you are placing
the design exactly where you want it. Fine tune
with the wheel.
Precise positioning - overview
A Locking point
B Position hoop
C Matching point
D Rotate design
E Touch function - move
F Touch function - rotate
G Touch function - pan
H Wheel
I Corner icons
J Zoom to needle
To select locking point and position hoop
Select locking point (A). Place the green crosshair
where you would like the locking point to be in
your embroidery. Use zoom to needle (see below)
to be able to place the crosshair exactly where you
want it.
Next activate (B), position hoop. The green
crosshair will be locked on the screen, changing
color from green to black with a ring around the
center of the locking point. Now you can place the
design exactly where you want it on the fabric by
using the stylus or the wheel.
The position of the needle indicates where the
locking point is placed on the fabric.
Zoom to needle (J)
Precise positioning is easy to use with the zoom to
needle option. Touch the zoom to needle icon (J) to
pan to the current needle position and zoom in as
much as possible on the screen. You can position
the locking and matching point exactly where you
want them.
E
F
C
D
J
G
I
H
A
B
J
12
Embroidery mode - stitch-out