8:9
A
B
C
D
21
22
Embroidery mode - edit
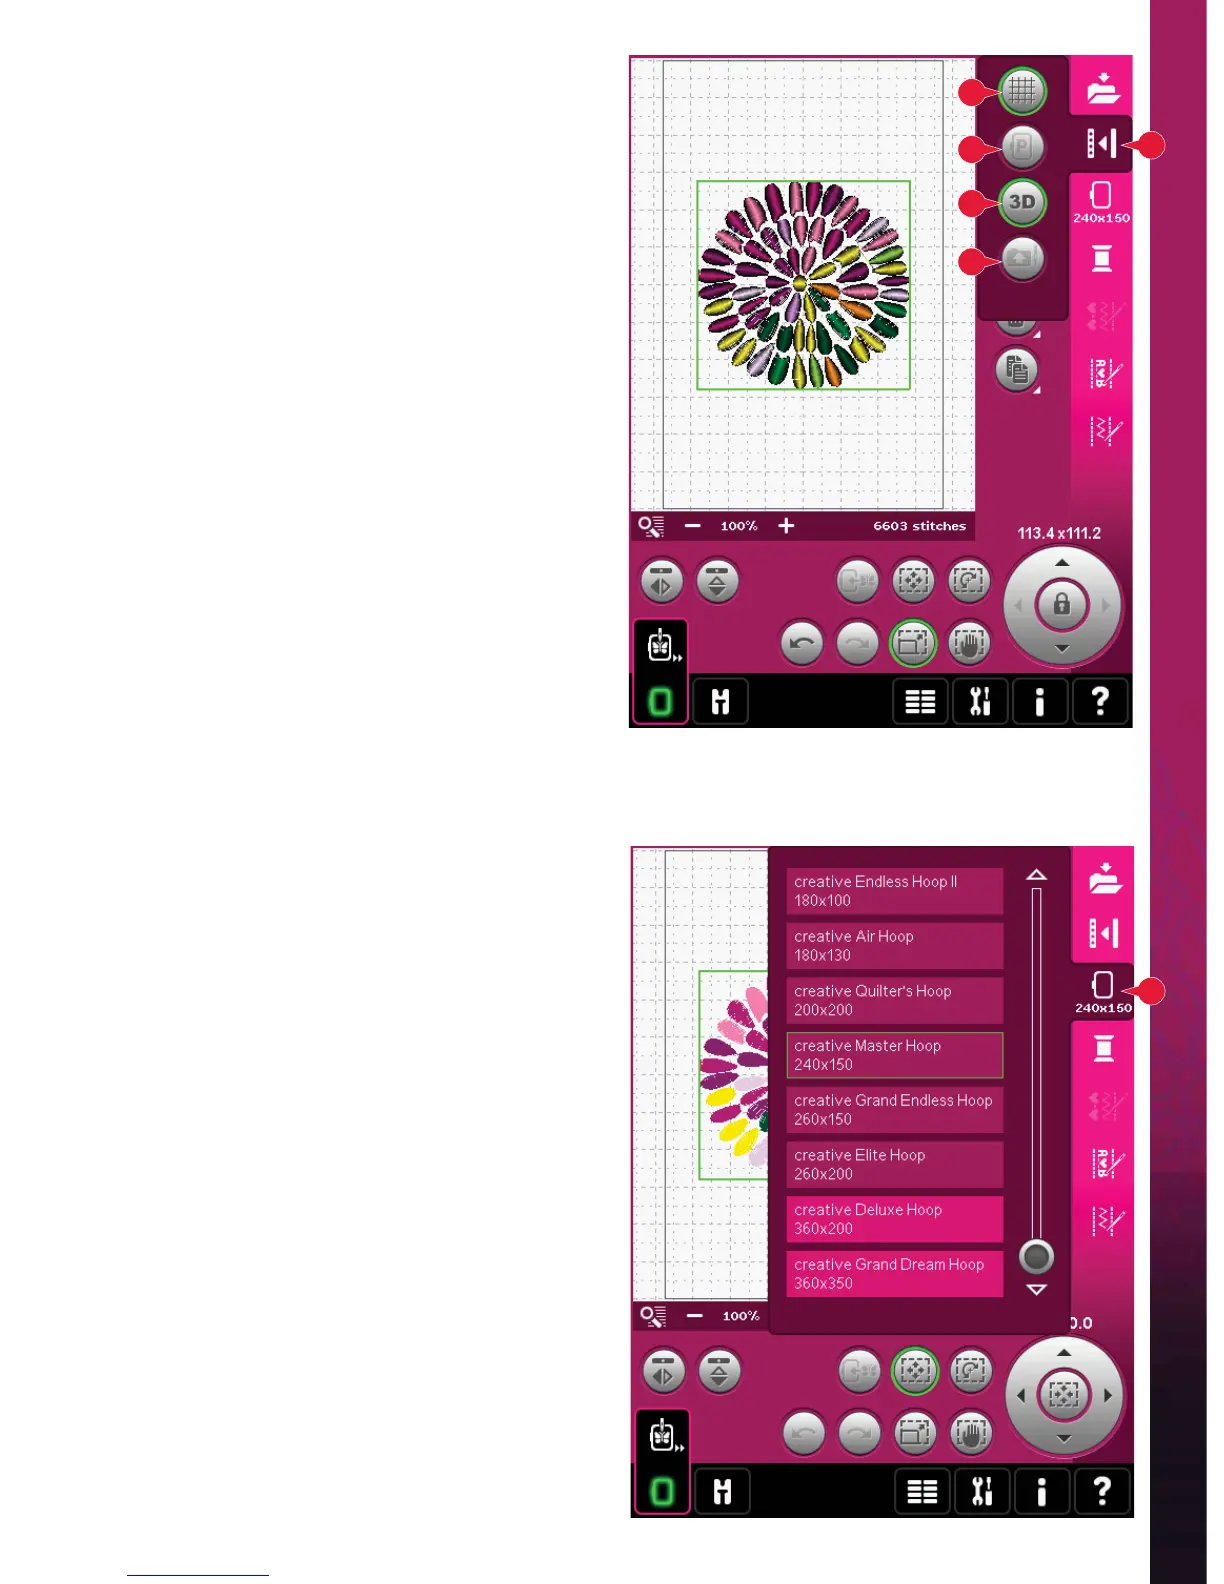
More options (21)
Grid (A)
Touch the grid icon (A) to activate/deactivate a grid
on the embroidery À eld. The grid is used as a guide
when combining or placing designs. The distance
between the grid lines equals 20mm. As you zoom
in on the embroidery À eld, the distance between
these lines reduces to 10mm and 5mm, indicated
with lighter lines.
Move to park position (B)
Touch the park position icon (B) to move the
embroidery arm to park position for storing the
embroidery unit.
The hoop must be removed À rst, to avoid damage.
3-dimensional view (C)
Touch the 3-dimensional view icon (C) to turn on
or off a 3-dimensional view of the designs in the
embroidery À eld.
By default, the designs are displayed in
2-dimensional view in the embroidery À eld. In
2-dimensional view, the designs load faster on the
screen and it is easier to see the color blocks in the
design. The view setting remains as selected even
when you turn your machine off.
Restore current state (D)
Touch restore current state (D) to automatically
move from Embroidery edit to Embroidery stitch-
out. When the design is reloaded, you will start to
embroider where you stopped.
If any design is loaded to Embroidery edit when
you restore current state, it will be deleted.
Select hoop (22)
To select the correct hoop size, touch the hoop
selection icon (22). A pop-up will appear with the
hoop choices, including hoops that are available to
purchase from your authorized PFAFF® dealer.
After selecting your hoop size, the pop-up will close
automatically.
Note: Hoops that can only be used with the 350x360 size
embroidery unit are indicated with a lighter background.