6:4
10
4
5
6
11
12
10 10
Stitch Creator
Multi-select (11)
Long touch the multi-select icon to select all stitch
points at the same time.
To select the stitch points next to the marked stitch
point, touch the multi-select icon and then touch the
arrows (12) to select the next stitch point.
Use the up arrow to select stitch points before the
marked stitch point and the down arrow to select
the stitch points after the marked stitch point.
Note: If selecting stitch points using the up arrow, you
can deselect them by touching the down arrow.
Delete selected stitch point (4)
If you want to delete a single stitch point, select the
stitch point and touch the delete icon. If more than
one stitch point is selected, they will all be deleted
when touching the delete icon.
Use the long touch function to delete all stitch
points in the stitch À eld.
Duplicate selected stitch point (5)
If you want to duplicate a stitch point, select the
stitch point and use the duplicate icon to create a
copy.
If several stitch points are selected, all stitch points
will be duplicated and inserted after the marked
stitch point.
Use the long touch function to get a pop-up where
you can enter the exact number of duplicates you
want to insert.
Insert a new stitch point (6)
Touch this icon to insert one single stitch point. The
two stitch points will create a new stitch.
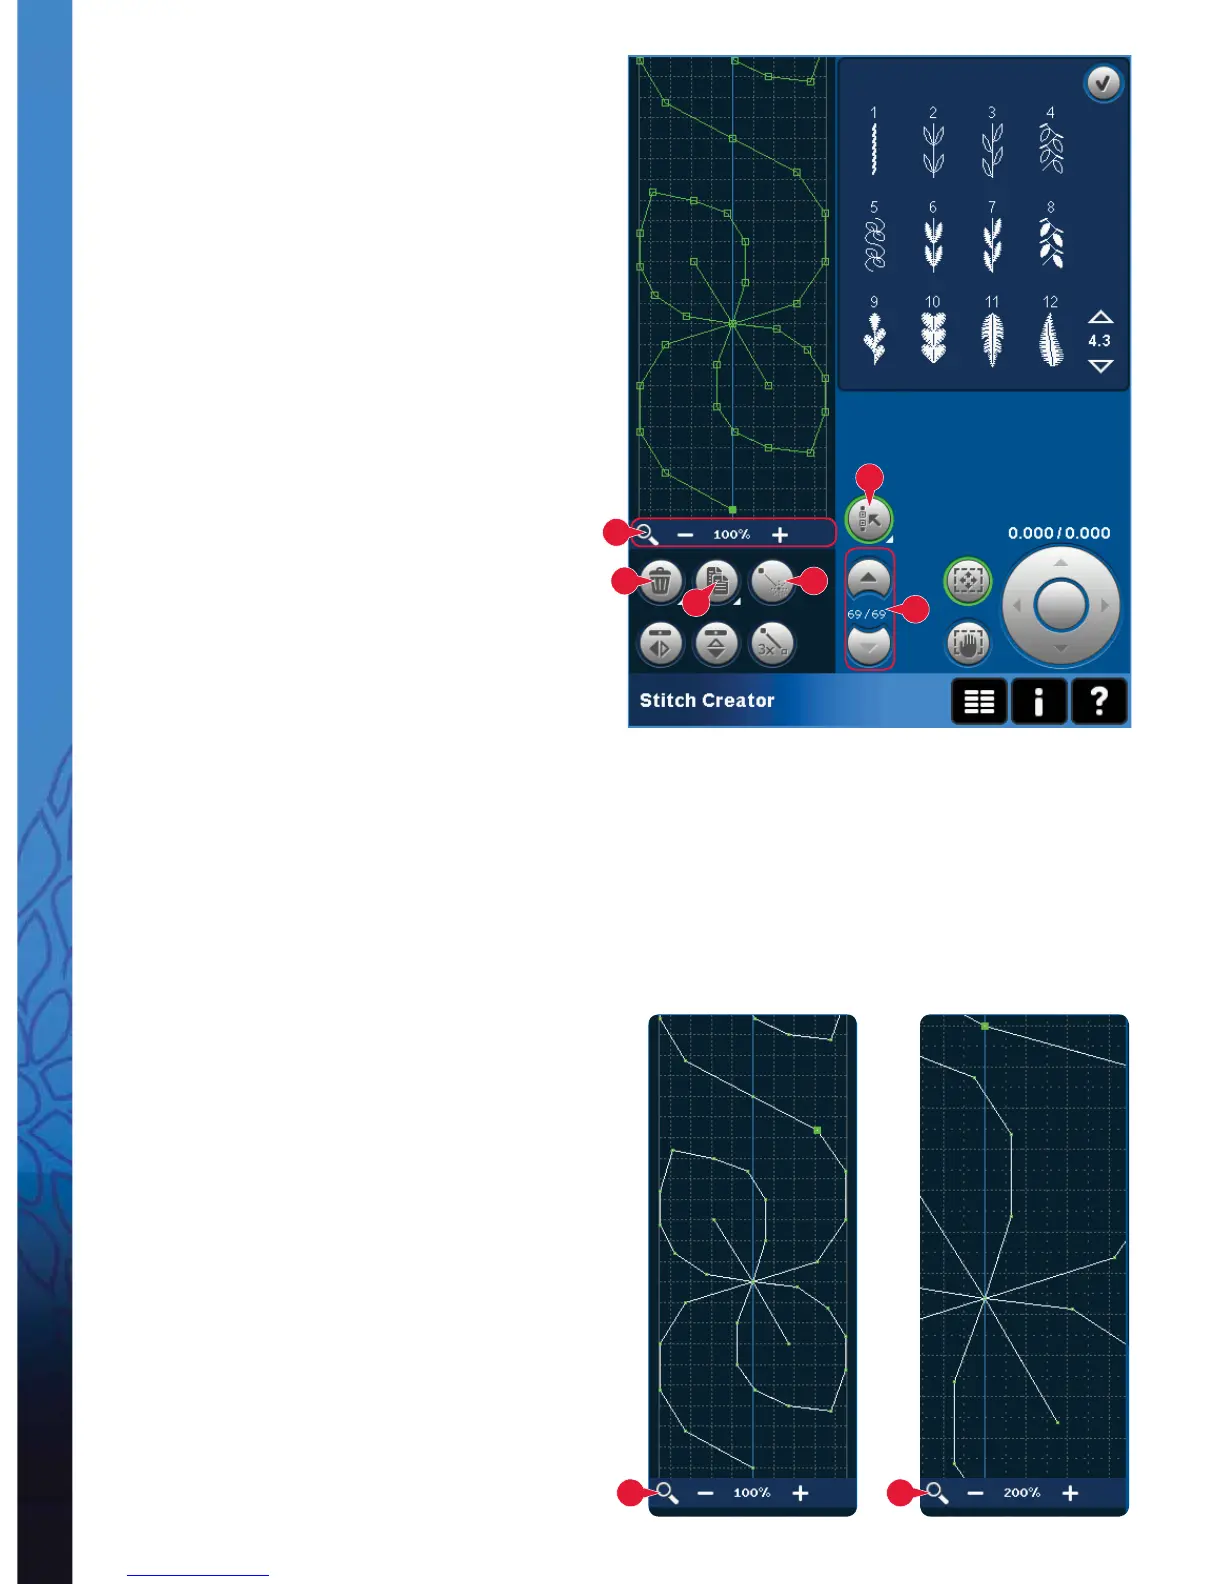
Zoom (10)
When using the zoom icons, the focus will be on the
marked stitch point.
The distance between the grid lines equals 1mm on
the fabric. If you zoom in on the stitch À eld, thinner
grid lines will appear. The distance between these
lines equals 0.5mm. If zooming out, only the edge
lines of the stitch À eld will be visible.