9:8
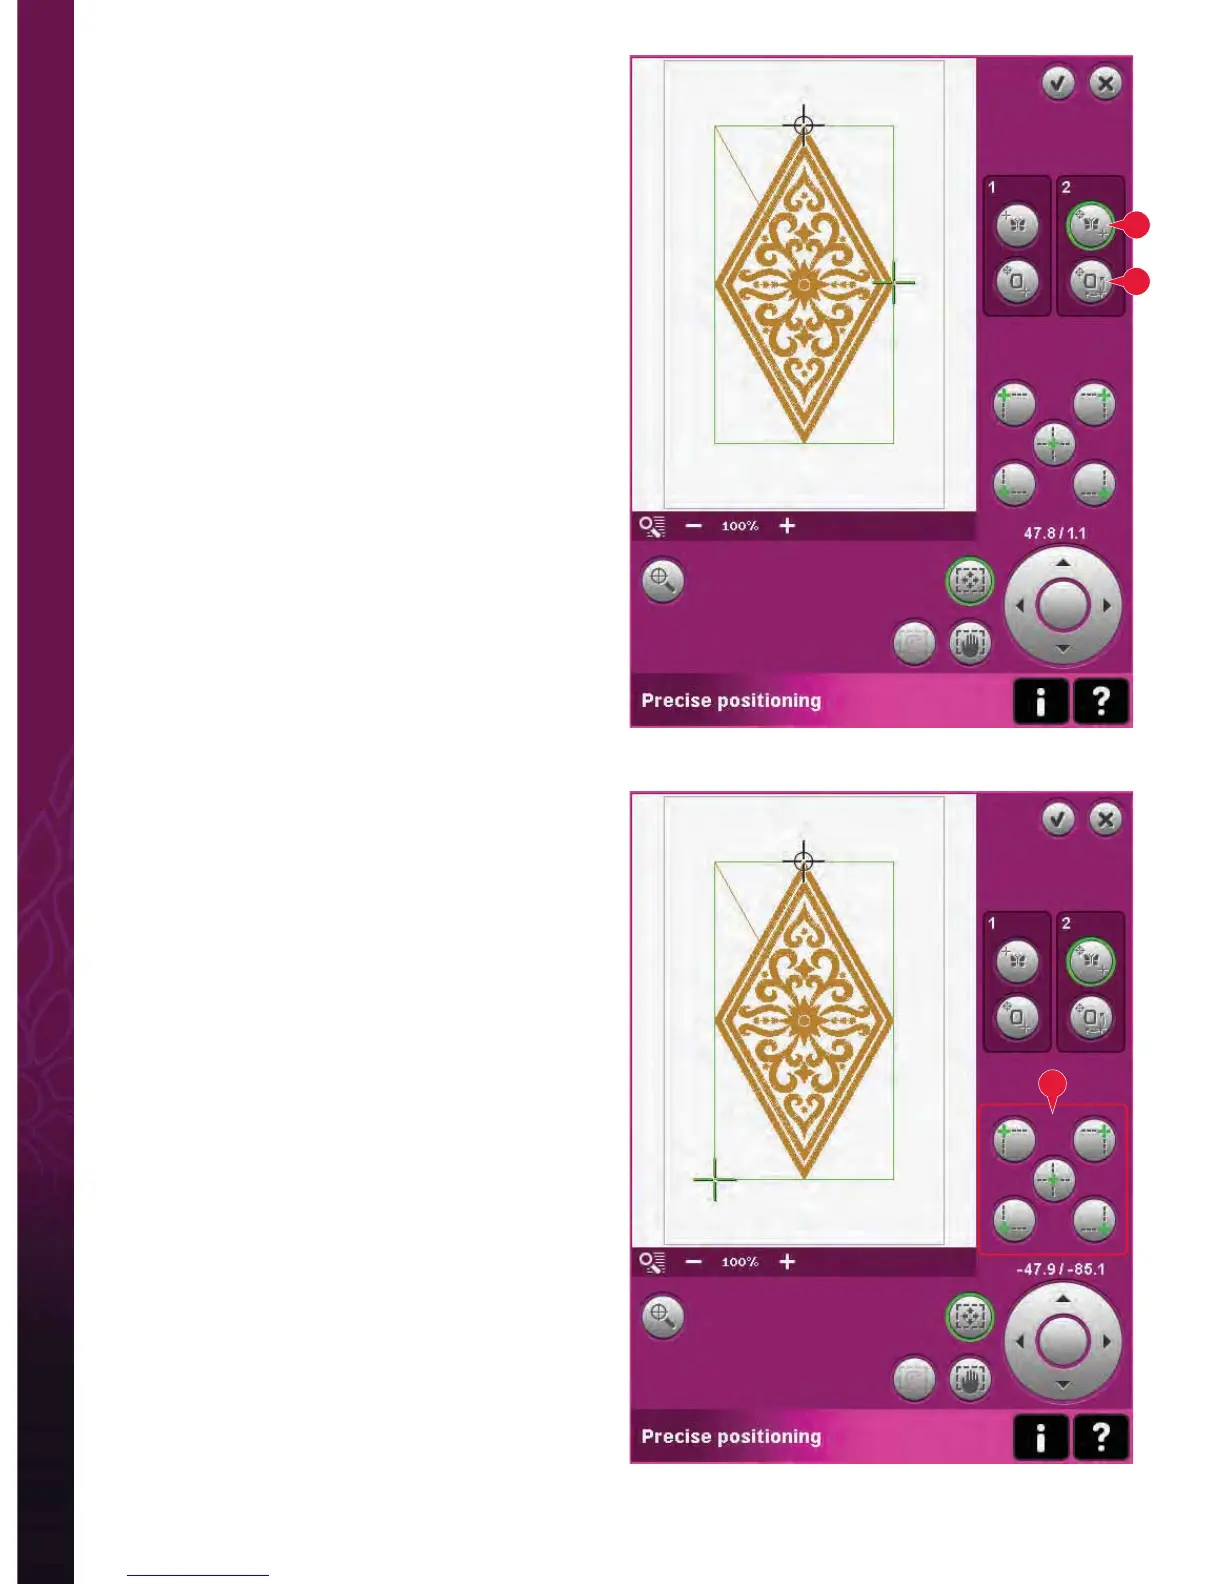
To select matching point and rotate design
You have the ability to check a second position
within the design to make sure your design is
lined up properly and make further adjustments if
necessary. Activate (C), matching point.
A second crosshair will appear, the matching point.
Place it at the point where you would like another
part of the design to connect. The hoop will move,
following the matching point.
To line up the design where you want it, activate
(D), rotate design. To move the matching point to
the right place on the fabric, the rotate function will
automatically be selected.
Use the stylus or wheel to rotate the design on the
screen around the locking point, kept in position.
Rotate the design to connect with the previously
embroidered design, or to get the correct placement
on the fabric.
Corner icons (I)
Use the corner icons to set the connecting point
(locking point or matching point) for precise
positioning in a corner of the design. This is the
easiest and most precise way since the connecting
point will be automatically placed exactly in the
corner. This is useful when positioning a design on
a patterned fabric.
The corner icons can also be used to trace the design
À eld by touching each of the four corner icons in
turn. You can À nd the center of the design again by
touching the centering icon.
The corner and centering icons may be used when
either locking point or matching point is selected.
When touching one of the icons, the selected point
will automatically be set to the corresponding
position, i.e. at a corner or at the center of the
embroidery.
E.g. when choosing the upper left corner icon, the
connecting point will be set at the upper left corner
in the outer line of the design(s). After this, you can
continue and make your own adjustments on the
connecting point.
C
D
I
Embroidery mode - stitch-out