9:9
K
A
B
Embroidery mode - stitch-out
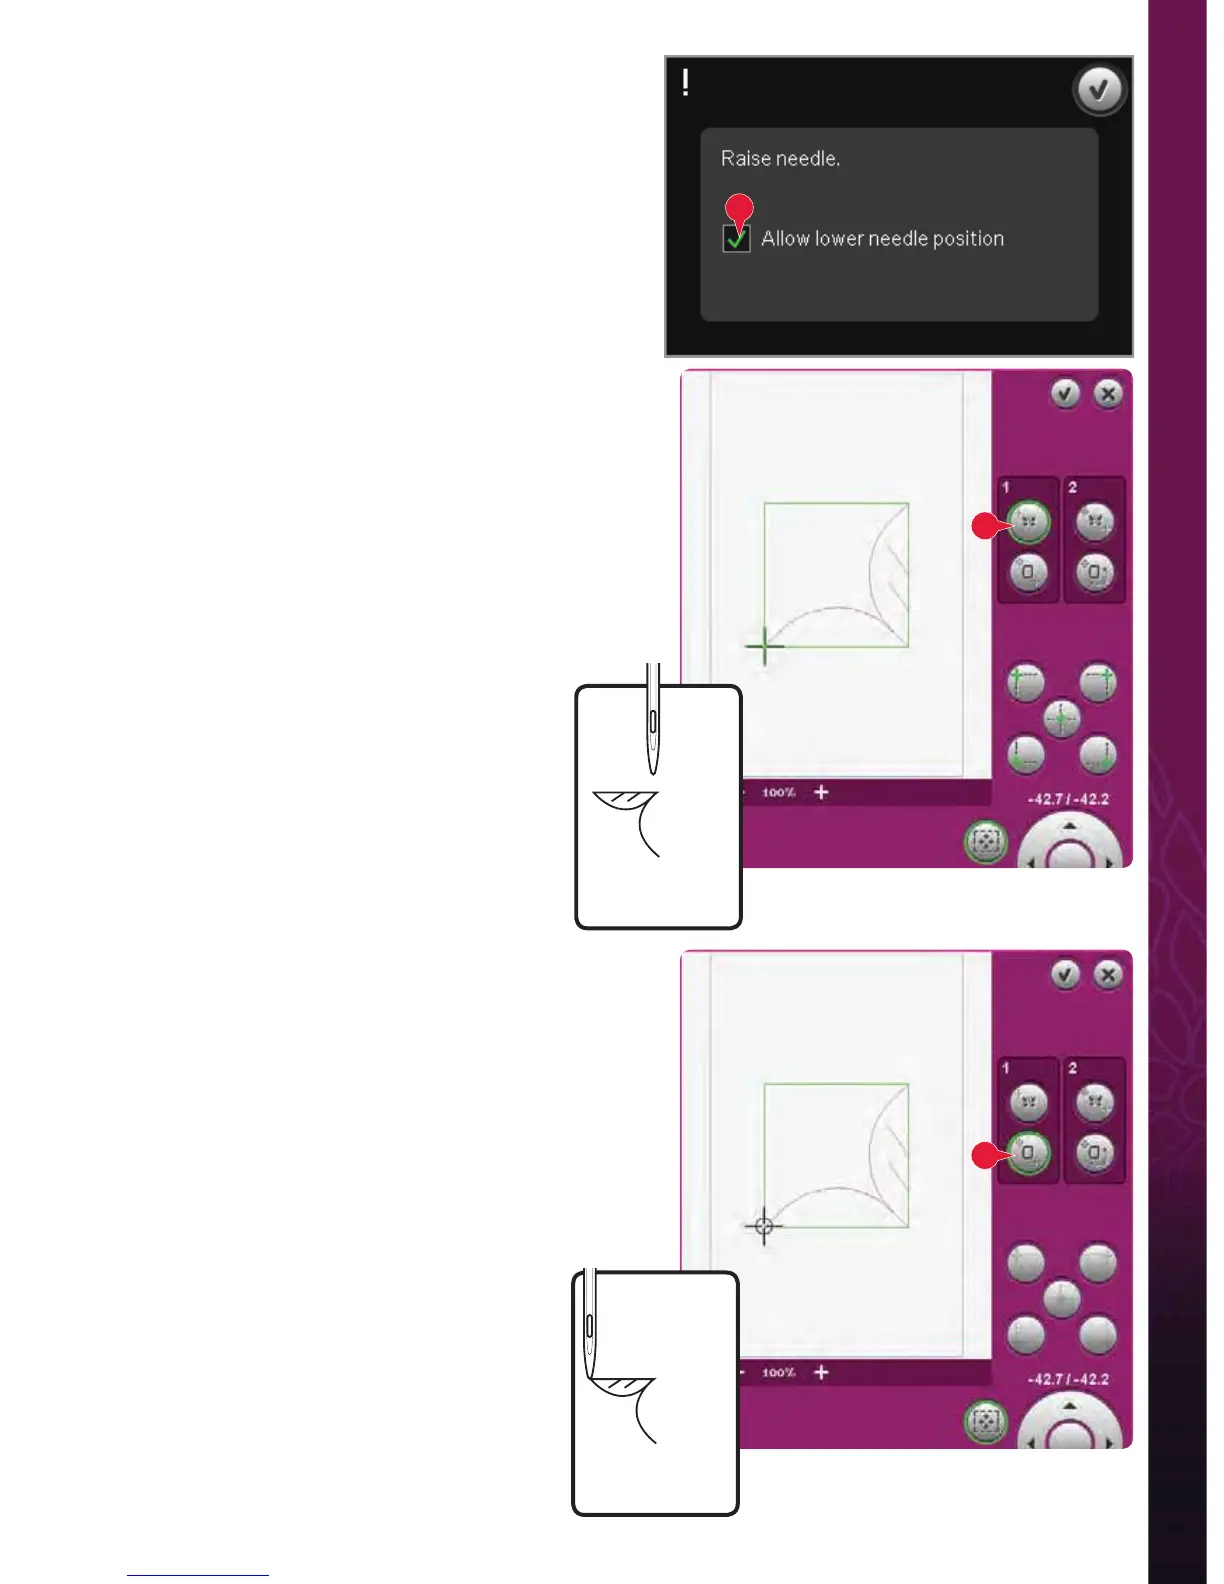
Disable needle warning (K)
Check allow lower needle position (K) to
temporarily allow the needle to be in a lower
position while moving the hoop. The needle can
then remain close to the fabric when using precise
positioning. Just make sure the needle is above the
fabric to prevent damage to the needle and fabric.
Note: The warning cannot be disabled when the needle is
below the needle plate.
Precise positioning - example
When adding one design to one previously
embroidered, precise positioning is very useful.
1. Choose one of the corners to be the locking
point (A) by touching one of the corner icons (I).
You can also set the locking point using touch
function - move on the screen or the wheel.
2. Select the next function, position hoop (B), to
move the locking point to the right position in
the hoop.
Move the locking point to the upper left corner
of the embroidered design. Use the touch
function - move. Check that the needle is at the
exact position.
If satisÀ ed, close precise positioning and start
embroidering.