16
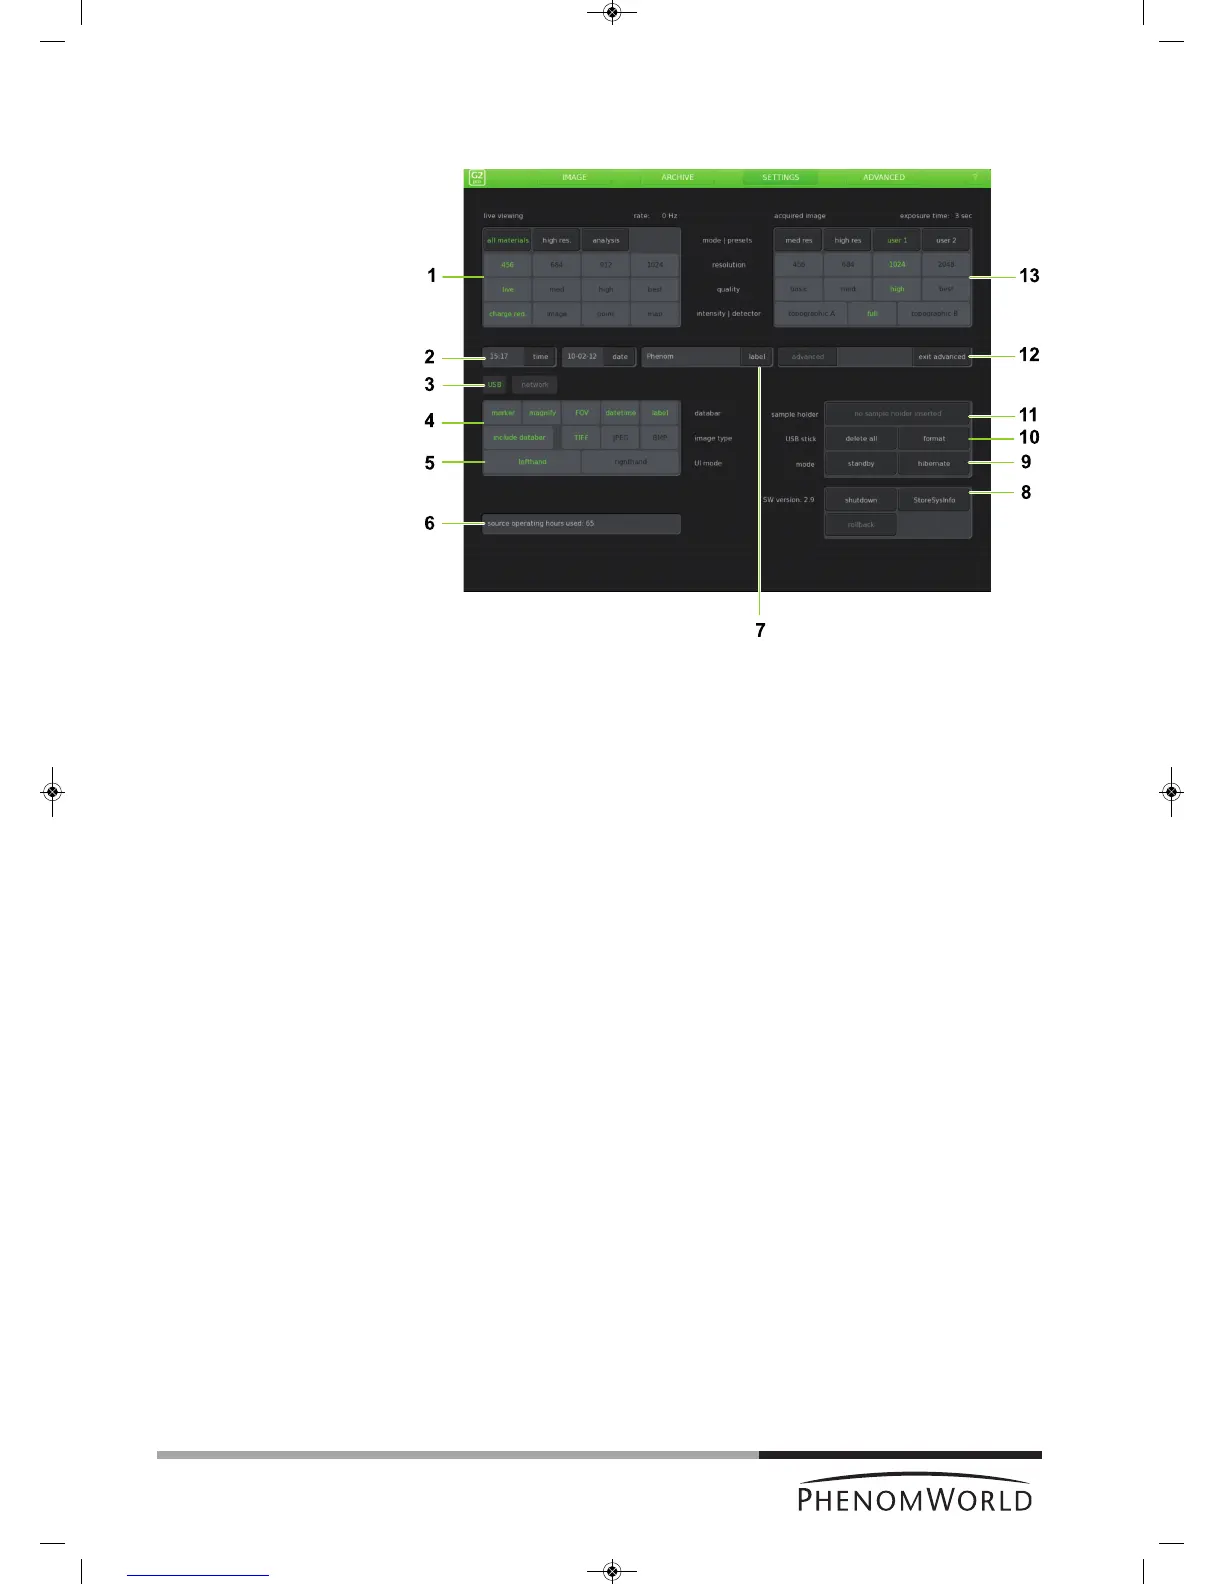
Settings screen
Notes!
The Settings screen allows you to adjust the various Phenom settings to suit your own
personal preferences. For this refer to 5. ‘Phenom settings’.
1 Live viewing
Adjusts and stores viewing conditions such as imaging mode, pixel resolution and
averaging speed.
2 Date and time adjustment
Adjusts date and time.
3 USB / network
Selects USB Flash drive (USB) or network share (network) to store images.
4 Data bar
Selects the items to be displayed in the data bar in the main viewing window and / or
on the saved images.
Image type
Selects file format for stored image.
5 U(ser) I(nterface) mode
Selects the desired User Interface mode. Select whether the button bar on the Image
screen will be placed on the left or on the right side of the screen.
6 Source
Displays the total time the Phenom electron source has been operational.
Only visible when Advanced is activated. Refer to 11 ‘Advanced’).
– When the Phenom electron source is replaced, the timer will start counting again from
zero. Operating hours of the previous source will not be taken into account.
– When new software is installed on the Phenom, the timer will copy the operating
hours from the previous software versions.
7 Label
Enter image / file name. Refer to 5.5 ‘Label’.
Fig.5