LUCAS® Chest Compression System – Service Manual
3323809-001, © 2017 Physio-Control, Inc.
73
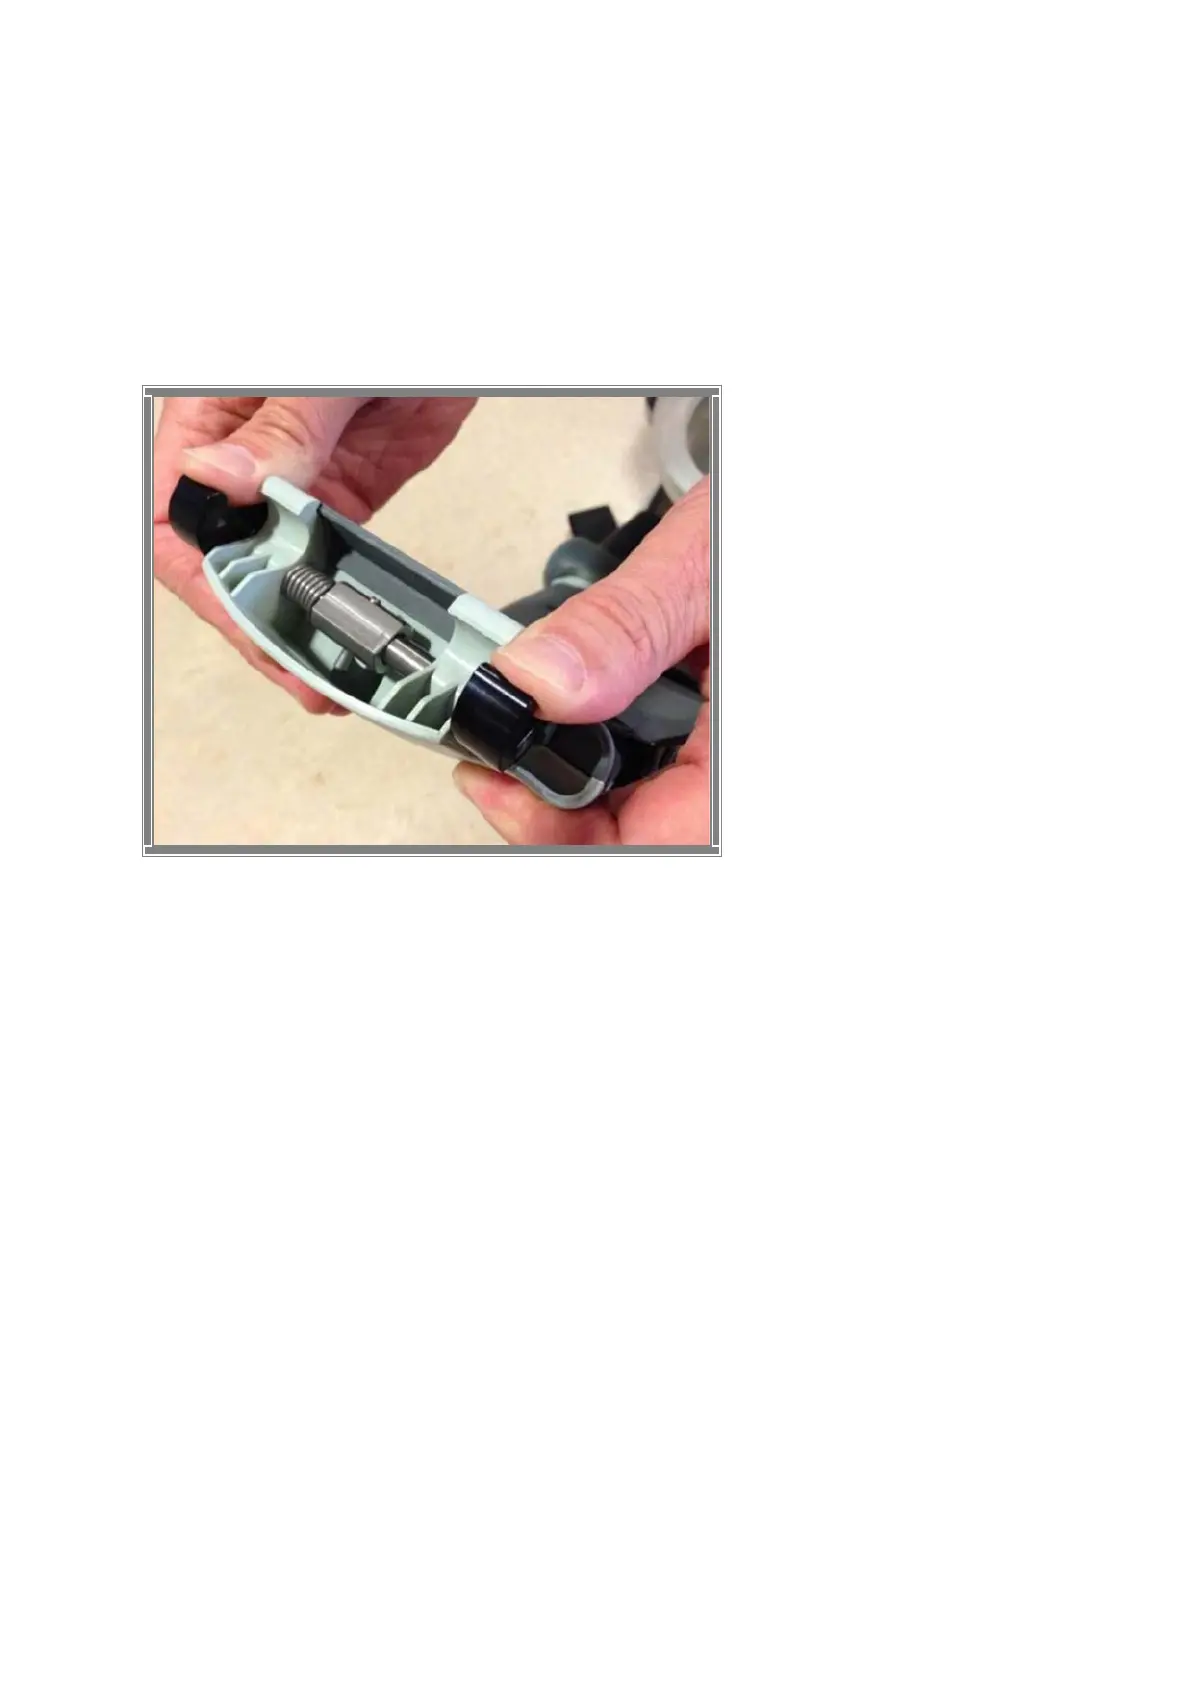
Check for the ability of the Claw Mechanism to remain locked:
Press the Claw Lock towards the center point of the Support leg (closed position) with your
thumbs.
When locked, press hard with two thumbs on the two claws as shown in the Figure 10.2-2. If
the claw mechanism unlocks, then the check has failed.
Figure 10.2-2: Claw Mechanism Lock
Check
10.3. Electronics Test
Turn on the device and perform the following tests:
Check that the Internal Function Test is performed and that the ADJUST LED shows a green
light.
Change mode to ACTIVE (30:2) and check that the ACTIVE (30:2) LED shows a green light.
Let the device run for approximately two minutes and listen for unusual noise. Check that
there is an audible alert sound prior to the ventilation pause (each 30 strokes) together with
an intermittent LED.
Change mode to PAUSE and check that the PAUSE LED shows a green light.
Change mode to ACTIVE (continuous) and check that the ACTIVE (continuous) LED shows
a green light. The LED will then blink each twelve strokes (ventilation alert).
Change mode to ADJUST, pull the Suction Cup down to test the Adjustment Servo.
Push the Suction Cup back up to its top position. Check that it runs smoothly.
Connect a charger to the device and check that the charging sequence begins (the battery
LED’s show a “running” light). Disconnect the charger.
Turn the device off.