Planmeca ProMax 3D Max with ProTouch 13
MAIN PARTS
User’s Manual
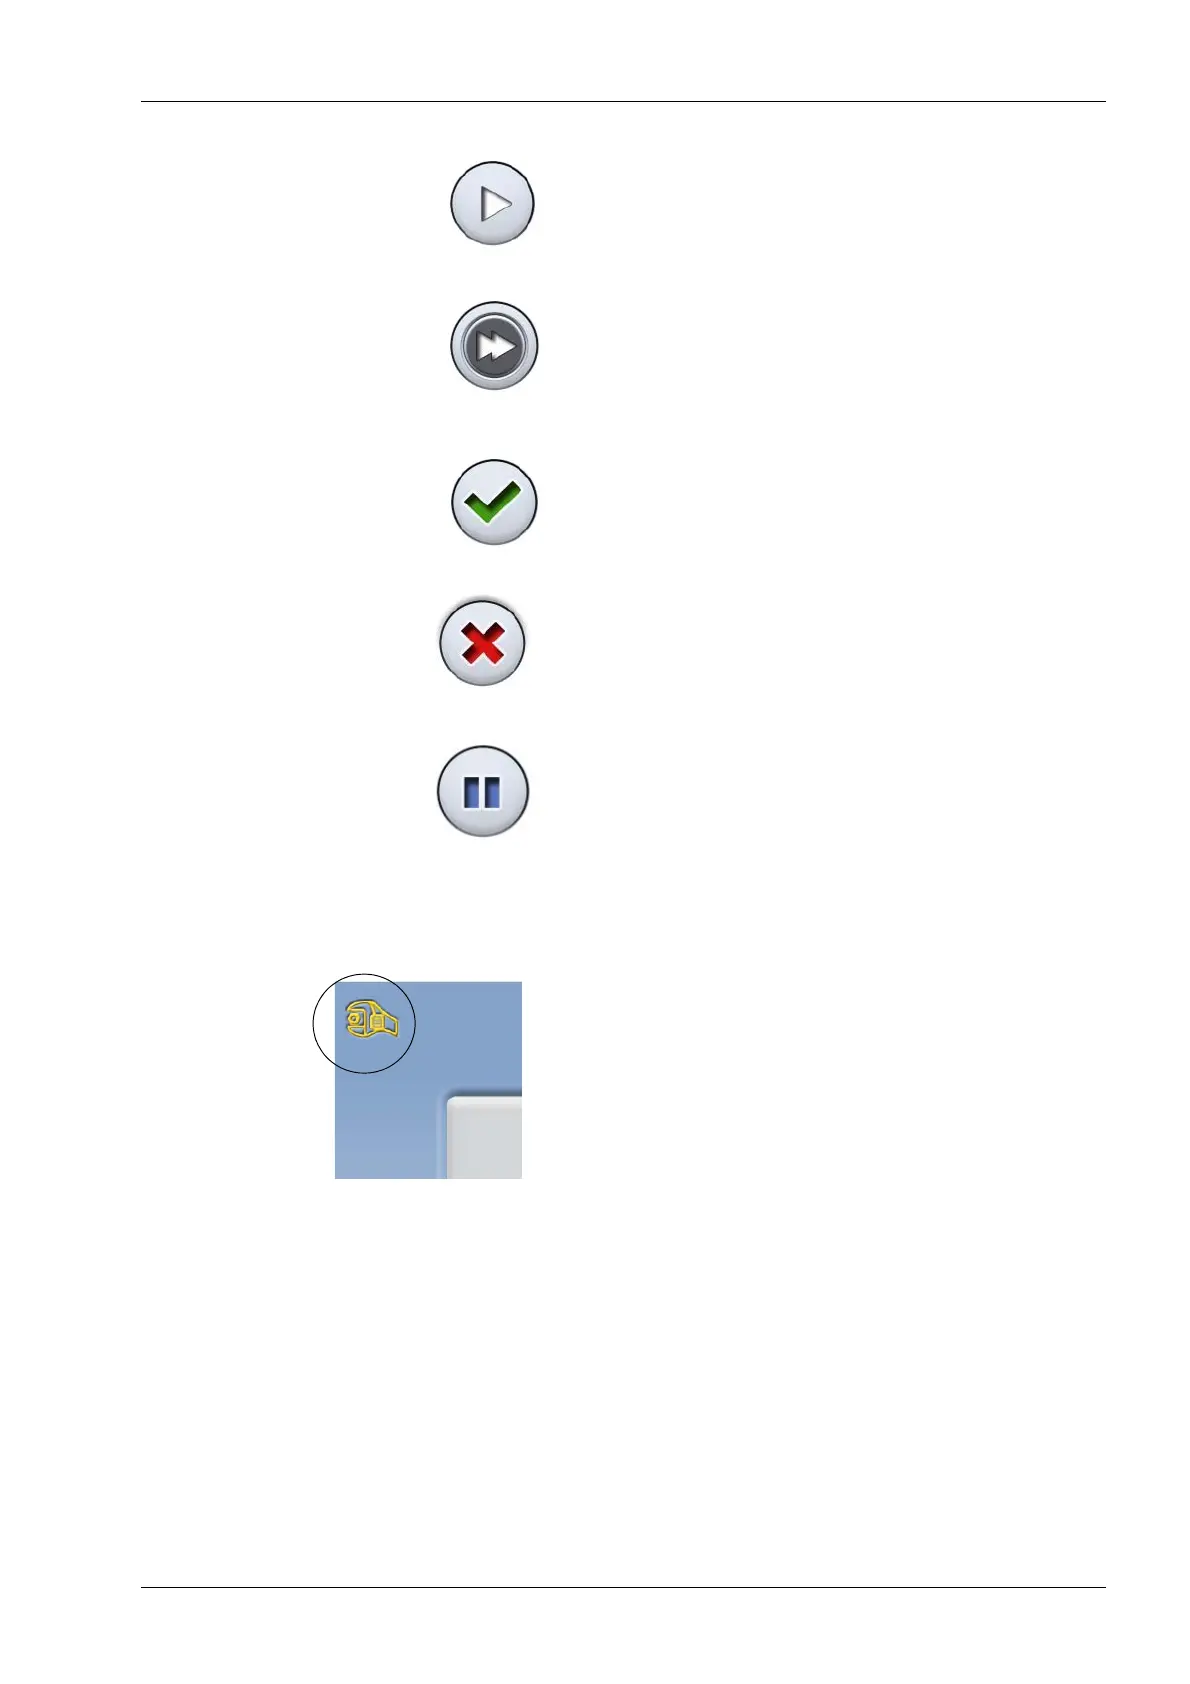
• To accept a selection and to go to the next screen,
touch the forward button.
• To accept a selection and to skip the next screen,
touch the fast forward button.
• To accept a selection, touch the green check mark
button.
• To cancel a selection, touch the red cross button.
• To pause a function (instead of cancelling it), touch the
pause button.
• To scroll a list down or up, slide your finger on the
screen.
• To change a setting, select the service spanner at the
top left corner of the main view. This takes you to the
settings menu where you can adjust the settings of the
X-ray unit. Refer to section 11 “SETTINGS” on page
47 for details.
The screen will automatically switch to stand-by mode if
you do not touch the screen or the exposure button for
more than thirty minutes. In stand-by mode the green light
on the exposure button indicates that the X-ray unit is
switched on even though the screen is dark. The screen
will switch on as soon as you touch it again.
NOTE You can switch demo mode on if you wish to practice
or demonstrate the functions of the X-ray unit without
radiation (Service spanner > User > 1300 Operational
settings > 1310 User Mode > 1311 Set Demo Mode).
Pause
Forward
Fast
forward
Cancel
Accept