Planmeca ProMax 3D Max with ProTouch 45
3D MODEL EXPOSURE
User’s Manual
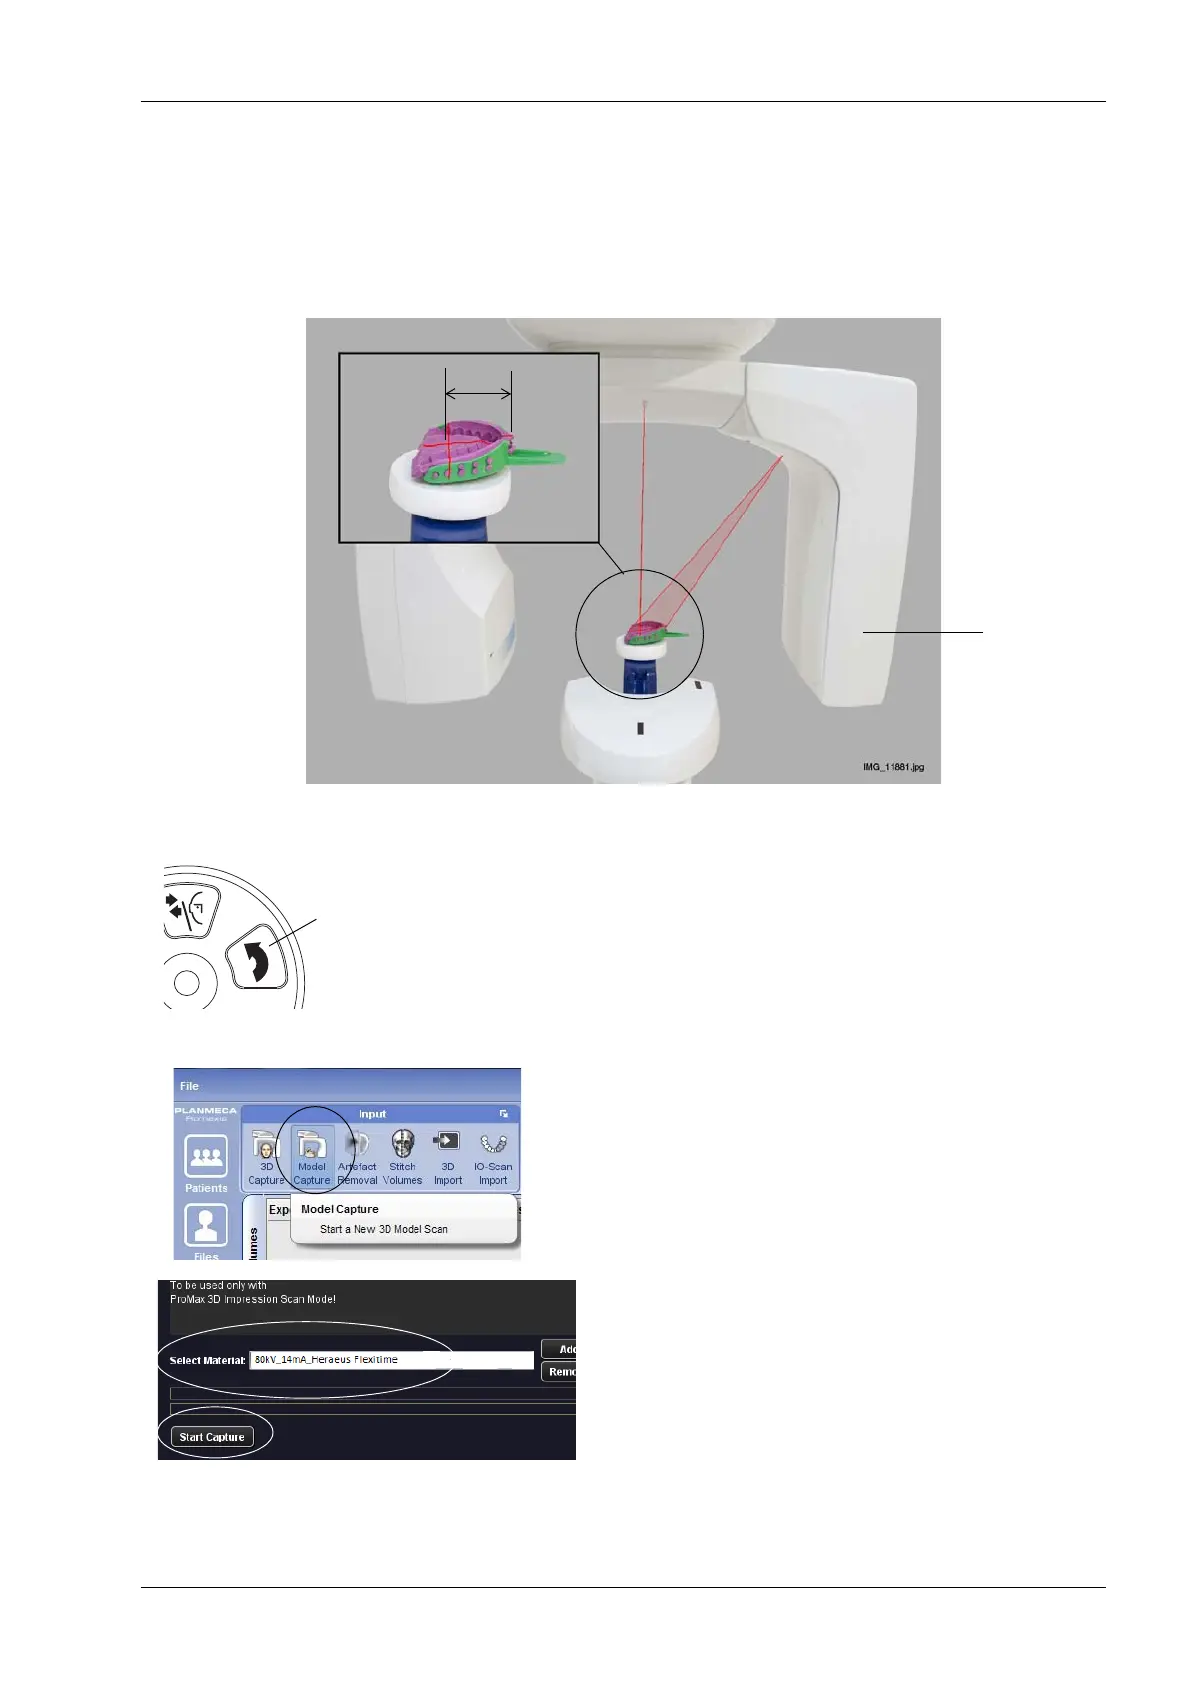
5. Place the model (impression or plaster cast) on the
polystyrene disc and ensure that:
• The model faces the sensor and
• The model is positioned so that the distance between
the cross formed by the volume center lights and the
front edge of the model is 50 mm.
NOTE FOR PLASTER CASTS
Move the C-arm up about 13 mm (0.5 in.) by pressing
the image volume up button.
6. In the Planmeca Romexis program, click 3D > Model
Capture. Refer to the Planmeca Romexis User’s
Manual for details on Romexis functions.
7. In the window that appears, first select the material
you are exposing. Then click the option Start Capture.
NOTE Ensure that you have selected the correct exposure
values on the X-ray unit. The exposure values shown
here are only examples.
Volume center
lights
50 mm
Impression
Sensor
on polystyrene disc