Image File Requirements for Speed Dial Contacts
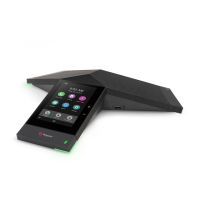
You can upload a photo or graphic for contacts in the Speed Dial list for the RealPresence Group Series
system and for a paired RealPresence Touch device. Note the following requirements for Speed Dial
images:
• JPEG format (.jpg or .jpeg extension)
• Image dimensions within a range of 300 to 2000 pixels (both width and height)
• File size less than 5 MB
Upload an Image File for Speed Dial Contacts
You can upload a photo or graphic for contacts in the Speed Dial list on your RealPresence Group Series
system web interface.
Procedure
1. In the system web interface at Speed Dial, click Edit.
2. Click Choose File, navigate to the file, and click Open and Upload.
3. To save your changes, click Save.
The image is now displayed for the Speed Dial contact on the system Home screen and on a
paired RealPresence Touch.
Remove Speed Dial Contacts
You can remove contacts from the Speed Dial list in the RealPresence Group Series system web
interface.
Procedure
1. In the system web interface at Speed Dial, click Edit.
2. For the contact you want to delete, click Remove.
3. To save your changes, click Save.
Related Links
Call a Speed Dial Contact on page 212
Kiosk Mode
In the RealPresence Group Series system local interface, Kiosk Mode simplifies the Home screen by
displaying only speed dial entries and calendar meetings (if enabled). In Kiosk Mode, therefore, users can
call speed dial numbers, join calendar meetings, and answer calls.
You must create your speed dial numbers before users can access Kiosk Mode.
Kiosk Mode is disabled by default. If Kiosk Mode is enabled, these conditions apply:
• The Home screen menu, Out of Call menu, and other icons are disabled.
• Alerts bring the local interface out of Kiosk Mode until you clear the alerts.
• You can still use the remote to adjust the volume, control the camera, and mute/unmute the
microphone when in calls.
• You can bring up the In a Call menu by pressing Menu on the remote during the call.
Registering with a Directory
Polycom, Inc. 137