31
Installation
Method 2:
Prepare the final calibration solution by diluting the concentrated solution (at 21.39 mg/liters)
with demineralized water. Then determine the exact silica concentration value of this solution by
using a laboratory measurement technique (e.g. Hach Lange laboratory photometer) or by using
the grab sample mode of an accurately calibrated POLYMETRON 9210 if available on site.
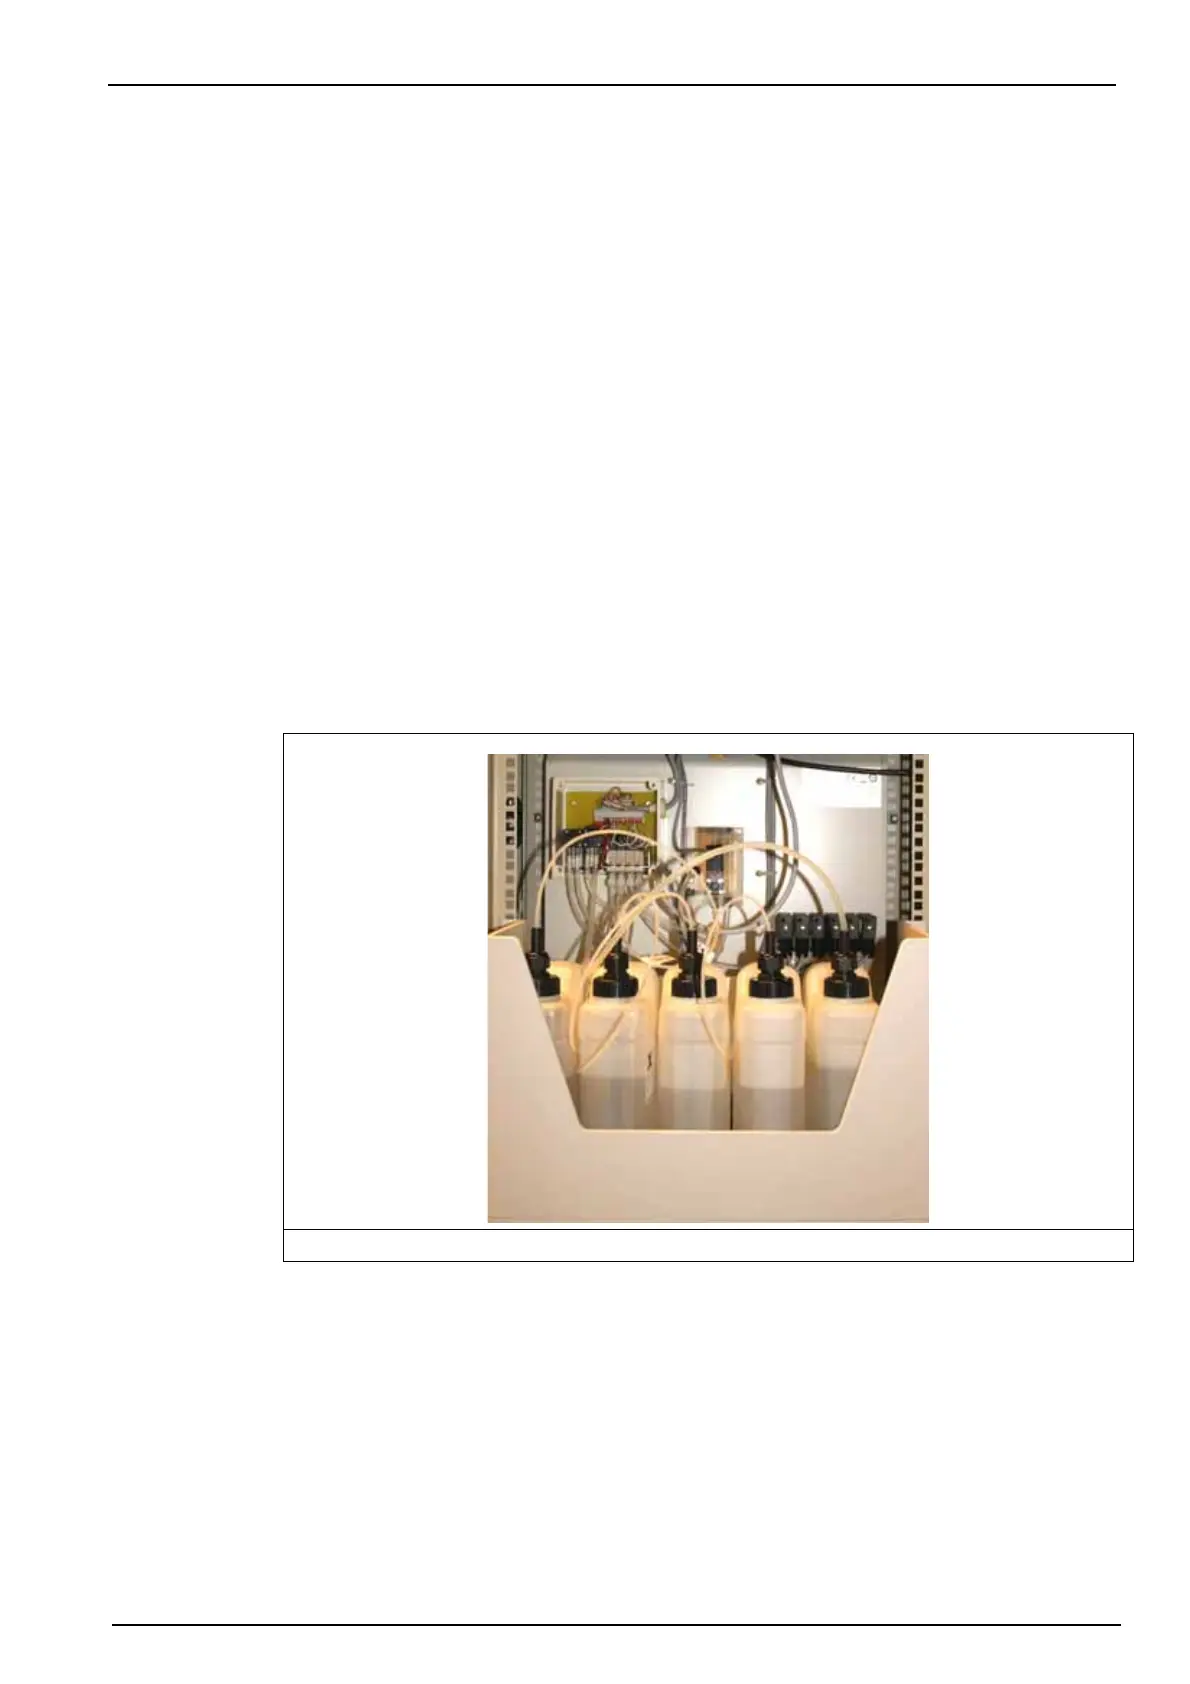
4.12 Connecting the canisters
Each reagent tubing is labelled individually and delivered already connected to the analyzer.
They are fed through, and attached to, caps that attach to the reagent canisters. One end of the
tube is fitted with a chemically inert PVC weight that is used to position the tube in the bottom of
the canister.
Connect each cap to its canister:
• Tube R1M to reagent canister labelled R1M: Sodium molybdate
• Tube R1A on reagent canister labelled R1A: Nitric acid
• Tube R2 on reagent canister labelled R2: Oxalic acid
• Tube R3 on reagent canister labelled R3: Sulfuric acid and ferrous ammonium sulfate
Screw the cap on each canister so that the weight is resting at the bottom of the canister. Put
the canister in the canister holder with the cap towards the exterior as shown in Figure 11
below.
The canister on the far right of the illustration is the calibration solution. This has a thicker tube
compared to the reagents. Ensure that the cap has also been securely screwed on to this
canister.
At this stage, the analyzer doors can now be closed and locked as access to the interior of the
analyzer is no longer required.
Figure 11 Canisters connected