10
X8 | SERVICE MANUAL
INDEX
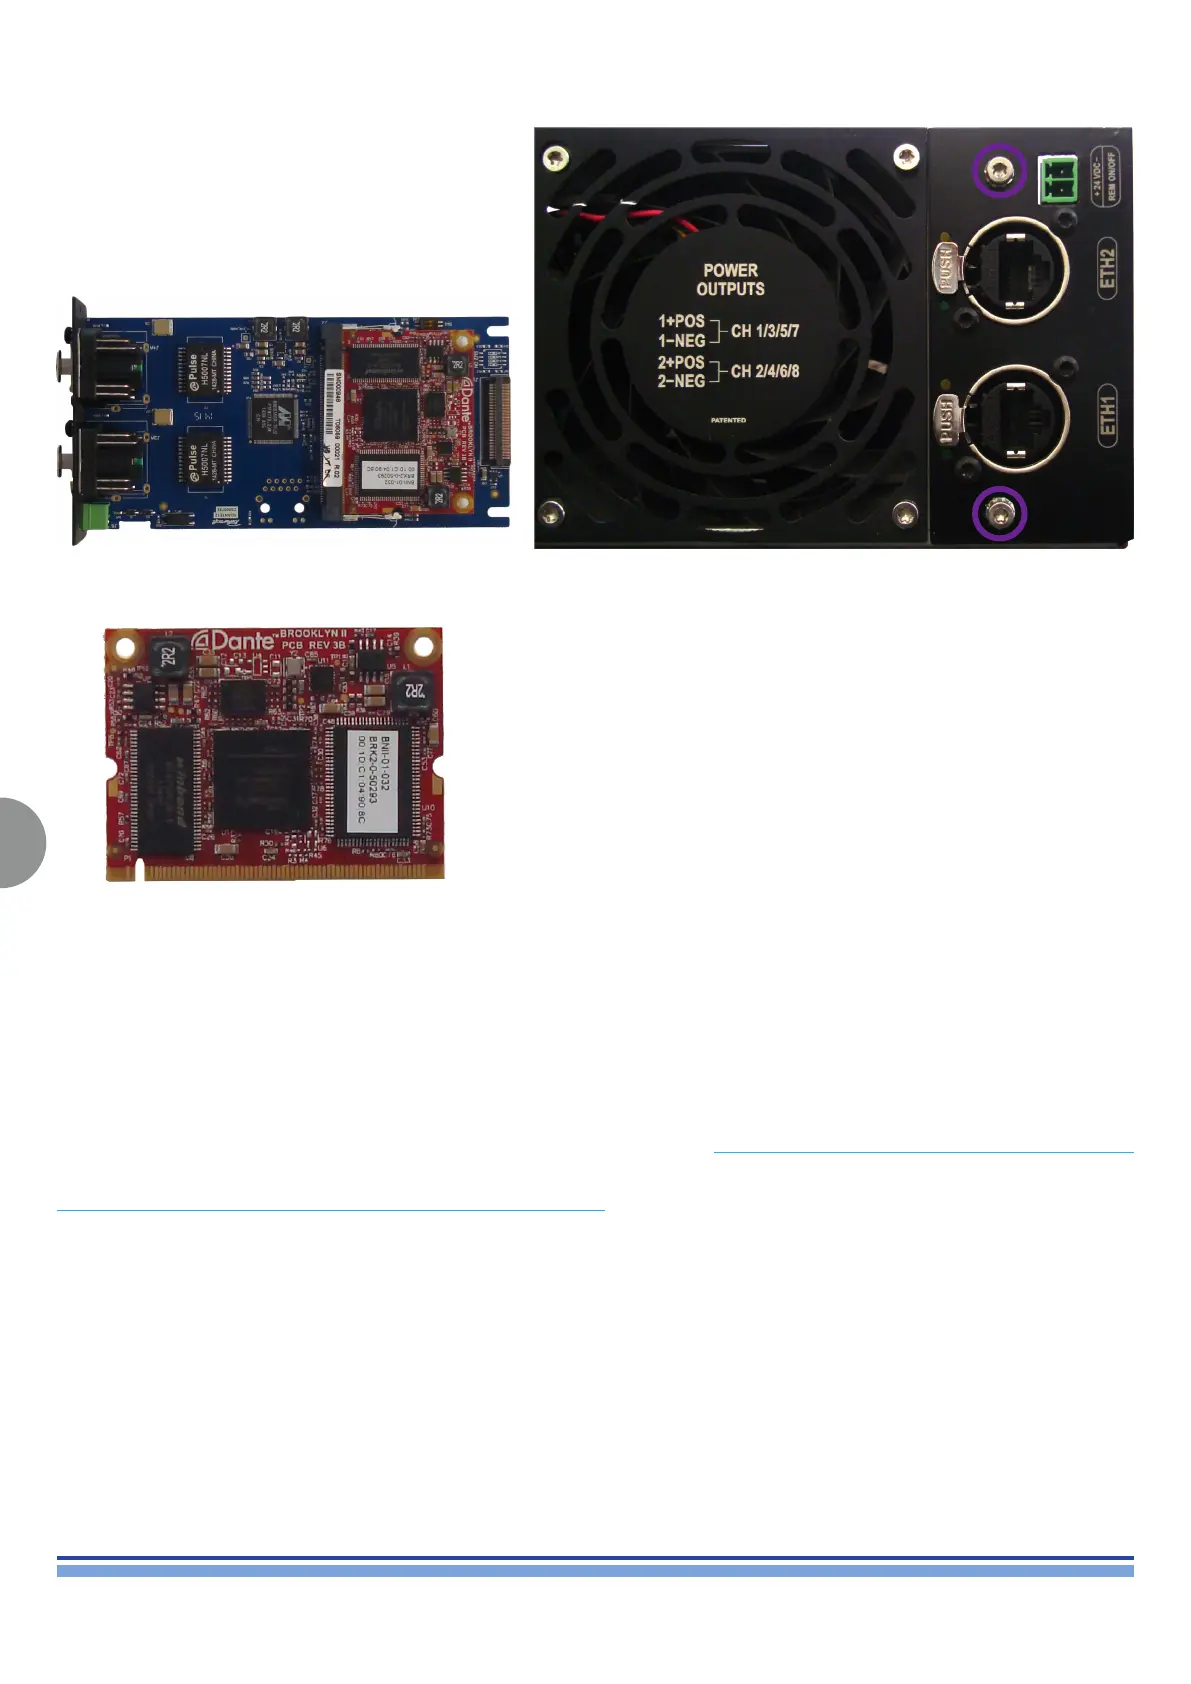
2. Removing The Slot Ethernet Board
By means of a Torx T10 Screwdriver, remove the two
screws highlighted on (Fig. 6).
Gently pull the Slot Ethernet Board outwards, removing
it from its slot.
Carefully extract the Slot Ethernet Board
In case of fault in the Slot Ethernet Board, and functioning Dante Board, it is possible to simply replace the Slot Ethernet Board without
having to restore the original Dante Board Settings.
In case of fault in the Dante Board, and functioning Slot Ethernet Board, the following procedure must be implemented in order to
initialize the Dante Board.
(Fig. 6)
Removed Dante Board
Removed Slot Ethernet Board with Dante Board Installed
Dante Board FW reset procedure
http://www.powersoft-audio.com/en/downloads/rmware/x-series-3
• Download the les on you laptop from the link above
• open Audinate FW updater
• connect the unit to the proper network
• select the X-1.0.0.5-bklyn2-3.9.0.20_fpga-4.0.0.13.dnt archive in the folder X Series Dante Card Brooklyn II FW 1.0.0.5
• proceed and select the amplier model
• Select “Override” on both units and start the procedure
• complete the procedure
• reboot
When replacing the DANTE Board located on the Digi Board, download and install the Dante Firmware Update Manager v3.10.1.2 (Windows).