17
X8 | SERVICE MANUAL
INDEX
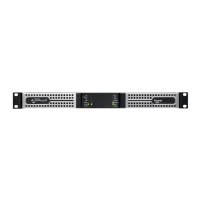
Discharge the internal capacitor’s bank by connecting a
60W light bulb to the points indicated and in the
picture below.
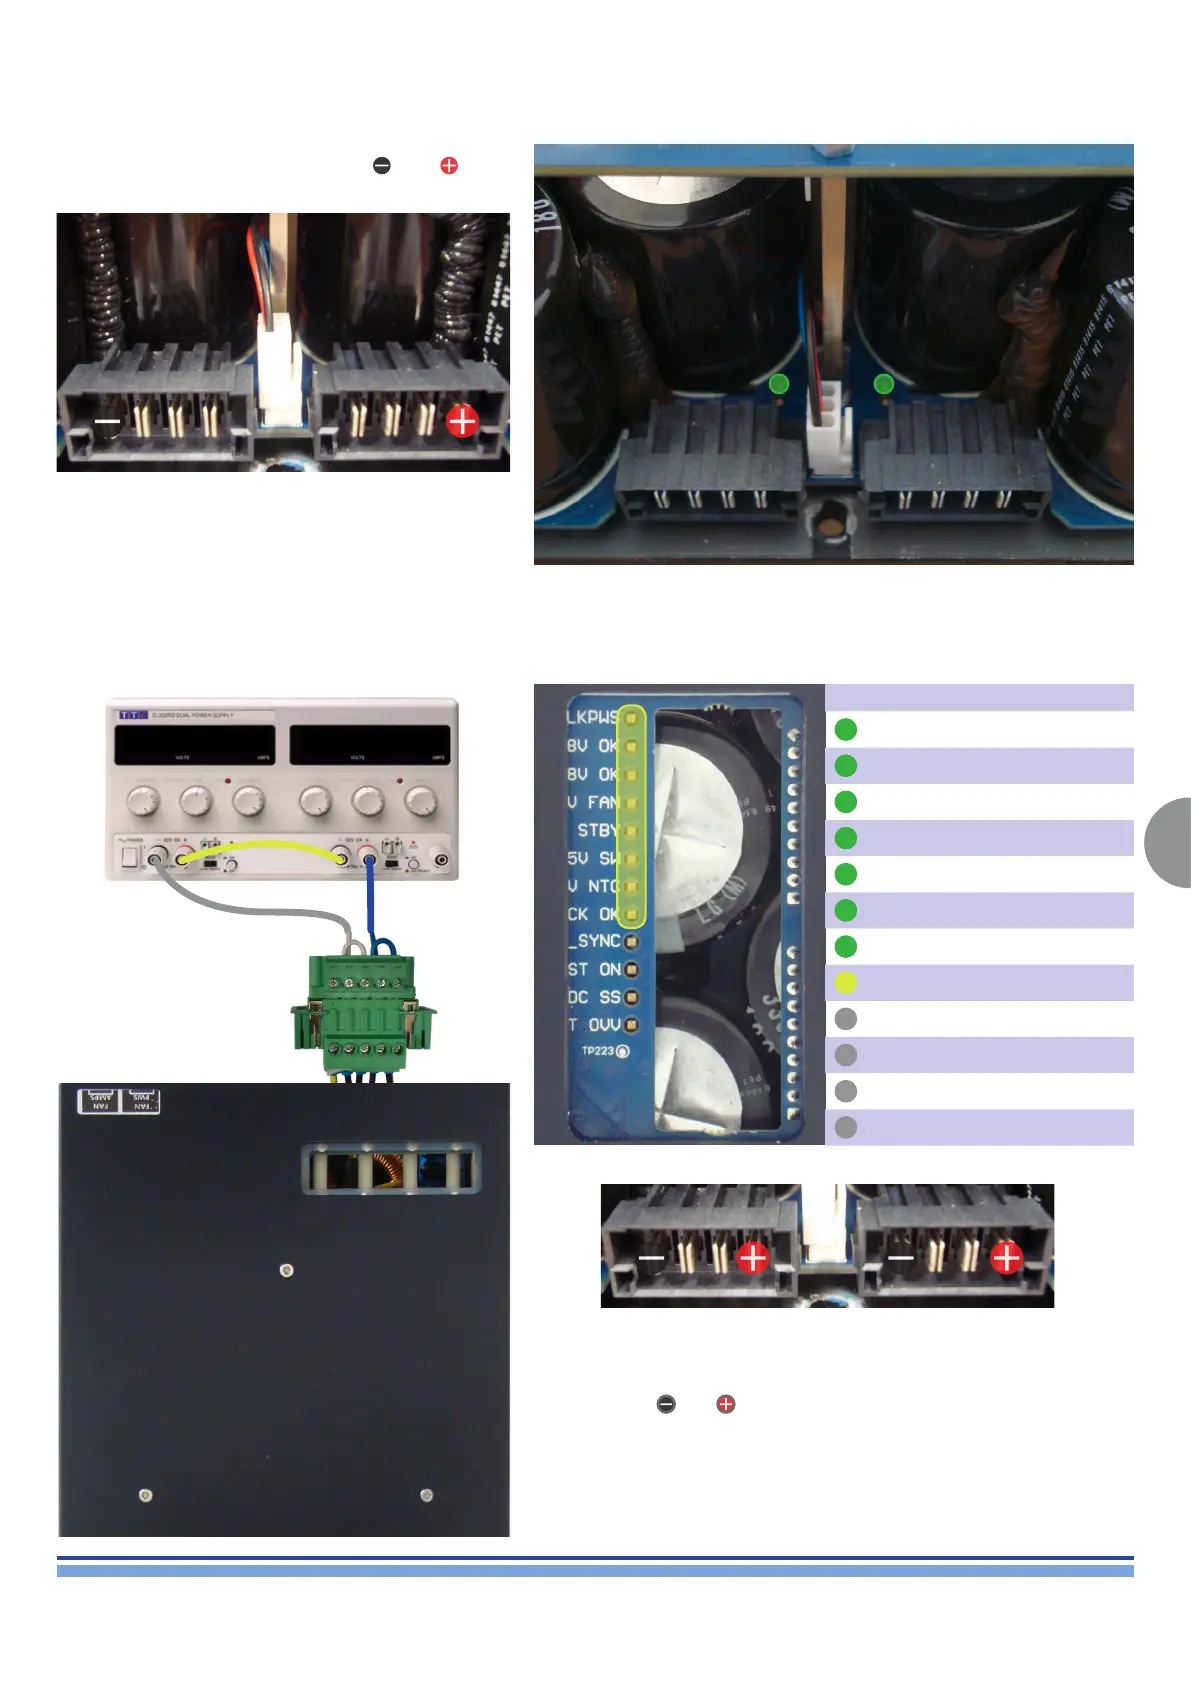
Connect a DC Power Supply via the CN000536 connector
assembly.
Limit the output current to 1.5A.
Supply 60 Vdc and check the absorption, once powered
and stabilized, the power supply’s absorption should be
around 250 mA.
As portrayed in the following picture.
Connect a DC Power Supply via the CN000536 connector assembly.
Limit the output current to 1.5A.
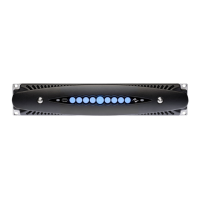
Supply 60 Vdc and check the +/- VRail Tension by probing on the points
indicated with and on the picture above.
Check if the LEDs highlighted in the following picture are on, in accordance
with the depicted table.
Color Label LED Status
Green CLKPWS ON
Green +18V OK ON
Green -18V OK ON
Green +24V FAN ON
Green +15V STBY ON
Green +15 SW ON
Green +12V NTC ON
Yellow CLOCK OK ON
Yellow F/H_SYNC OFF
Yellow BURST ON OFF
Yellow DC-DC SS OFF
Green DRV ENA OFF
8. Power Supply Verification Procedure
Once the check has been successfully completed, discharge the internal
capacitor’s bank as described in the previous paragraphs.
30 Vdc 250mA 30 Vdc
Highlighted above are the VRails check LEDs.
+/- VRAIL TENSION: +/- 75Vdc ± 5Vdc