23
X8 | SERVICE MANUAL
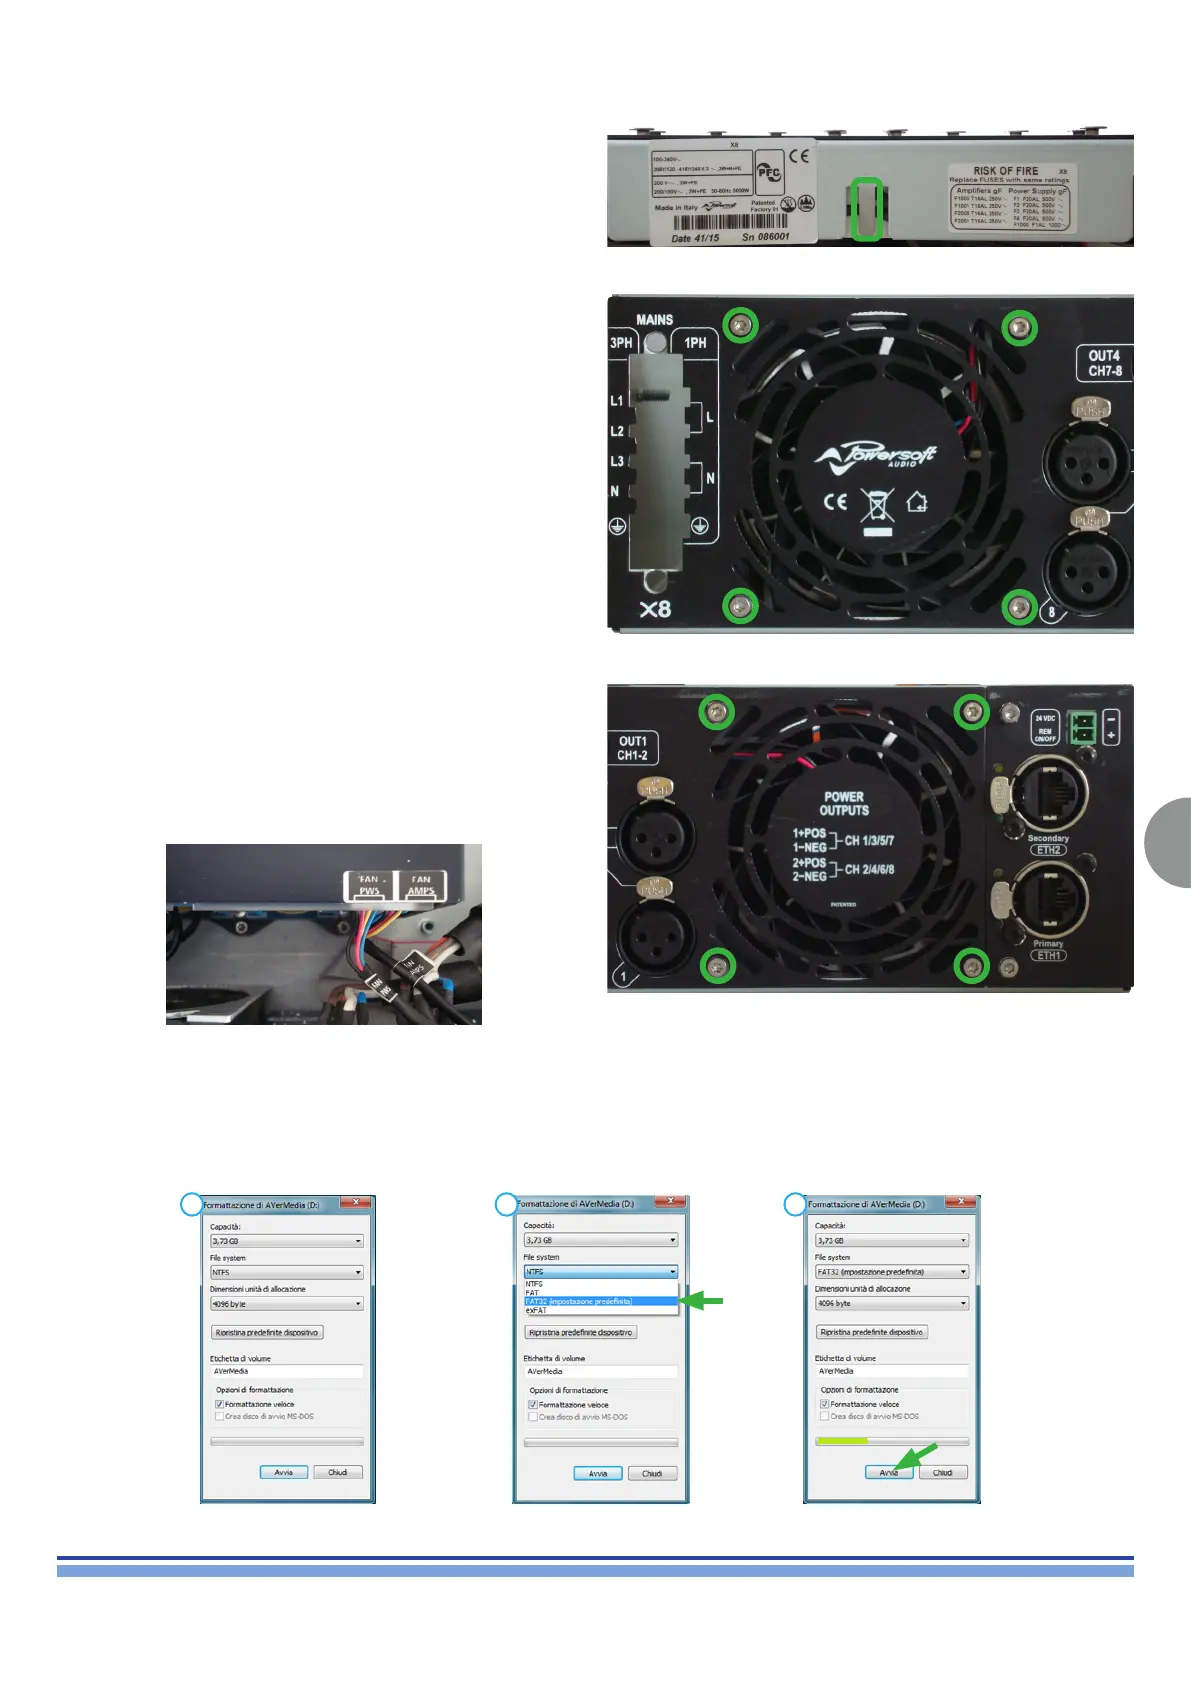
10. Replacing the Fans
Slightly bend the metal retainer upwards in order to free the fan’s
cables as portrayed on (Fig. 34).
(Fig. 34)
Fan PWS:
Fan AMPS:
Remove the Power Supply.
By means of a T10 Torx Screwdriver, unscrew all 4 screws
highlighted on (Fig. 35).
Gently remove the fan and its retainer.
Replace the fan and reset the cable and the metal retainer to their
original position.
Remove the CH1-2 CH3-4 Modules.
By means of a T10 Torx Screwdriver, unscrew all 4 screws
highlighted on (Fig. 36).
Gently remove the fan and its retainer.
Replace the fan and reset the cable and the metal retainer to their
original position.
(Fig. 35)
(Fig. 36)
Plug a USB Pen Drive into a computer, follow the procedure
portrayed in the following pictures.
WARNING: This procedure must be followed for all Powersoft Products
11. Updating the Software
Formatting a FAT-32 USB Pen Drive:
1 2 3
INDEX