I
I
I
0
I
I
I
I
I
I
10
I
I
I
I
I
I
I
I0
I
Installing
‘lope
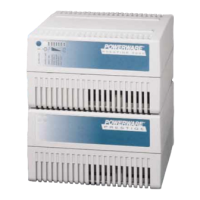
1 Stand-Alone Battery Cabinets
Before beginning the following procedures, be sure you have prepared the UPS for
installation of the Type 1 battery cabinets. Refer to Figure
20
on page 31 for the
location of items mentioned in these procedures.
To prepare
l)fpe
1 battery cabinets for stand-alone installation:
1.
Remove the right side panel.
2. Remove the hanger bracket
3.
Remove the lug kit. Retain the lug
kit.
right side panel, hanger bracket, and
screws for later use.
4. Unlock the left side door of the battery cabinet using the key provided. Open
the door (press the top of the door latch, twist the latch lever clockwise
Fro’,
and
pull out).
WARNING:
LETHAL VOLTAGE WILL BE PRESENT WHEN PERFORMING THE
REMAINING STEPS IN THIS SECTION AND SUBSEQUENT SECTIONS.
5.
Remove the center deadfront and battery drawer connector guard (see Figure
20),
retaining them and their hardware for later reuse.
6.
ff
you are installing more than one battery cabinet, perform steps 1 through 5 for
each cabinet.
To wire stand-alone 7Lpe 1 battery cabinets together:
1.
All battery cabinets will arrfve at your site with each battery connection string
electrically disconnected. Remove the screws that secure the left cable
connector, and remove the tiewrap securing the left wire plug. Sea Figure 20 for
connector and plug locations.
2. In the adjoining battery cabinet to the left, remove the screws securing the right
cable connector guard. Remove and discard the guard and hardware.
3.
Mate the left cable connector and left wire plug to the right cable connector and
rixed
right
wire
plug in the adjoining cabinet to the left
4. Repeat steps 1 through 3 for each battery cabinet to be joined.
-.
30
Powerware
Plus
80
UPS Installation Manual