360 Repairs
38
2.5 Exchanging the horizontal flexures
2.5.1 Removing the old horizontal flexures
1. Release all screws from the flexure holders and remove the old flexures together with their
spring washers.
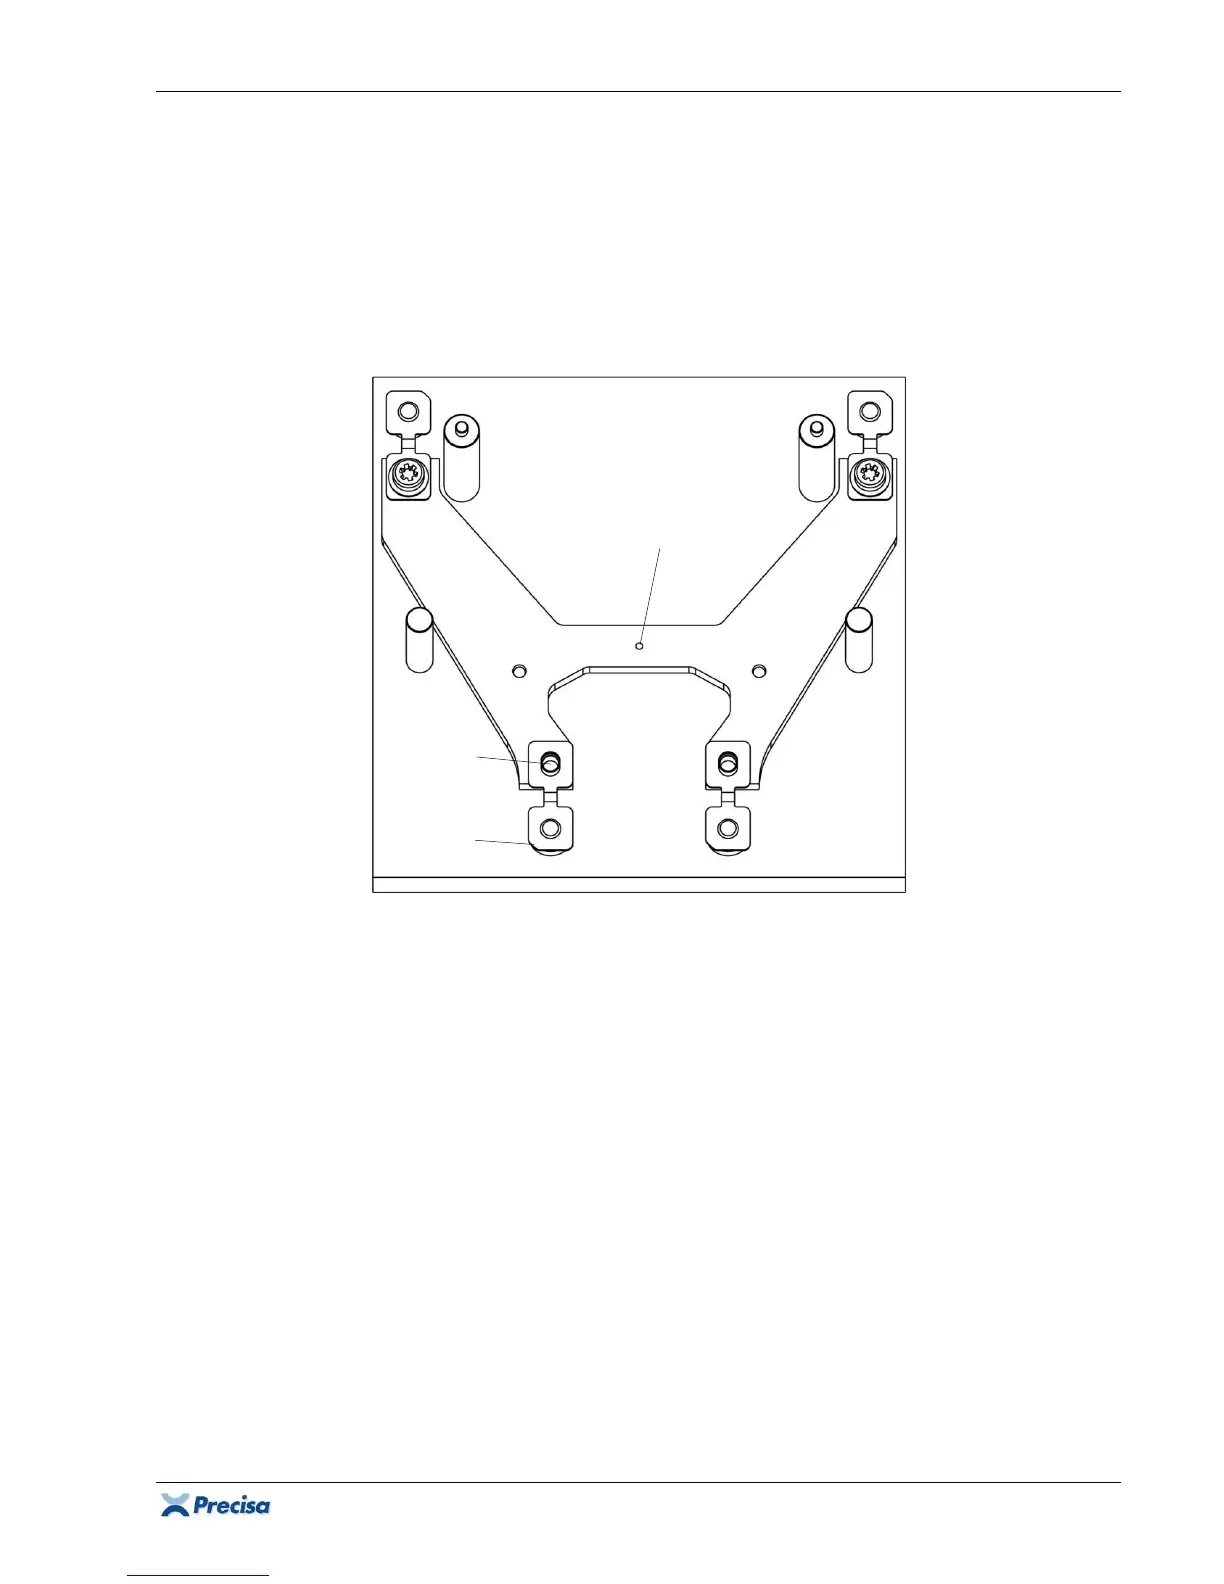
2.5.2 Installing new horizontal flexures
1. Place a flexure holder on the assembly plate [1]. The mark has to be underneath, i.e. assembly
plate sided!
2. Place 4 new horizontal flexures (8) carefully on the assembly plate, observe the alignment of
their slotted holes and cut edges!
3. Place the 4 spring washers (32) (
Group A:
4 XR-bases (35)) on the flexures and fix them tightly
to the holder with their screws (24).
4. Take the complete flexure holder carefully off the assembly plate. Do not touch the flexures!
5. Prepare the other flexure holder the same way.
Mark
under-
neath!
Cut
edge
Slotted
hole