360 Repairs
42
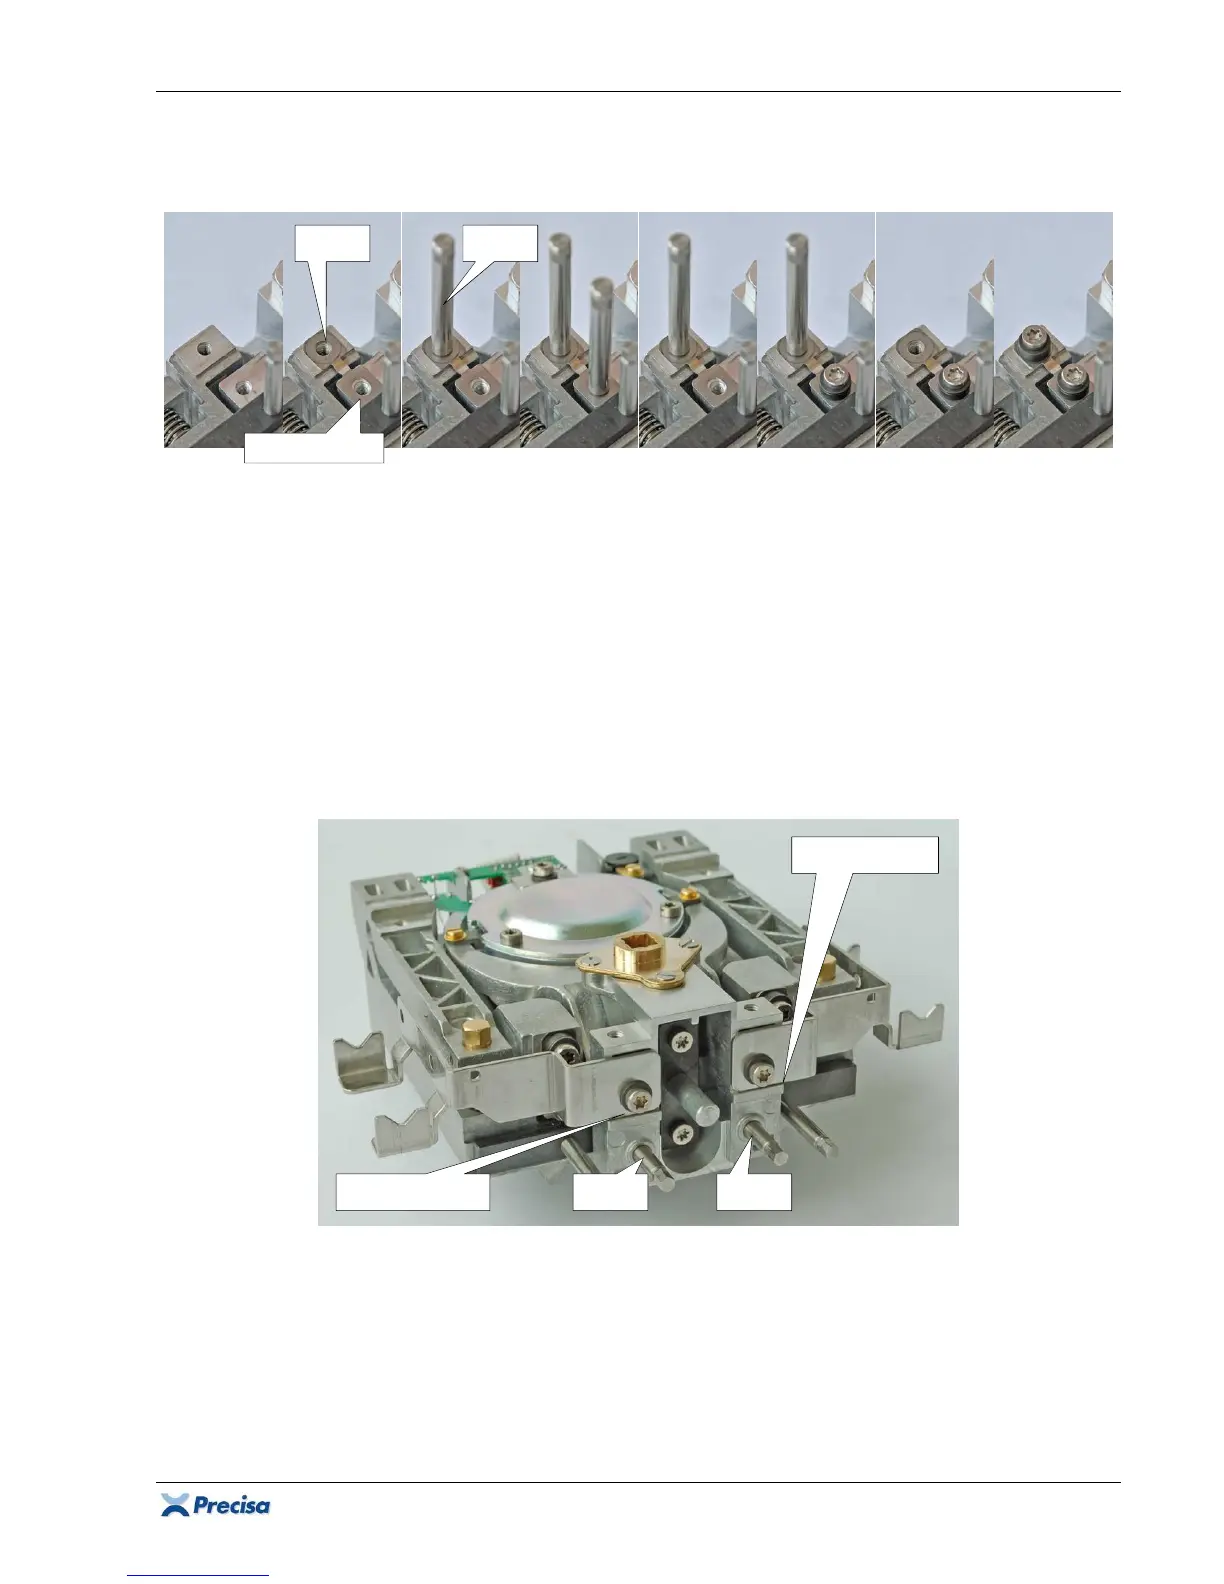
2.7.4 Assembling new vertical flexures
1. Place the chassis on the assembly plate. Take care of the floating sensor!
2. Bring a new flexure (6) into position, its slotted hole has to be on the balance arm side (bottom).
3. Centre the flexure with a centring spigot [10] first on the chassis side (top), then on the balance
arm side (bottom).
4. Tighten the first (upper) centring spigot, then remove the second (lower) centring spigot. Do
not touch the flexure and fix it there with its round base (34) and spring washer (32) (
Group A:
with its XR-base (35) only) and its screw (27).
5. Remove the remained (upper) centring spigot and fix the flexure the same way on the chassis
side.
6. Do so with the other flexure, too.
2.7.5 Assembling the support piece and the inner cone
1. Introduce the support piece with the loosely held coupling anchor over the two inner assembly
pins [9]. It must be possible to push the support piece smoothly over the two inner assembly
pins. If not, release and tighten them again.
2. Screw the support piece and the balance arm together using the coupling anchor [13] and its
two screws [14].
3. Assemble the inner cone (9) with the 3 grub screws (29) to the support piece.
4.
SCS only:
Re-assemble the two reference weight bearings (19) and (20) with the 2 screws (27)
and spring washers (32/
Group A:
35) aligning them on the support piece's edge.