360 Repairs
40
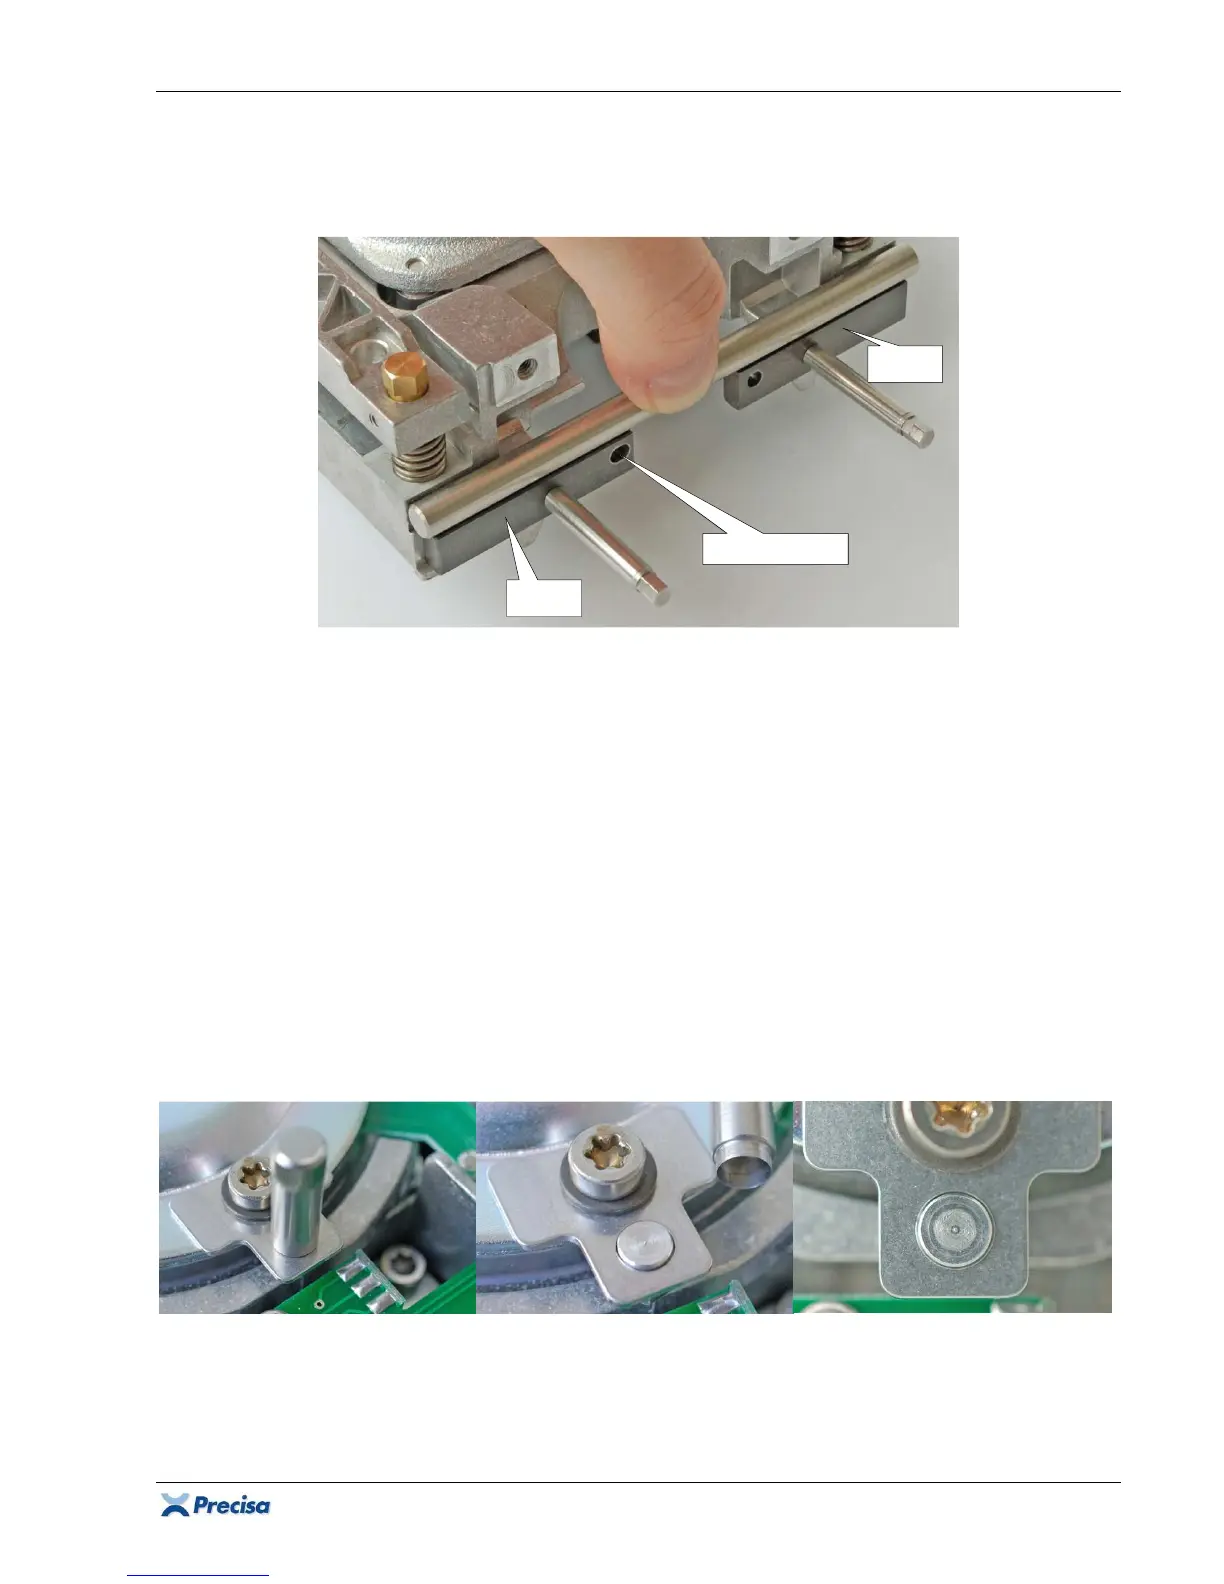
2.7 Assembling the weighing cell
2.7.1 Assembling the balance arm
1. Place the assembly jigs [7] + [8] with 2 assembly pins [9] on the chassis, position them
horizontally using the alignment jig [15] and tighten the two assembly pins [9] with a No. 4 box
spanner.
2. Carefully introduce the balance arm (2) over the magnet pot and pass it to the floating sensor.
3. Assemble the balance arm with 2 assembly pins [9] loosely behind the assembly jigs. The
balance arm must remain moveable.
4. Firmly tighten first the one, then the other inner assembly pin [9] of the assembly jigs [7] and
[8].
2.7.2 Assembling the coil, the magnet cover and the transport safety device
1. Place the coil onto the balance arm, centre it with the centring spigot [11] and fix it firmly with
2 brass screws (23) and 2 washers (31). The centring spigot must be smoothly removable!
2. Slightly pre-fix the magnet cover (16) with its left and right screw (25).
3. Gently pre-assemble the transport safety device (17) with the third screw (25) and spring
washer (32).
4. The centring bush [17] shall be introduced between the balance arm-pilot and the transport
safety device to assure a constant annular gap. Tighten the screw (25), remove the centring
bush and tighten the other two pre-fixed magnet cover screws.