PIN Number and Calibration Switch
_____________________________________________________________________________________________________________________________________
6-4
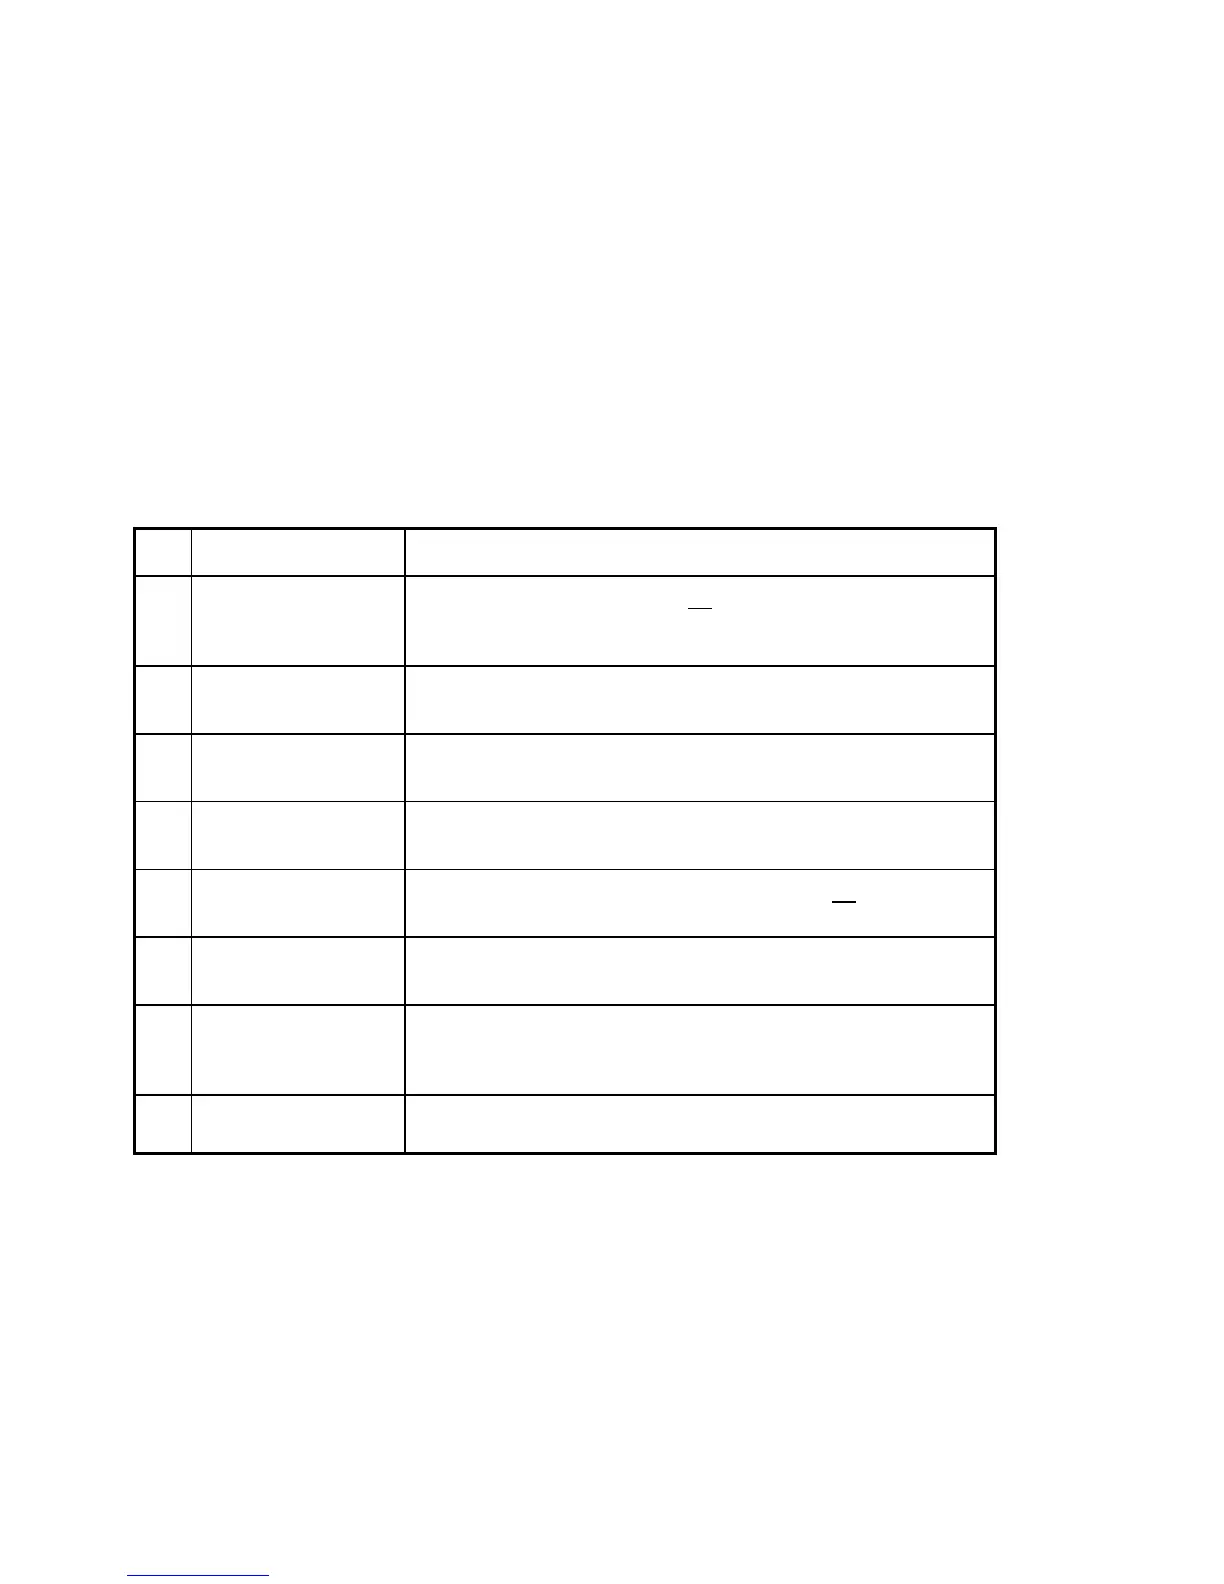
6.6 PIN Number and Calibration Switch
Calibration can be protected against accidental or incorrect calibrations, through the
use of a rear calibration switch and a special PIN number.
The calibration button is located on the rear panel, and can be pushed with a pointed
object (pen, pencil, paper clip, etc.). This button can be pushed after the calibration
menu has been selected. At the same time, a request to input the PIN number will
appear in the display.
Press Key Display / Action
1. Cal key on the
rear panel
1 PIN:0 000000
Enter a PIN No. (after delivery: 0000000), the display shows alternating
"CAL" and the reading with the correct PIN No..
2. MENU-IN KEY 2 CONFIGURE..
if this display does not appear press the ñ KEY until it appears
3. MENU-IN KEY 4 Calibration..
if this display does not appear press the ñ KEY until it appears
4. MENU-IN KEY 1 Enter Value..
only with the right PIN No..
5. MENU-IN KEY V +100.00000
Enter the calibration value, close with the MENU-IN KEY
6. MENU-IN KEY 1 Enter Value..
press several times to return to the calibration input menu
7. ò KEY 2 Store Cal.
with afterwards pressing of the MENU-IN KEY stores durably the
calibration data
8. Cal key on the
rear panel
to close the calibration procedure
Note: Item 7 is very important. If you forget to store the user calibration it is
completely deleted after you switch off the instrument. Then only the
factory calibration is valid.